
# LightAct 4 Documentation

A user guide on LightAct 4

LightAct 4 Documentation is a collection of user guides, tutorials and manuals on how to use LightAct 4 software. We've grouped the docs into several categories so that you can find what you are looking for faster.

If you are looking for something specific, you can also use <img src="/files/gC3CMEAn3Sr4qg34alzW" alt="" data-size="line">search bar in the top.

<table data-view="cards"><thead><tr><th></th><th></th><th data-hidden data-card-cover data-type="image">Cover image</th><th data-hidden data-card-target data-type="content-ref"></th></tr></thead><tbody><tr><td><h4><a href="/pages/vc8T4BKgM5HIurbVbVVQ">Quick start</a></h4></td><td>Start here if you are totally new to LightAct.</td><td><a href="/files/uvTH9SUOohGDMDCjvA8E">/files/uvTH9SUOohGDMDCjvA8E</a></td><td><a href="/pages/2o73hZmjzlOZhEg8Ns0m">/pages/2o73hZmjzlOZhEg8Ns0m</a></td></tr><tr><td><h4><a href="/pages/5Byenjv01fwaBxLPKiSz">Transitioning from other media servers</a></h4></td><td>Start here if you are switching from another media server.</td><td><a href="/files/bZgp6JWpoU1etBhfMoYQ">/files/bZgp6JWpoU1etBhfMoYQ</a></td><td><a href="/pages/0BBH6xczRSONXP4nIdOi">/pages/0BBH6xczRSONXP4nIdOi</a></td></tr><tr><td><h4><a href="/pages/rbAjhR0t2LwIQmo22aL5">Assets</a></h4></td><td>Learn how to ingest and manage Assets in LightAct.</td><td><a href="/files/qZ36V8iBCX8LU3kJ22QV">/files/qZ36V8iBCX8LU3kJ22QV</a></td><td><a href="/pages/rbAjhR0t2LwIQmo22aL5">/pages/rbAjhR0t2LwIQmo22aL5</a></td></tr><tr><td><h4><a href="/pages/Bbct7cGIYTfOXEMUrEmd">Timelines</a></h4></td><td>Learn how to sequence content, manage multiple timelines and sync to external timecode.</td><td><a href="/files/owBsBubvdineUCICaziX">/files/owBsBubvdineUCICaziX</a></td><td><a href="/pages/Bbct7cGIYTfOXEMUrEmd">/pages/Bbct7cGIYTfOXEMUrEmd</a></td></tr><tr><td><h4><a href="/pages/h6GTpxMEhOnyjC4wuflB">Layers and layouts</a></h4></td><td>Explore why LightAct's layer system is one-of-a-kind.</td><td><a href="/files/spDMpJTKYw6vcuXQW2Nr">/files/spDMpJTKYw6vcuXQW2Nr</a></td><td><a href="/pages/h6GTpxMEhOnyjC4wuflB">/pages/h6GTpxMEhOnyjC4wuflB</a></td></tr><tr><td><h4><a href="/pages/stWukhlhBgAQRRPkOeef">Node reference</a></h4></td><td>Learn about LightAct's powerful and flexible nodes.</td><td><a href="/files/gzMEy6QVWlpSi6ntDWbr">/files/gzMEy6QVWlpSi6ntDWbr</a></td><td><a href="/pages/stWukhlhBgAQRRPkOeef">/pages/stWukhlhBgAQRRPkOeef</a></td></tr><tr><td><h4><a href="/pages/xL2cJfmEPyMuTlYzU5Xp">Video playback</a></h4></td><td>Here you'll find everything you need to know about how to play video files in the most efficient and pixel-perfect way.</td><td><a href="/files/pHXfdpE0Kkm1tt4pivux">/files/pHXfdpE0Kkm1tt4pivux</a></td><td><a href="/pages/xL2cJfmEPyMuTlYzU5Xp">/pages/xL2cJfmEPyMuTlYzU5Xp</a></td></tr><tr><td><h4><a href="/pages/c9tViC9I87twBq9vmMLa">Real-time content playback</a></h4></td><td>Learn how to play Notch, Unreal Engine and TouchDesigner - all natively integrated in LightAct.</td><td><a href="/files/YsF01wvDZ9PXiZuOHoUP">/files/YsF01wvDZ9PXiZuOHoUP</a></td><td><a href="/pages/c9tViC9I87twBq9vmMLa">/pages/c9tViC9I87twBq9vmMLa</a></td></tr><tr><td><h4><a href="/pages/7iZIddM5hFukOH9Y1jZp">Content mapping</a></h4></td><td>Explore how you map content from LightAct's layers to various Viewport objects.</td><td><a href="/files/rMTVBAwkf80NSBNnNoHR">/files/rMTVBAwkf80NSBNnNoHR</a></td><td><a href="/pages/7iZIddM5hFukOH9Y1jZp">/pages/7iZIddM5hFukOH9Y1jZp</a></td></tr><tr><td><h4><a href="/pages/2OtOcOqeeDQiyqPDxnHq">Output setup</a></h4></td><td>Learn how to output content from video outputs on your server to physical displays and projectors.</td><td><a href="/files/5MKrAtPTKqhcv7Ha2SF0">/files/5MKrAtPTKqhcv7Ha2SF0</a></td><td><a href="/pages/2OtOcOqeeDQiyqPDxnHq">/pages/2OtOcOqeeDQiyqPDxnHq</a></td></tr><tr><td><h4><a href="/pages/Gjffcq89bwOI8MISZSOD">Projection mapping</a></h4></td><td>Explore LightAct's powerful projection mapping features that help you from the first projection study to final blending of the projectors.</td><td><a href="/files/jXklAYeaMY1VnMvA3r64">/files/jXklAYeaMY1VnMvA3r64</a></td><td><a href="/pages/Gjffcq89bwOI8MISZSOD">/pages/Gjffcq89bwOI8MISZSOD</a></td></tr><tr><td><h4><a href="/pages/AbX460sBLIrspIAbkHI9">DMX</a></h4></td><td>Learn how you can control LightAct with DMX and about all the different ways you can output DMX from LightAct.</td><td><a href="/files/a277Q7DdvGZheqlwjYHd">/files/a277Q7DdvGZheqlwjYHd</a></td><td><a href="/pages/AbX460sBLIrspIAbkHI9">/pages/AbX460sBLIrspIAbkHI9</a></td></tr><tr><td><h4><a href="/pages/q9eSULCfDMa3rBIK8Y7u">OSC &#x26; MIDI</a></h4></td><td>Learn how you can control LightAct with OSC and MIDI and how you can output OSC directly from LightAct.</td><td><a href="/files/hkfkHDTcZjCnE5mLoYRG">/files/hkfkHDTcZjCnE5mLoYRG</a></td><td><a href="/pages/q9eSULCfDMa3rBIK8Y7u">/pages/q9eSULCfDMa3rBIK8Y7u</a></td></tr><tr><td><h4><a href="/pages/iv4ZqIdR7JEs0Hri1wCD">Integrations</a></h4></td><td>LightAct can communicate with dozens of different protocols and technology.</td><td><a href="/files/1YWka72NIyxvLQ5L9Ucv">/files/1YWka72NIyxvLQ5L9Ucv</a></td><td><a href="/pages/iv4ZqIdR7JEs0Hri1wCD">/pages/iv4ZqIdR7JEs0Hri1wCD</a></td></tr><tr><td><h4><a href="/pages/NtRbbHaNtASVpCx0Mlzy">LightTrack</a></h4></td><td>Explore LightAct's unique tracking system called LightTrack.</td><td><a href="/files/Y3tesPvxacNgoaVs1n01">/files/Y3tesPvxacNgoaVs1n01</a></td><td><a href="/pages/NtRbbHaNtASVpCx0Mlzy">/pages/NtRbbHaNtASVpCx0Mlzy</a></td></tr><tr><td><h4><a href="/pages/nZp0oghHH3y8va5bVrY9">LightNet</a></h4></td><td>Learn how you can set up multi-server clusters and manage them efficiently and effortlessly.</td><td><a href="/files/aDrrGtiUw2l77qdQosAj">/files/aDrrGtiUw2l77qdQosAj</a></td><td><a href="/pages/nZp0oghHH3y8va5bVrY9">/pages/nZp0oghHH3y8va5bVrY9</a></td></tr><tr><td><h4><a href="/pages/jAyAy90tKNEXz1FXN49R">Licensing</a></h4></td><td>Learn everything you need to know about managing LightAct licenses.</td><td><a href="/files/6gqMeb06y1mvM9neLJ71">/files/6gqMeb06y1mvM9neLJ71</a></td><td><a href="/pages/jAyAy90tKNEXz1FXN49R">/pages/jAyAy90tKNEXz1FXN49R</a></td></tr><tr><td><h4><a href="/pages/knhzNZdeNGwyNKd6dLZr">BYO hardware</a></h4></td><td>Don't want to use LightAct Hardware? Click here and learn how to set up your own hardware for LightAct.</td><td><a href="https://images.unsplash.com/photo-1767081476096-350e18758625?crop=entropy&#x26;cs=srgb&#x26;fm=jpg&#x26;ixid=M3wxOTcwMjR8MHwxfHJhbmRvbXx8fHx8fHx8fDE3Njc4NjM1MjZ8&#x26;ixlib=rb-4.1.0&#x26;q=85">https://images.unsplash.com/photo-1767081476096-350e18758625?crop=entropy&#x26;cs=srgb&#x26;fm=jpg&#x26;ixid=M3wxOTcwMjR8MHwxfHJhbmRvbXx8fHx8fHx8fDE3Njc4NjM1MjZ8&#x26;ixlib=rb-4.1.0&#x26;q=85</a></td><td><a href="/pages/knhzNZdeNGwyNKd6dLZr">/pages/knhzNZdeNGwyNKd6dLZr</a></td></tr></tbody></table>


# Terminology

A description of some of the most commonly used terms in LightAct

## **Timeline**

<figure><img src="/files/SHeK0kIB0B1iXYtcFbn1" alt=""><figcaption></figcaption></figure>

<figure><img src="/files/BzGtILWtpN3ZoCxoXihx" alt=""><figcaption></figcaption></figure>

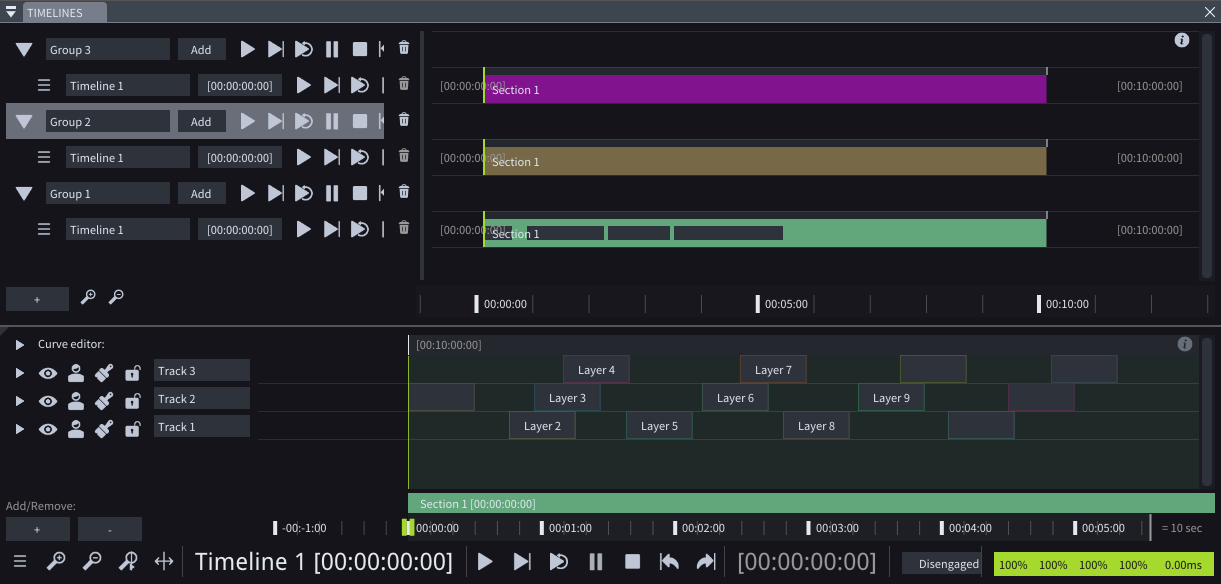
Timelines are where you sequence and composite content (layers), events and actions. LightAct can have several independent timelines. In every timeline you can have one or several:

* Tracks
* Sections
* Layers
* Markers

### **Timeline group**

<figure><img src="/files/bZV3HkUOqzIm4hun3IRX" alt=""><figcaption></figcaption></figure>

Timeline group is a group of one or more Timelines. It is used to control syncing to external timecode sources and to control playstates of Timelines in that Timeline group.

### **Track**

<figure><img src="/files/PxkBoF2jCOhsGGLWCUhP" alt=""><figcaption></figcaption></figure>

Each Timeline is divided into several Tracks. On each track you can have one or several layers.

### **Layer**

<div align="left"><img src="/files/bVNtypIq2VNBSs8uFMHJ" alt=""></div>

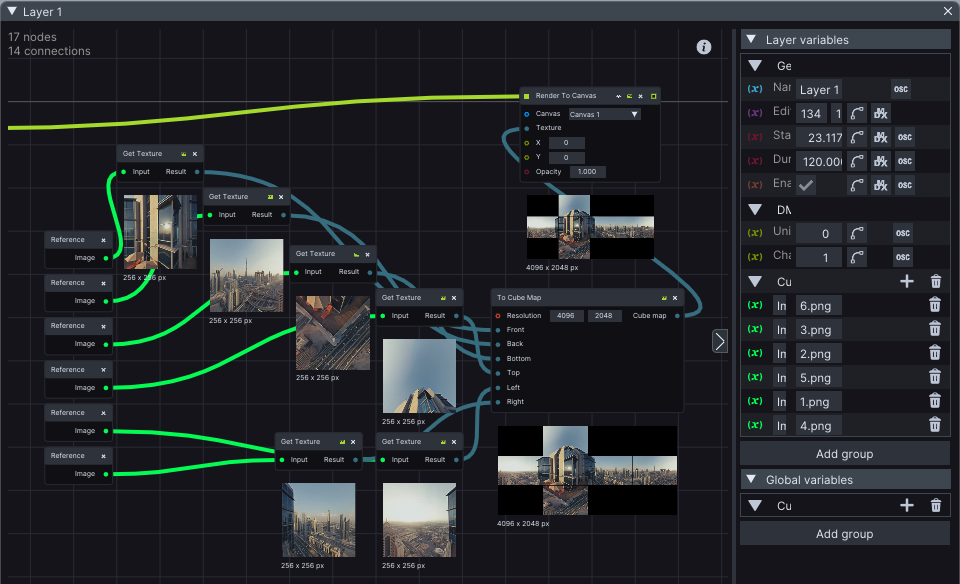
A *layer* is an entity that exists in a *Timeline* and has a beginning and an end (determined by the **Duration** parameter). A *layer* can perform a variety of functions such as content processing & playback, video/image/image sequence/Notch block reading and playback or just some logic.

{% hint style="info" %}
**Good to know**: Layers in LightAct are called Layer Templates and you can easily create your own.
{% endhint %}

### **Layouts**

<figure><img src="/files/JI6UzCbIV0KHGhOQijhy" alt=""><figcaption></figcaption></figure>

Layouts are LightAct's node-based system. You can find them in:

* Layers
* Mappings (in Canvas Maps and Output Maps windows)
* Projectors

### **Variable**

<div align="left"><img src="/files/QxHNhcWJqoltKjRMAGAV" alt=""></div>

A LightAct variable is a container holding information. The information can be a number (integer or float), color, texture or something else.

There are 2 types of variables:

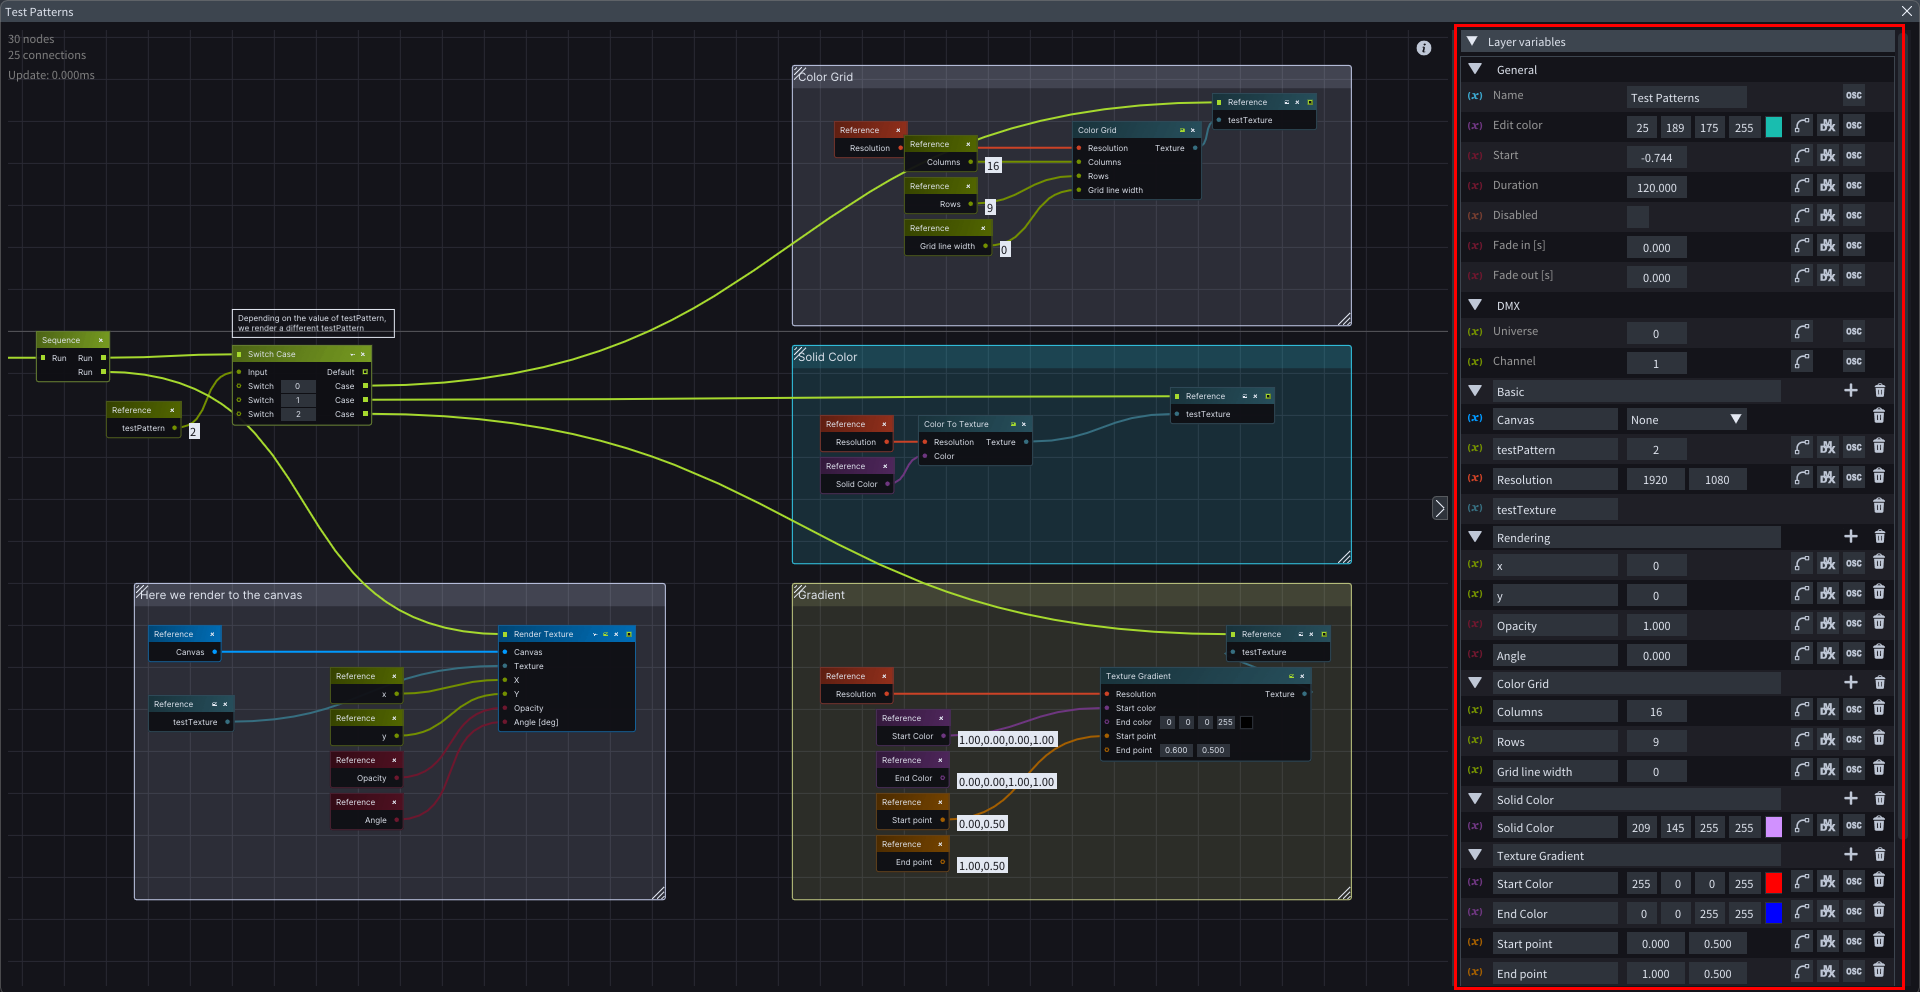
* **Layer variables** are available only within one layer
* **Global variables** can be accessed anywhere

### Section

<div align="left"><figure><img src="/files/i3Hv0rL40lsri4upADmL" alt=""><figcaption></figcaption></figure></div>

Section is part of a timeline. Very often sections also serves as cues.

### **Marker**

<div align="left"><figure><img src="/files/6xQvZgBKV6ksBMybZxC6" alt=""><figcaption></figcaption></figure></div>

A *Timeline marker* indicates a position on a Timeline.

## **Viewport**

Serves as the visual preview area where you can see how your compositions and mappings will appear in the real world.

### **Video screen**

<div align="left"><figure><img src="/files/IiAwzTgfcCwXeWORH7yc" alt=""><figcaption></figcaption></figure></div>

A *video screen* is a virtual representation of a physical video screen.

### **Thrower**

<div align="left"><img src="/files/E6sj8OiKH39M4FexP9P1" alt=""></div>

A *thrower* is a helper virtual object that facilitates mapping of content onto various viewport objects by taking into account their position in the 3D scene of the viewport.

### **3D model**

<div align="left"><img src="/files/H7CBIW1KwF0WhAz3Vvfs" alt=""></div>

A *3D model* is a virtual representation of a physical object. *3D models* are usually imported as an *.fbx* or .*obj* assets.

### **Primitive**

<div align="left"><img src="/files/8SHVOi4Pu0Rsp4C7X4OA" alt=""></div>

A *primitive* is a simple 3D model of a cube, a plane, a sphere or a cone.

### Null object

<div align="left"><figure><img src="/files/vgLIHw6eEfYEQgYiABfq" alt=""><figcaption></figcaption></figure></div>

A *null object* is an ‘empty’ object that can be used as a container of other objects.

<div align="left"><img src="/files/5yq3R2miaweZidWdO7UA" alt=""></div>

It allows you to group objects and move them together.

### **Marker in Viewport**

<div align="left"><img src="/files/DEPH2cB1TtLE1AKntets" alt=""></div>

A *viewport marker* indicates a 3D position in the *Viewport window*.

## **Other**

### **Canvas**

![](/files/dWh0DDVHrSUsiMqBgjkv)

A *canvas* is an entity that holds one texture. The texture can be of an arbitrary resolution. In most cases, content is rendered on a canvas through the Layers.

Content is then rendered to various viewport objects through Canvas maps window.

### **Assets**

<div align="left"><figure><img src="/files/itoRflhufiI8mVAi7W1Q" alt=""><figcaption></figcaption></figure></div>

Asset is an external resource that LightAct uses in a specific project. Examples include:

* images, image sequences or video files,
* Notch blocks, or TouchDesigner components,
* Audio files,
* 3D models or
* Unreal Engine projects.

### **Video output**

<div align="left"><figure><img src="/files/peSCbnvhWeMuYf5ztbTl" alt=""><figcaption></figcaption></figure></div>

*Video output* is a virtual representation of a physical output on the system’s GPU.

## **DMX**

*DMX* stands for DMX512, which is a communication standard commonly used to control lighting and effects.

### **Art-Net**

*Art-Net* is a UDP based protocol used to transmit DMX data over Ethernet. It was developed by Artistic License.

### **sACN**

*sACN* is a UDP based protocol used to transmit DMX data over Ethernet. It was developed by ESTA. In many aspects it is comparable with Art-Net.

### **Fixture**

<div align="left"><img src="/files/eqssgDgW3rmEfIQ00ySw" alt=""></div>

*Fixture* refers to a *DMX light fixture*, i.e. a light fixture controlled by DMX.


# User Interface

<figure><img src="/files/VXPIhNjA2oITAFWZOpHB" alt=""><figcaption></figcaption></figure>

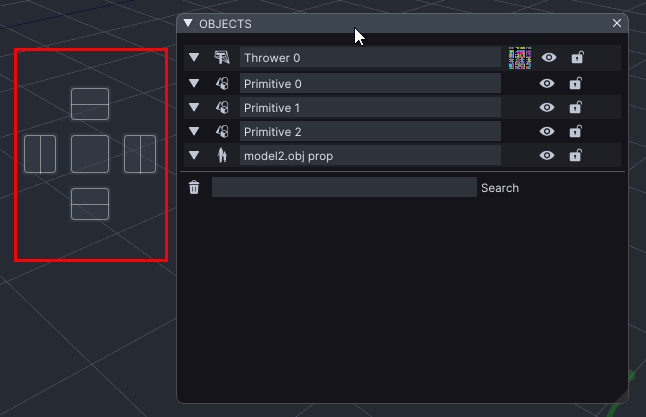
LightAct's user interface is flexible and you can easily adjust it as you want by dragging windows around and docking them where you want.

<div align="left"><img src="/files/tfXNaPffVr9Y6IKxUuQU" alt=""></div>

When dragging windows around you will see *docking handles*. They tell you where the window will be docked to, if you drop it on the handle.

Feel free to re-arrange your windows the way you like.

### **Workspaces**

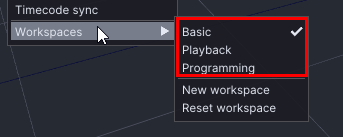
*Workspace* is a saved window arrangement.

<div align="left"><img src="/files/bXyEvtG5lbyvurEuGDN1" alt=""></div>

LightAct comes with 3 pre-defined *workspaces*:

* Basic
* Playback
* Programming

You can also create a new *custom workspace.*

{% hint style="info" %}
**Good to know:** A workspace is saved whenever you close the program or switch to another *workspace*.
{% endhint %}


# Top Bar

LightAct's Top Bar is populated with a lot of useful information regarding your machines' and projects' state.

In this chapter, we will go over a few of the options it offers.

<figure><img src="/files/hF0D4T2LMszbi8WzwgVC" alt=""><figcaption></figcaption></figure>

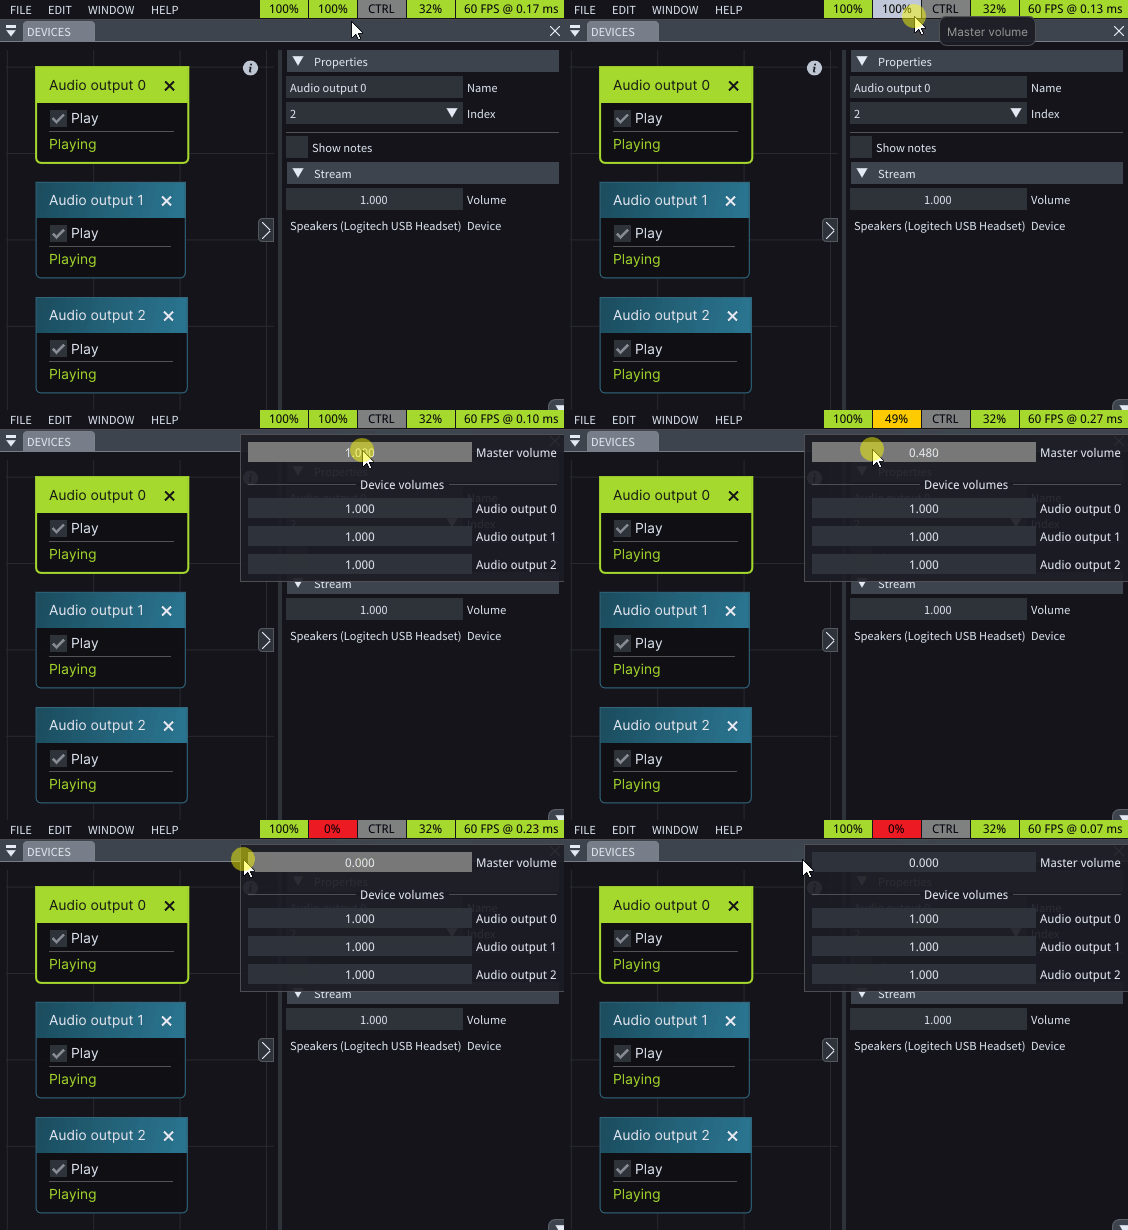
## Master Fade

## Master Volume

<figure><img src="/files/Hre2PSLqfVgLyNYnUFmS" alt=""><figcaption></figcaption></figure>

## CTRL

*Master Control*, or *CTRL*, is a powerful feature designed .

### Lock UI

Once activated, *Lock UI* locks all program functionalities and access until the correct password is entered.

To enable this feature, click on the **CTRL** button and choose **Lock UI**.

<figure><img src="/files/dciygAWgFOzE5WVfZ1QC" alt=""><figcaption></figcaption></figure>

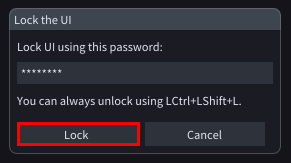
Upon clicking, a *Lock the UI pop-up* will appear, populated with the default lock password chosen in the *Preferences Window*, under the *General* tab.

Once you click **Lock** button, the UI will be locked.

<figure><img src="/files/38OPIY6s5AdICI4hK9RN" alt=""><figcaption></figcaption></figure>

To unlock it, you could either type the correct password, as entered in the *Lock the UI pop-up*, or you can press **LeftCtrl + LeftShift + L***.*

This security measure ensures that unauthorized users cannot interact with or make any changes to the program's settings, configurations, or content until the correct password is provided.

{% hint style="info" %}
**Good to know:** Default password is **LightAct**.
{% endhint %}

### Lock Cursor to App

When enabled, **Lock cursor to app** keeps the cursor confined to the application window, making sure it does not exceed the boundaries of LightAct's GUI.

<figure><img src="/files/UBs3Ep2q6yOa6qdHtDSK" alt=""><figcaption></figcaption></figure>


# Viewport Navigation

To *rotate* the camera use right mouse button, to *pan* use middle mouse button and to s*elect* an object, use left mouse button. To *fly* the camera, hold right mouse button and use *WASD keys*. This features works best if you use *Pilot camera mode* (read below).

There are 2 different ways the *viewport camera* responds to the right mouse button: **Orbit** *and* **Pilot***.*

<figure><img src="/files/RDEwPRRHVznPPukozAPJ" alt=""><figcaption></figcaption></figure>

Most Viewport settings are accessible in the Properties menu of the Viewport.

## Viewport camera

<figure><img src="/files/wc1UDbVdLcBsnAgA4Aa3" alt=""><figcaption></figcaption></figure>

There are 3 predefined camera positions: Top, Front and Side.

<figure><img src="/files/gWTAyQwj9lhrbt27eWy3" alt=""><figcaption></figcaption></figure>

If you right click anywhere in the Viewport you can also create a custom camera position.

<figure><img src="/files/obPaUHo3Lw63vZ8R5tKI" alt=""><figcaption></figcaption></figure>

You can then recall it in the Viewport properties menu.

## Camera movement

There are 2 types of moving the camera around the Viewport.

### **Camera orbit**

In this mode the camera rotates either:

* Around a selected object if there is one
* Around a point in front of the camera if no object is selected.

### Camera Pilot

In this mode the camera always rotates around itself. This mode is best used in combination with WASD keys which allow you to fly around the viewport.


# Drag & drop

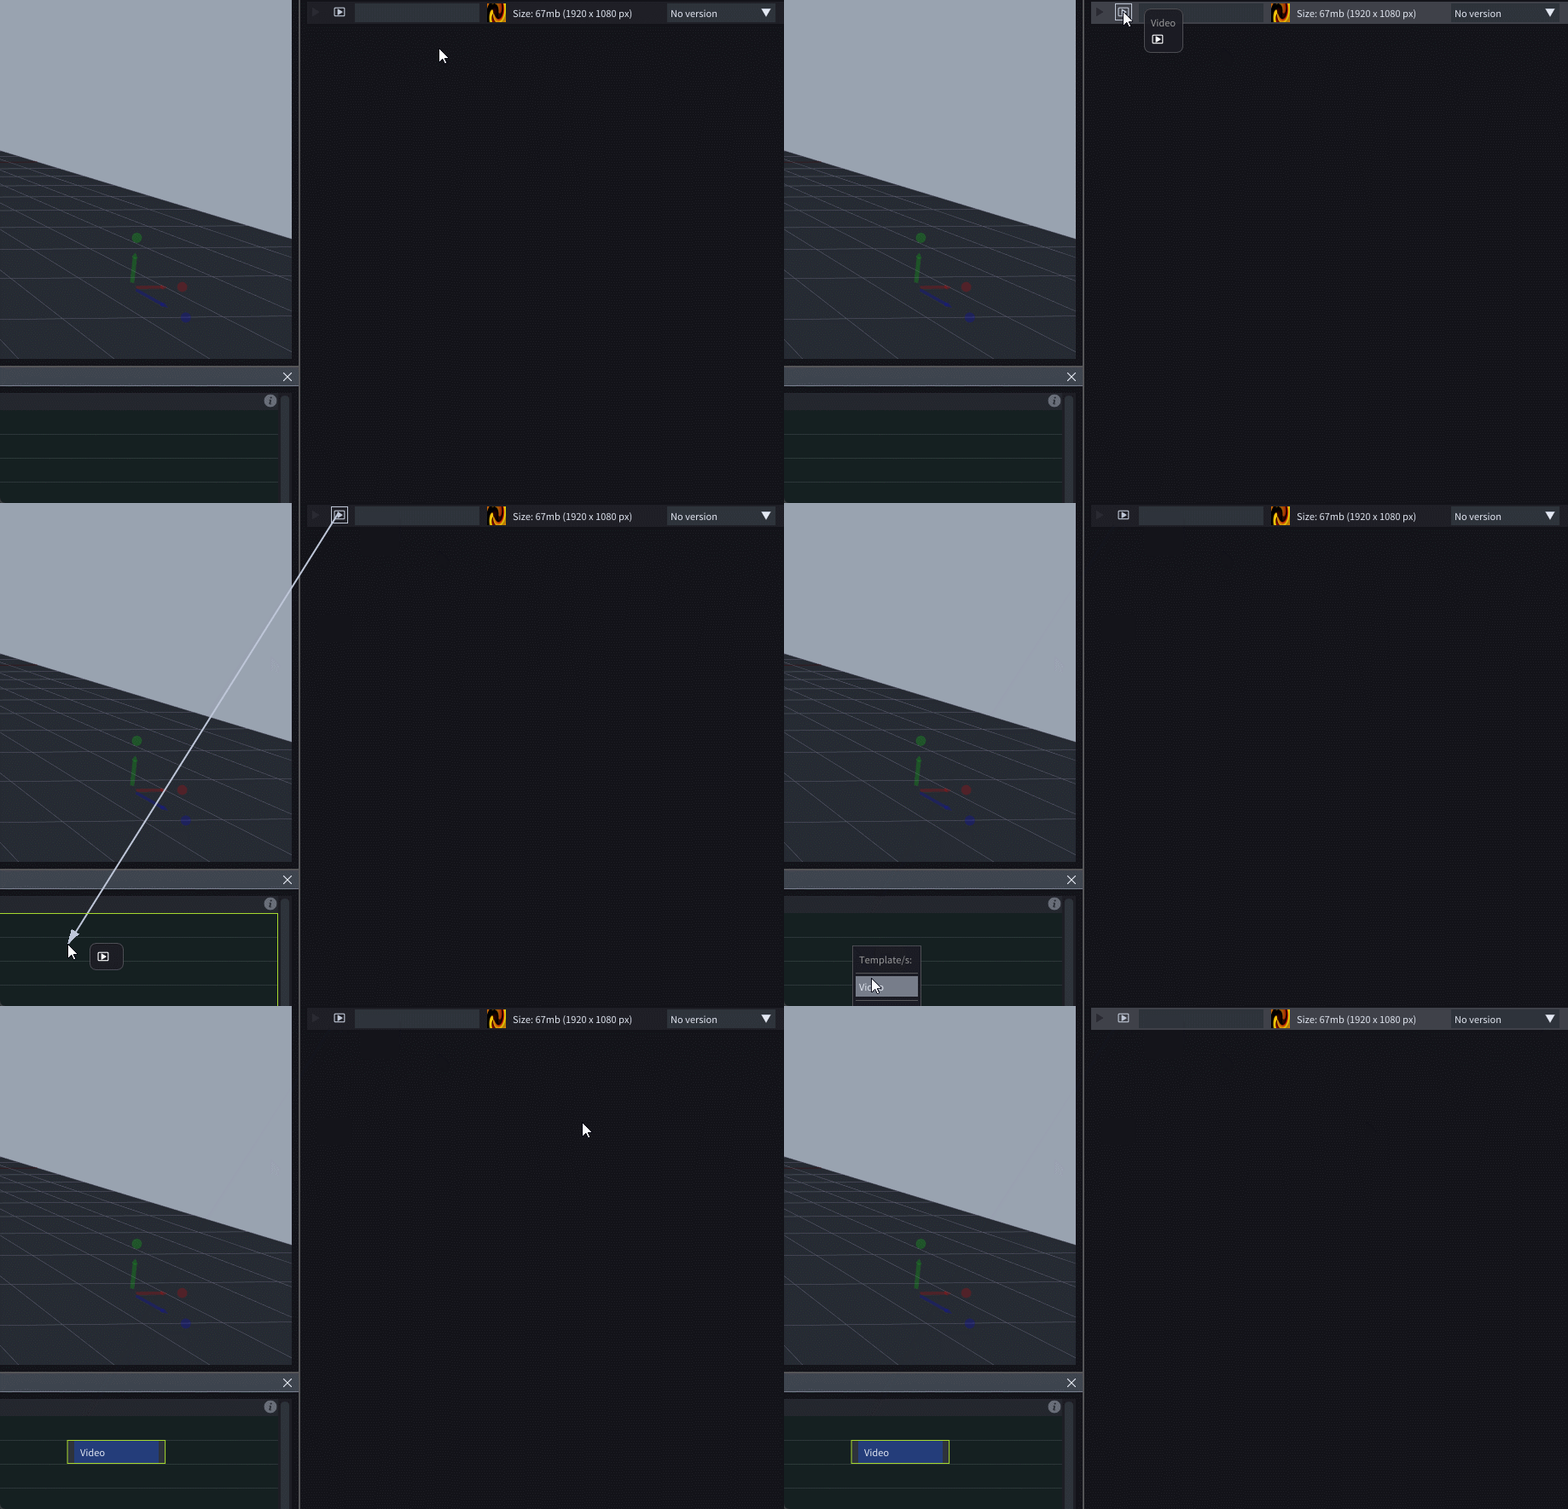
Most of the actions in LightAct can be performed by **dragging and dropping**. For example, if you drag off of a video screen icon in the Viewport’s toolbar, you will create a video screen at the location where you dropped it.

<div align="left"><img src="/files/L3WSDb9Ejk6FwSzb6N1I" alt=""></div>

In the case of a video screen (and a lot of other objects) you will see an additional popup menu where you will be able to choose the resolution.

<div align="left"><img src="/files/NBNEYlI5YovTxJSjru9L" alt=""></div>

{% hint style="info" %}
**Useful tip:**\
If you hold a **number** when dropping an object, the popup menu will be skipped and an option with the same sequential number will get automatically chosen.
{% endhint %}


# Quick Tips

<figure><img src="/files/e57xTr6QsvptEB2l8SUC" alt=""><figcaption></figcaption></figure>

Throughout the software there are (i) icons which open Quick Tips window.

<figure><img src="/files/mozjy4a0seJj6XsmemHi" alt=""><figcaption></figcaption></figure>

Depending on where you clicked this icon, the Quick Tips window will show you the additional help resources and shortcuts.


# Shortcuts

There is a number of different shortcuts available in LightAct which should speed up your workflow.

## **General**

| Shortcut             | Description                             |
| -------------------- | --------------------------------------- |
| **Ctrl + N**         | New file                                |
| **Ctrl + O**         | Opens file                              |
| **Ctrl + S**         | Saves file                              |
| **Ctrl + Shift + S** | Saves file as...                        |
| **Ctrl + I**         | Imports asset                           |
| **Ctrl + Q**         | Quits program                           |
| **Ctrl + C**         | Copy                                    |
| **Ctrl + V**         | Paste                                   |
| **Ctrl + Z**         | Undo                                    |
| **Ctrl + Y**         | Redo                                    |
| **Ctrl + A**         | Selects All                             |
| **Ctrl + F4**        | Closes undocked hovered window or popup |

## **Viewport**

| Shortcut                     | Description                                                                                                                                                                      |
| ---------------------------- | -------------------------------------------------------------------------------------------------------------------------------------------------------------------------------- |
| **Mouse drag & number keys** | Holding one of 1-4 numbers while dragging a viewport object with a texture (for example, a video screen) onto the viewport will automatically select the appropriate resolution. |
| **NumPad 0**                 | Resets the camera                                                                                                                                                                |
| **F**                        | Focuses on the selected object                                                                                                                                                   |
| **Del**                      | Deletes the selected object                                                                                                                                                      |
| **T**                        | Translate gizmo mode                                                                                                                                                             |
| **R**                        | Rotate gizmo mode                                                                                                                                                                |
| **E**                        | Scale gizmo mode                                                                                                                                                                 |
| **L**                        | Shows object labels                                                                                                                                                              |
| **W**                        | Toggles World/Local coordinate space                                                                                                                                             |
| **Shift + drag**             | Duplicates object                                                                                                                                                                |
| **Shift + L**                | Locks or unlocks object                                                                                                                                                          |
| **Shift + F**                | Looks at source object of projector                                                                                                                                              |

## Assets

## Timelines

| Shortcut                       | Description                                  |
| ------------------------------ | -------------------------------------------- |
| **Shift + click Play button**  | Plays current and stops all other Timelines  |
| **Shift + click Pause button** | Pauses current and stops all other Timelines |
| **Shift + click Stop button**  | Stops all Timelines                          |
| **Double click on timeline**   | Creates a sequence                           |
| **Shift + mousewheel scroll**  | Scrolls Sequences section horizontally       |

## Timeline

| Shortcut                             | Description                                              |
| ------------------------------------ | -------------------------------------------------------- |
| **Double click on a sequence**       | Creates a blank layer                                    |
| **L + left click**                   | Creates a blank layer                                    |
| **M + left click**                   | Creates a marker                                         |
| **Ctrl + .**                         | Jumps to next marker                                     |
| **Ctrl + ,**                         | Jumps to previous marker                                 |
| **Shift + mousewheel scroll**        | Scrolls horizontally                                     |
| **Ctrl + mousewheel scroll**         | Moves playhead for 1 frame                               |
| **Ctrl + Shift + mousewheel scroll** | Moves playhead for 1 second                              |
| **Ctrl & +**                         | Increases selected section's Start TC time by one frame. |
| **Ctrl & -**                         | Decreases selected section's Start TC time by one frame. |

## Layers

| Shortcut               | Description                                                        |
| ---------------------- | ------------------------------------------------------------------ |
| **Del**                | Deletes selected layer                                             |
| **Shift + Del**        | Deletes selected layer and shifts track content to fill the gap    |
| **Shift + Ctrl + Del** | Deletes selected layer and shifts timeline content to fill the gap |

### **Inserting layer templates with shortcuts**

<div align="left"><img src="/files/lNoXXMQd73pYG9nXammS" alt=""></div>

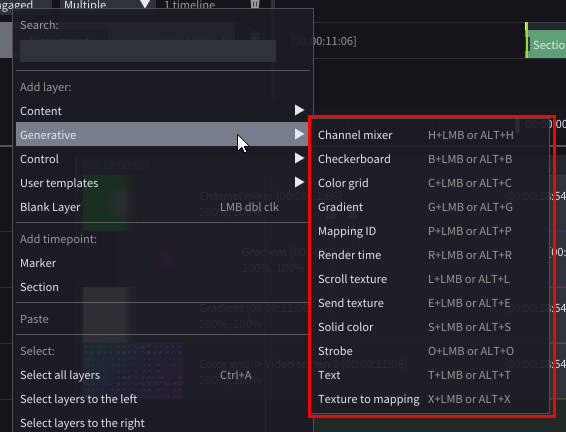
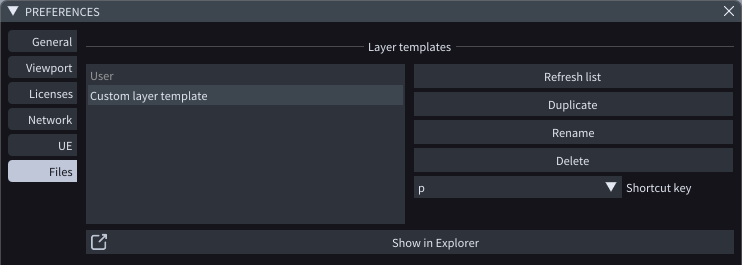
Every layer template, which you can edit in *Template Editor* window, can have a shortcut key assigned. LightAct comes with a number of predefined layer templates all of which have a shortcut key assigned. These are as described below, but please note that you might have changed some of them:

| Shortcut            | Description                   |
| ------------------- | ----------------------------- |
| **V + right click** | Creates a video layer         |
| **I + right click** | Creates an image layer        |
| **N + right click** | Creates a Notch layer         |
| **D + right click** | Creates an NDI or Spout layer |
| **C + right click** | Creates a color grid layer    |
| **S + right click** | Creates a solid color layer   |

### **Creating variables in Layouts**

<div align="left"><img src="/files/mMxDo8AOB7KgnxmuuBNK" alt=""></div>

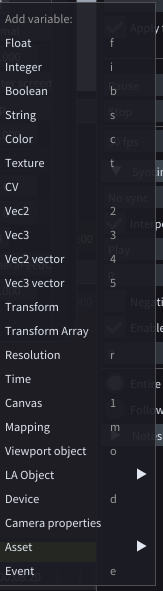
You can create *layer* or *global variables* by clicking on the **plus icon** in a particular group and selecting the type of variable you want to create. However, you can also hold one of the shortcuts below while clicking the plus icon and the variable of the corresponding type will be automatically created.

| Shortcut | Description                      |
| -------- | -------------------------------- |
| **F**    | Creates a float variable         |
| **I**    | Creates an integer variable      |
| **B**    | Creates a boolean variable       |
| **S**    | Creates a string (text) variable |
| **c**    | Creates a color variable         |
| **t**    | Creates a texture variable       |
| **2**    | Creates a vec2 variable          |
| **3**    | Creates an vec3 variable         |
| **r**    | Creates a resolution variable    |
| **1**    | Creates a canvas variable        |
| **o**    | Creates an object variable       |
| **d**    | Creates a device variable        |

## **Nodes**

| Shortcut                                                                                                                                                           | Description                                                                                                                                                                                                      |
| ------------------------------------------------------------------------------------------------------------------------------------------------------------------ | ---------------------------------------------------------------------------------------------------------------------------------------------------------------------------------------------------------------- |
| **Ctrl + X**                                                                                                                                                       | Cuts node                                                                                                                                                                                                        |
| **Q**                                                                                                                                                              | Straightens connections between selected nodes                                                                                                                                                                   |
| **↑, →, ↓, ←**                                                                                                                                                     | <p>Moves selected node 1 step toward the chosen direction<br><br>Moves the selected point 1 step toward the chosen direction in the Setup Window of a node such as Texture Mask node and other similar ones.</p> |
| <p><strong>Ctrl +↑,</strong></p><p><strong>Ctrl + →,</strong></p><p><strong>Ctrl +↓,</strong></p><p><strong>Ctrl + ←</strong></p>                                  | Moves the selected point 10 steps toward the chosen direction in the Setup Window of a node such as Texture Mask node and other similar ones.                                                                    |
| <p><strong>Ctrl + Shift +↑,</strong></p><p><strong>Ctrl + Shift + →,</strong></p><p><strong>Ctrl + Shift + ↓,</strong></p><p><strong>Ctrl + Shift + ←</strong></p> | Moves the selected point 100 steps toward the chosen direction in the Setup Window of a node such as Texture Mask node and other similar ones.                                                                   |
| <p><strong>Shift +↑,</strong><br><strong>Shift + →,</strong><br><strong>Shift + ↓,</strong><br><strong>Shift + ←</strong></p>                                      | Selects the neighboring point in the Setup Window of a node such as Texture Mask node and other similar ones.                                                                                                    |

## **Curve Editor**

| Shortcut         | Description            |
| ---------------- | ---------------------- |
| **Double click** | Adds point             |
| **Del**          | Removes selected point |

## Fixture editor

In *Custom* mode, you can **select** or **deselect** Fixture pixels.

<table><thead><tr><th>Shortcut</th><th>Description</th><th data-hidden></th></tr></thead><tbody><tr><td><strong>Double click</strong></td><td>Adds a pixel</td><td></td></tr><tr><td><strong>↑↓</strong></td><td>Moves the pixel by 1 unit</td><td></td></tr><tr><td><strong>Ctrl + ↑↓</strong></td><td>Moves the pixel by 10 unit</td><td></td></tr><tr><td><strong>Shift + ↑↓</strong></td><td>Moves the pixel by 100 unit</td><td></td></tr><tr><td><strong>Del</strong></td><td>Deletes the pixel</td><td></td></tr><tr><td><strong>ESC</strong></td><td>Stops the connecting process</td><td></td></tr></tbody></table>

## **Video Output**

| Shortcut                   | Description                                                                                 |
| -------------------------- | ------------------------------------------------------------------------------------------- |
| **Ctrl + T**               | Toggles *Always on top* flag of an Output window (it needs to have focus for this to work). |
| **Alt + Ctrl + Shift + Q** | Closes Output window (it needs to have focus for this to work)                              |

| Shortcut                                            | Description                                                                                                                                  |
| --------------------------------------------------- | -------------------------------------------------------------------------------------------------------------------------------------------- |
| **Drag to empty space on track**                    | Creates layer on the track                                                                                                                   |
| **Shift + Drag to empty space on track**            | Creates layer on the track and shifts all affected layers on the track to the right                                                          |
| **Ctrl +** **Shift + Drag to empty space on track** | Creates layer on the track and shifts all affected layers on the sequence to the right                                                       |
| **Drag to existing layer on track**                 | Finds all variables of the same type and updates them to reference the dragged object or asset                                               |
| **Shift + Drag to existing layer on track**         | Replaces the layer we dragged to with a new layer and adjusts the duration of the layer and shifts the layers on the right side of the track |
| **Ctrl + Shift + Drag to existing layer on track**  | Replaces the layer we dragged to with a new layer and adjusts the position of all layers on the right side of the sequence                   |


# Content flow

LightAct uses a flexible and powerful multi-stage content pipeline that has been fine-tuned for performance. In this article we will go through the basic concepts, terminology and how it all comes together.

<figure><img src="/files/Q7TcbDkR8ABvJ6K3DFSv" alt=""><figcaption></figcaption></figure>

## Ingesting content into LightAct

<div align="left"><figure><img src="/files/MikzvHJHHWMN6gV9Cgug" alt=""><figcaption></figcaption></figure></div>

As a media server, perhaps the most standard way for LightAct to ingest content is through Assets repository.

<div align="left"><figure><img src="/files/vAuzMGWik86zPdX4wRdE" alt=""><figcaption></figcaption></figure></div>

These assets are then played back in Layers.

<div align="left"><figure><img src="/files/nj0hY4fwbxD2N7FeeMBJ" alt=""><figcaption></figcaption></figure></div>

LightAct can also ingest content through *Device* nodes such as NDI, Spout or Unreal Texture Share.

<div align="left"><figure><img src="/files/OFr1HnSukpemZtyTIDLr" alt=""><figcaption></figcaption></figure></div>

The content from Device nodes is also processed by LightAct's layer system.

## Layers

Layers are a central element in LightAct. They reside in Timelines and all the content that you want to play and all the data that you want to process will have to at some point pass through LightAct's layer system.

## Content Mappings

Layers can render the content to viewport objects, canvases or throwers. If they render content directly onto viewport objects, for example, video screens, we call this Direct mapping. So, there are 3 types of mappings:

* **Direct mappings**: if layer renders directly onto a viewport object
* **Canvases**: a texture container that allows you to map the texture or parts of it onto various viewport objects
* **Throwers**: a virtual viewport object that 'projects' content onto viewport objects.

## Other content destinations

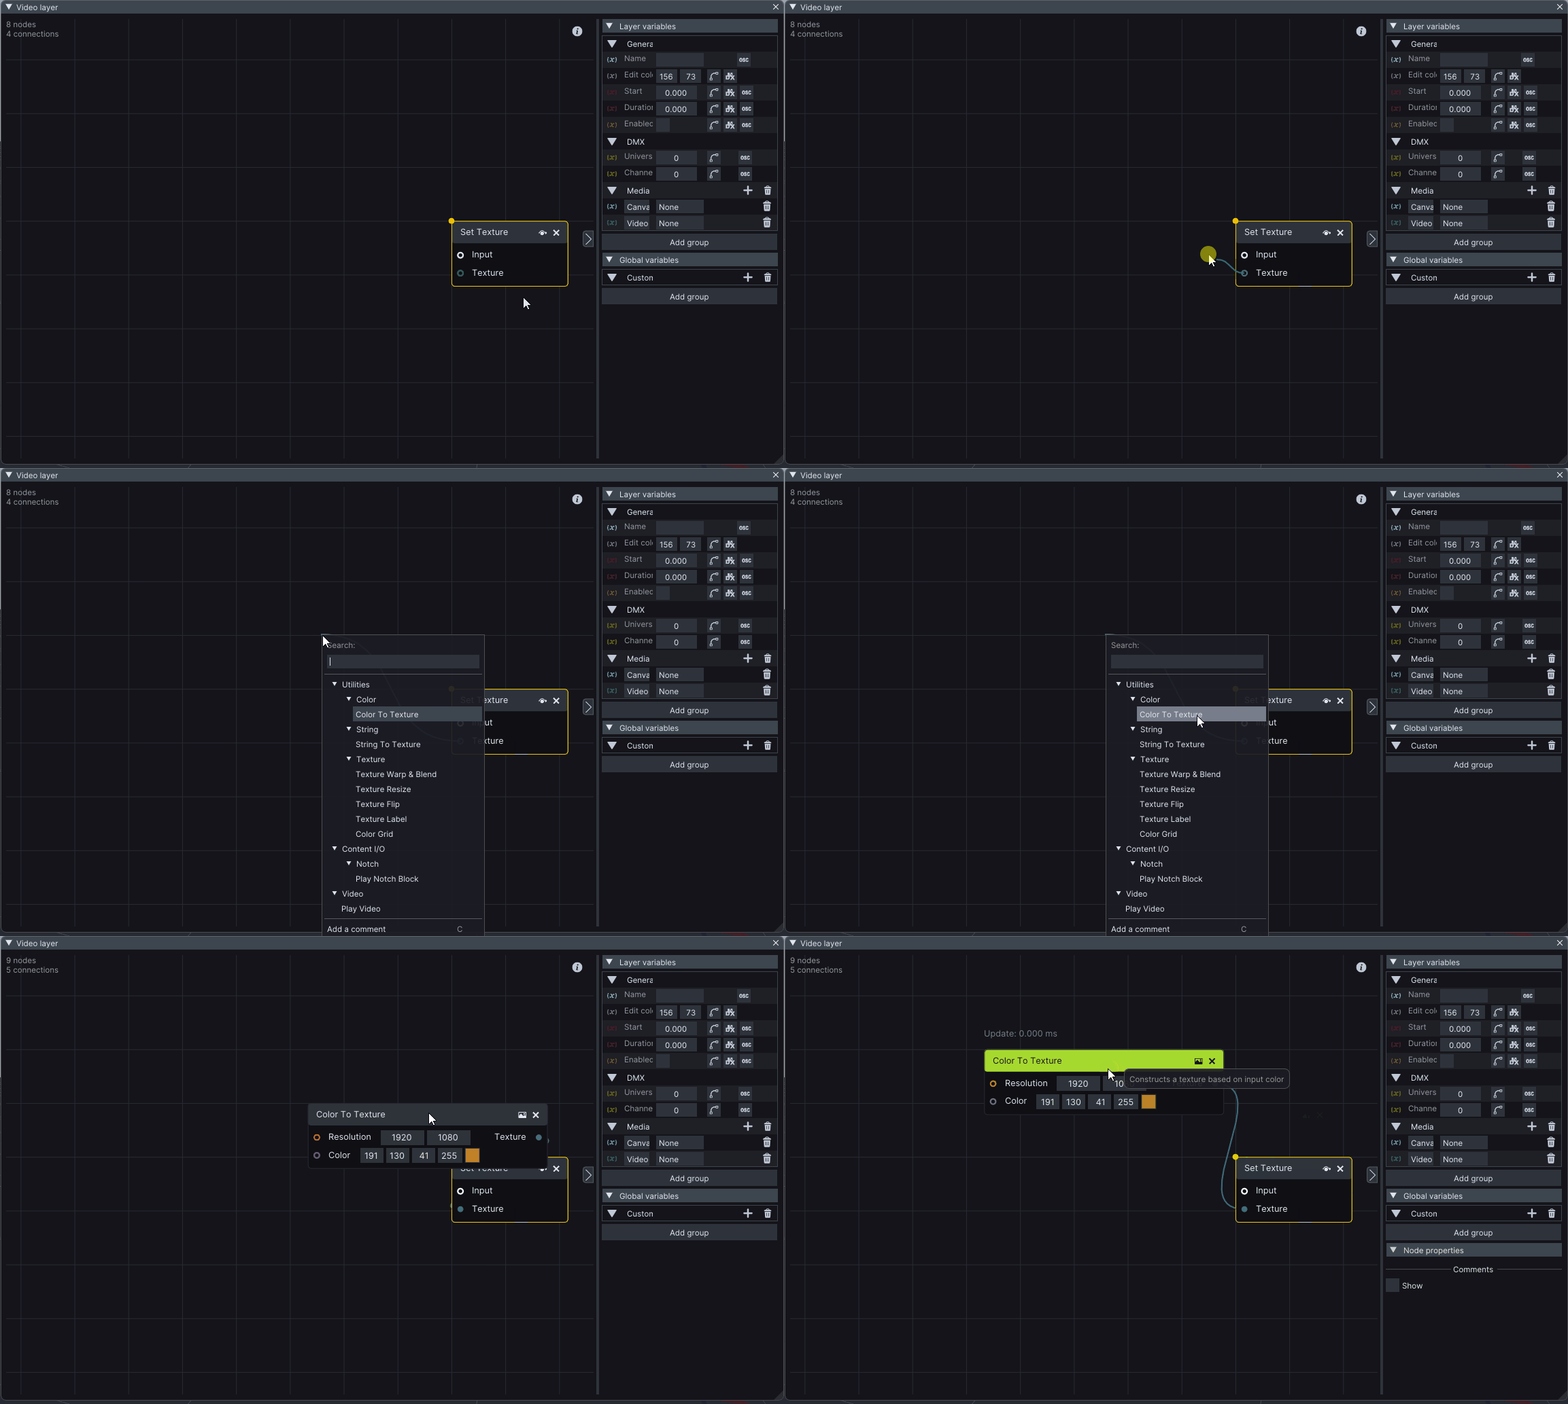
Layers can also render content to Device nodes. This is the usual workflow when you want to send a content through NDI or video IO cards (such as Deltacast or Blackmagic).Please note all of the above can also get content with **Set Texture** nodes.


# Asking for support

How to ask for support so that we can quickly help you

If you come across any issues, we would greatly appreciate hearing from you! However, in order to ensure that your bug report is useful to our development team, there are certain key pieces of information that should be included.

The best method for reporting a bug is to:

1. send an email to <support@lightact.com> or reach us over Discord,
2. and sending a **Package for Support** (as outlined below).

{% hint style="warning" %}
Before contacting us please make sure:

* you’re running the latest version of LightAct.
* to check Use Documentation to see if you’re looking at something that has a common fix
  {% endhint %}

## What to include in a support request?

When you contact us please always include:

* [ ] Package for Support
* [ ] Bug Report
* [ ] If possible, send over the Assets that are giving you problems

{% hint style="warning" %}
Please provide all the information you can. We cannot help you if we don't understand the issue.
{% endhint %}

## Package for Support

<div align="left"><figure><img src="/files/apTU6KRXg22weVyQvCgk" alt=""><figcaption></figcaption></figure></div>

In LightAct 4.13 we introduced a feature called **Package for Support**. When you click on it, LightAct will package **entire project folder except the Assets** into a zip file that is ready for you to send to us.

{% hint style="info" %}
**Good to know**: this package includes the project file, all the log files, BugSplat crash dumps (if any) and other useful information that will help us track down the issue.
{% endhint %}

{% hint style="info" %}
**Good to know**: if a particular Asset is giving you problems, send it over to use separately.
{% endhint %}

## Bug report

A Bug report can be written in an email or a Discord message, but it should include the following items:

* **Reproduction steps**: this is a written description on how to reproduce the bug. The sooner we can reproduce the issue, the faster it can be resolved.
* **The result:** here you describe the unexpected behaviour. Sometimes it also helps to describe how you thought the software (or hardware) should work so that we can understand better the expected vs the unexpected behaviour.
* **Expected result**: if required, describe how you thought the software is going to work.
* Attach as much **additional information** as you can. Particularly useful are:
  * **screenshots,**
  * **screen recordings,**
  * **photos or videos of the issue on the outputs** (projections, screens or similar).

{% hint style="info" %}
**Good to know**: the main goal of a bug report is for our development team to be able to reproduce the issue on our systems.

If we are unable to reproduce the issue in our office, it takes much longer for us to fix it, if we are able to fix it at all.
{% endhint %}

### **What are reproduction steps?**

Reproduction steps is a clear and as-short-as-possible description of steps we should take in order to reproduce the issue on our end.

{% hint style="warning" %}
We realize that it might take a bit more time to send this over, but believe us when we say this is the fastest way to fix the issue.
{% endhint %}

## **Examples of good support requests**

Below you will find some examples of good support requests that would allow us to act on them immediately.

<details>

<summary>Black border around the mapped sub-areas in video outputs</summary>

#### Issue

There is a black border around the mapped sub-areas in video outputs.

#### Reproduction steps

1. Create a sub area in a canvas in Canvas Maps window,
2. map it to a video screen of the same resolution and
3. output it through a video output.

#### The result

The sub-areas on the actual outputs have a black border around them.

#### Additional information

For such a bug report, what would be the most useful is:

* Package for Support
* screenshot or screenrecording showing where you are making the changes in the software,
* photo or video of the displays showing the unexpected result

</details>

{% hint style="info" %}
**Good to know**: writing a conscise support request similar to the one above is the best way for you to get a helpful reply the most quickly.

Help us help you.
{% endhint %}


# General troubleshooting

There are several troubleshooting pages spread across these user docs related to specific features. On this page, however, you will find more general troubleshooting advice.

{% hint style="info" %}
**Good to know:** please also have a look at the [system requirements](https://docs.lightact.com/preparing-your-hardware-for-lightact/getting-your-hardware-ready-to-run-lightact).
{% endhint %}

{% hint style="warning" %}
Project files shouldn't be saved in Google Drive or Dropbox folders or folders of similar services (see below).
{% endhint %}

<details>

<summary>LightAct's GUI is black upon launching</summary>

Most likely reason is that the GPU LightAct is running on is not a suitable one. Please make sure that you are using a discrete Nvidia GPU and that you've set up your laptop as per [this tutorial](https://youtu.be/siP-Rpj8S4E).

</details>

<details>

<summary>LightAct closes upon launch - cache</summary>

One possible step would be to go into *C:\ProgramData\LightAct\LightAct4* folder and delete these files and folders:

<div align="left"><figure><img src="/files/mm5For4AACnUgD6FdoQp" alt=""><figcaption></figcaption></figure></div>

If LightAct still doesn't launch correctly, try to:

1. uninstall LightAct completely, including the *Preferences*,
2. install it again.

In every case, please **contact us at <support@lightact.com>** and let us know what you find out.

</details>

<details>

<summary>LightAct closes upon launch - DirectShow</summary>

If LightAct closes upon launch and you are using either 4.12 or 4.13 version, please try launching LightAct with -omit "14" launch argument. This will prevent DirectShow module from loading.

You should therefore open CommandPrompt window:

<figure><img src="/files/jguTg0HJQEEZj6xpmdFR" alt=""><figcaption></figcaption></figure>

and type in:

```
"C:\Program Files\LightAct\LightAct4\LightAct4.exe" -omit "14"
```

Please note, this command assumes that LightAct is installed in *"C:\Program Files\LightAct\LightAct4\\".* If you installed LightAct in a different location, you should modify the command accordingly.

Also, this means you will not be able to use DirectShow Receiver node in the Devices window.

</details>

<details>

<summary>LightAct 'keeps crashing' or acts weirdly</summary>

One reason for this might be that you have your project files in a Google Drive or Dropbox or a similar service. These programs interfere with file access which might cause LightAct to behave in a weird way.

</details>


# Switching to LightAct

These chapters are meant for users who are switching to LightAct from other media servers. They will ease your transition by explaining common concepts, differences and similarities in UI, terminology and workflows.

{% hint style="info" %}
**Good to know:** we are by no means experts in any media server apart from LightAct, so if you notice something is not correct, please don't hesitate to reach out.

Also, if you'd like us to add another media server, feel free to contact us.
{% endhint %}

As we cannot write a page for every media server solution on the market, we focus first on the media servers where we see the largest number of users transitioning from. We will add additional pages as we see fit.

<table data-card-size="large" data-view="cards"><thead><tr><th></th><th></th><th></th><th data-hidden data-card-cover data-type="files"></th><th data-hidden data-card-target data-type="content-ref"></th></tr></thead><tbody><tr><td><strong>Switching to LightAct from Disguise</strong></td><td>An in-depth explanation of similarities that will help you make the switch quickly and effortlessly.</td><td></td><td><a href="/files/6unlUSE8fmXBXcCjNg7v">/files/6unlUSE8fmXBXcCjNg7v</a></td><td><a href="/pages/vFIisLlD7lUzUaUowg3u">/pages/vFIisLlD7lUzUaUowg3u</a></td></tr><tr><td><strong>Switching to LightAct from Pixera</strong></td><td>A quick overview of Pixera's main functionalities and where you can find similarities in LightAct.</td><td></td><td><a href="/files/YU2jBH8m3aLtslRRWlaS">/files/YU2jBH8m3aLtslRRWlaS</a></td><td></td></tr></tbody></table>


# LightAct for Disguise Operators

This section is dedicated to users who are familiar with Disguise media server and would like to know how to apply their knowledge in LightAct.

## Main elements

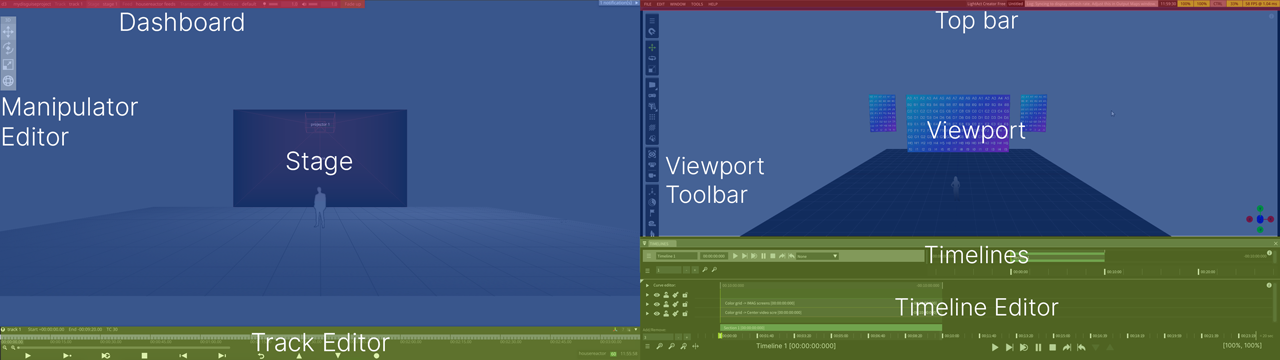
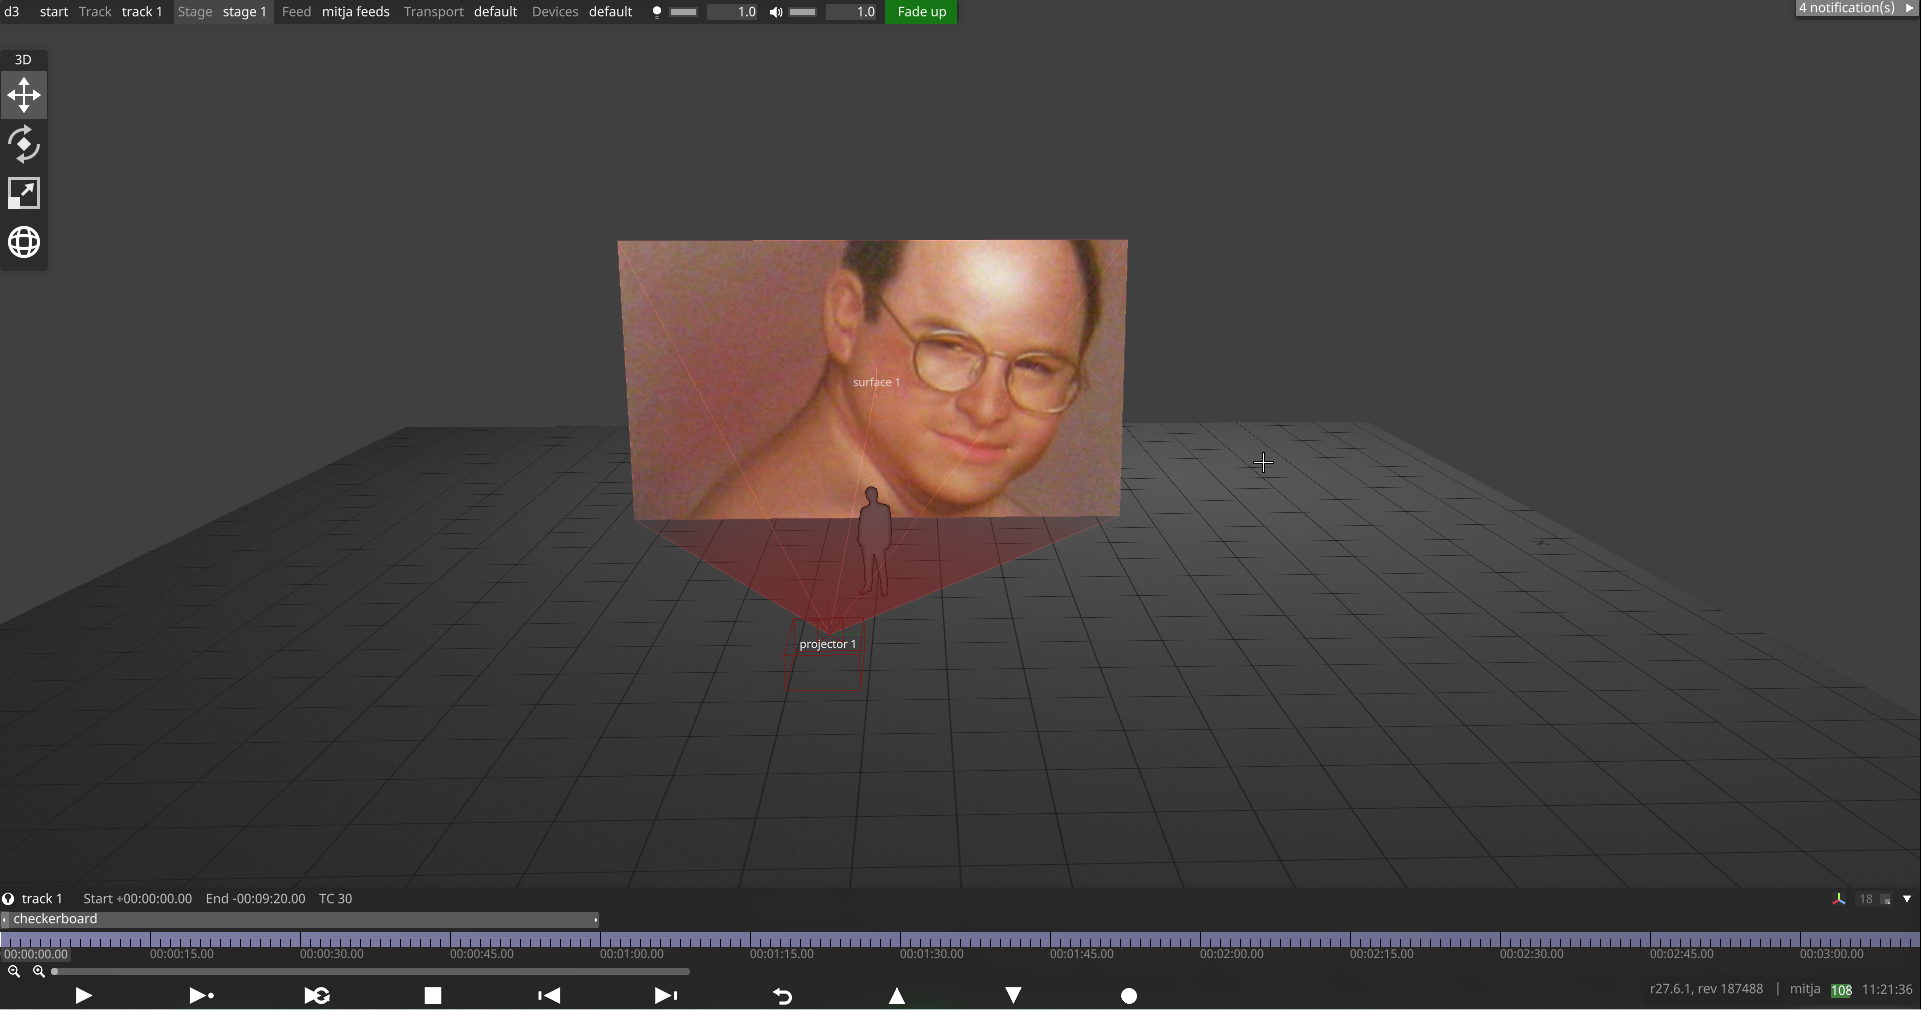
Disguise consists of three main elements, known as the Timeline level, the Stage level, and the Feed level. In comparison, LightAct offers different windows, and each window focuses on a set of similar functionalities.

<table><thead><tr><th>Category</th><th width="228.33333333333331">Disguise</th><th>LightAct</th></tr></thead><tbody><tr><td>Stage level</td><td>Stage</td><td>Viewport</td></tr><tr><td>Timeline level</td><td>Manipulator Editor</td><td>Viewport Toolbar</td></tr><tr><td></td><td>Track Editor</td><td>Timelines Window, Timeline Editor Window</td></tr><tr><td>Feed level</td><td></td><td>Output Maps Window</td></tr></tbody></table>


# GUI Overview

In this section, we are going to look at the differences and similarities between the graphics user interface of Disguise and LightAct software.

<figure><img src="/files/IoYI3x3oyxvPekk5CtMr" alt=""><figcaption></figcaption></figure>

{% hint style="info" %}
**Good to know:** unlike Disguise, LightAct uses dockable windows, that you can save into Workspaces. This allows you to modify the GUI and save it for future use.
{% endhint %}

## Dashboard

The closest thing to Disguise's Dashboard is LightAct's [Top Bar](/quick-start/user-interface/top-bar) where you can see all the Windows in LightAct software.

## Track Editor

Using the Track Editor in Disguise, you could play and edit all Tracks within a single project. Here is where you placed the desired Content Layers on the Timeline.

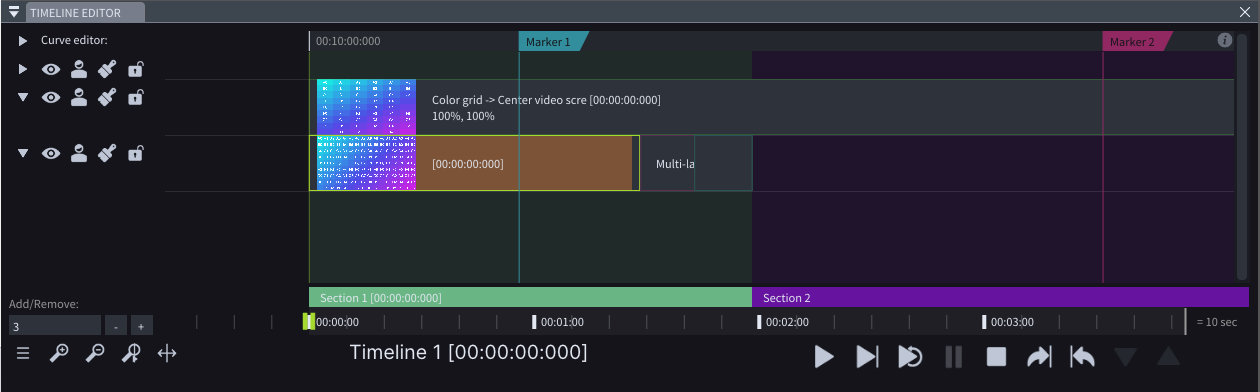
In LightAct, the term Track refers to a lane along which you can place layers in the [Timeline](broken://pages/gVo5IggqA2Ti6LFoq45y). Consequently, a Timeline can have lots of tracks, populated with different [Layers](broken://pages/uGObavuxs9guD7Ph8k4i), such as video, notch, image layers, or others.

{% hint style="info" %}
**Good to know:** Unlike Disguise, layers in LightAct are not strictly defined and are completely customizable.
{% endhint %}

LightAct also fosters the term Timeline, although a Timeline in LightAct typically contains one or more Timeline tracks. You can have multiple Timelines in a single project, which you can add and manage in the [Timelines window](broken://pages/s5uC9iAZKeosFNoPuwDQ).

## Stage

All your objects in Disguise could be visualized on the Stage. Similarly, in LightAct, all Viewport Objects can be seen in the [Viewport window](/quick-start/user-interface/viewport-navigation).

## Feed

The equivalent to the Feed level in Disguise, would be the [Output Maps Window ](broken://pages/lG8qiETTr6xQ57Jc5mWO)in LightAct.

## Devices

In Disguise you used to add devices in the form of a list displayed in the Devices Editor. In LightAct, devices are inserted in the form of nodes, in the Devices window.

Here, you can both receive or output from and to different [Network devices](/integrations/network), [Trackers](broken://pages/ZYGqSdzGrDzYelwMoooh), [MIDI](/osc-and-midi/midi), [Content I/O](/integrations/content-io), or [Audio devices](/integrations/audio).

{% hint style="info" %}
**Good to know:** In Disguise, you could create a DmxDevice, just like you created any other device type. In LightAct, you can receive or send DMX data by using the dedicated DMX In and DMX Out windows, instead of the generic Devices Window.
{% endhint %}

## Transport

In Disguise, Timecode configuration happened in the Transport Editor of the Dashboard. In LightAct, you can receive timecode data, such as LTC or MIDI in the Devices Window.

To find out more about syncing a Timeline to a Timecode, please read [this section](https://app.gitbook.com/o/jm10Bq9qF0zSG9DcWnyq/s/9sVaJpWJhPbmscipukhh/~/changes/232/understanding-the-basics/lightact-for-operators/lightact-for-disguise-operators/sequencing#multitransport-manager).


# Content Sequencing

In this section, we will cover all basic elements used in different sequencing methods.

## Layers

In Disguise, you could place layers in the Timeline. In LightAct, Layers are placed in the Timeline tracks.

All layers in LightAct, including the[ stock layer templates](/layers-and-layouts/layers#layer-templates) we provide, are completely customizable. It is also possible for you to create your own layer templates.

<figure><img src="/files/DD2yfSjinEPiL50PvF1G" alt=""><figcaption></figcaption></figure>

{% hint style="info" %}
**Good to know:** in LightAct, all layers are created with nodes, however this doesn't mean you need to actually use any of the nodes to use the layer. Instead, you can just modify layer variables to achieve what you want.

But if you want to modify what any particular layer does, that's when nodes become extremely useful.
{% endhint %}

### Control Layers with Art-Net

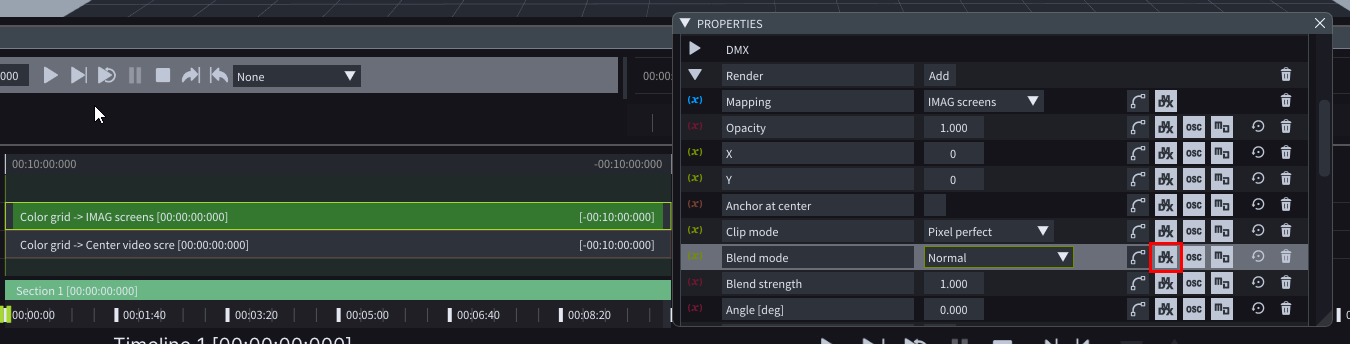
In Disguise, you could control a layer property by defining an Art-Net expression. In LightAct, you can control a layer variable through Art-Net or sACN by clicking on the Variable’s DMX icon.

<figure><img src="/files/oqX5p8L88EYy0iFKofWf" alt=""><figcaption></figcaption></figure>

The incoming DMX Data can be set and visualized in the [DMX In](/dmx/dmx-in) window.

### Control Layers with OSC

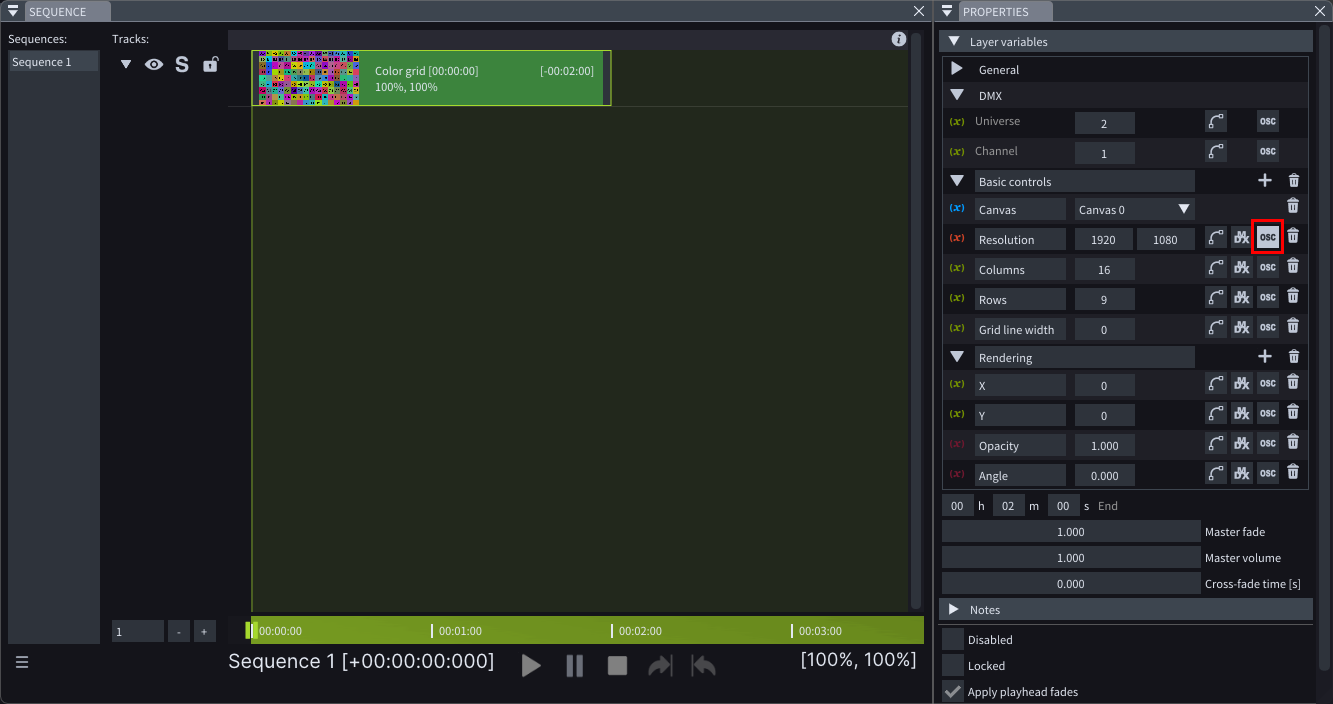
A similar approach applies for controlling layer properties with OSC in Disguise and controlling layer variables with OSC In, in LightAct. While you are used to creating an OSC Expression for a chosen layer property in Disguise, you can achieve this by clicking on the OSC Icon of a layer variable in LightAct.

<figure><img src="/files/Ve5HbK2W2R9lwGwi5cyG" alt=""><figcaption></figcaption></figure>

Of course, to receive OSC Data, you first need to correctly set up an OSC Receiver device node, and then map these values to the desired Layer variables in the [OSC In](/osc-and-midi/receiving-osc/oscin) window.

### Keyframing

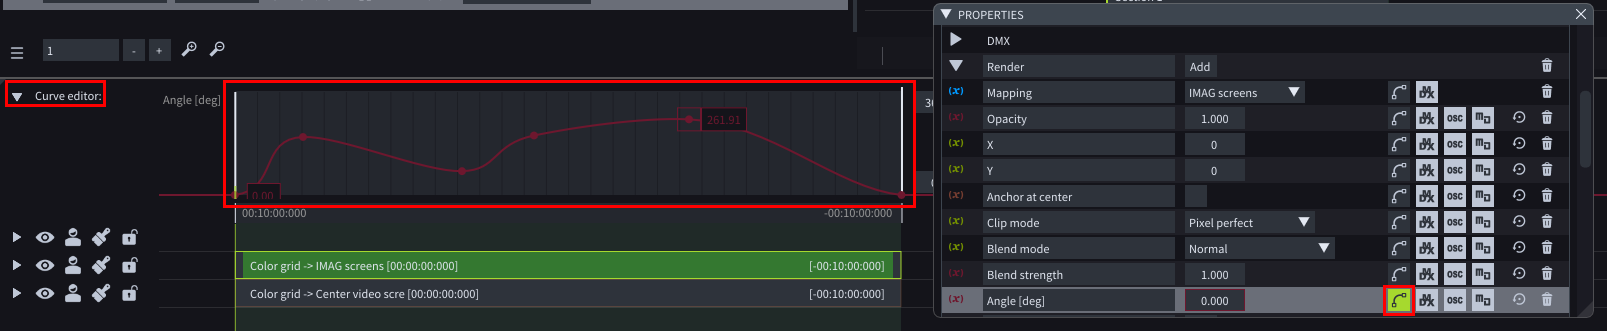
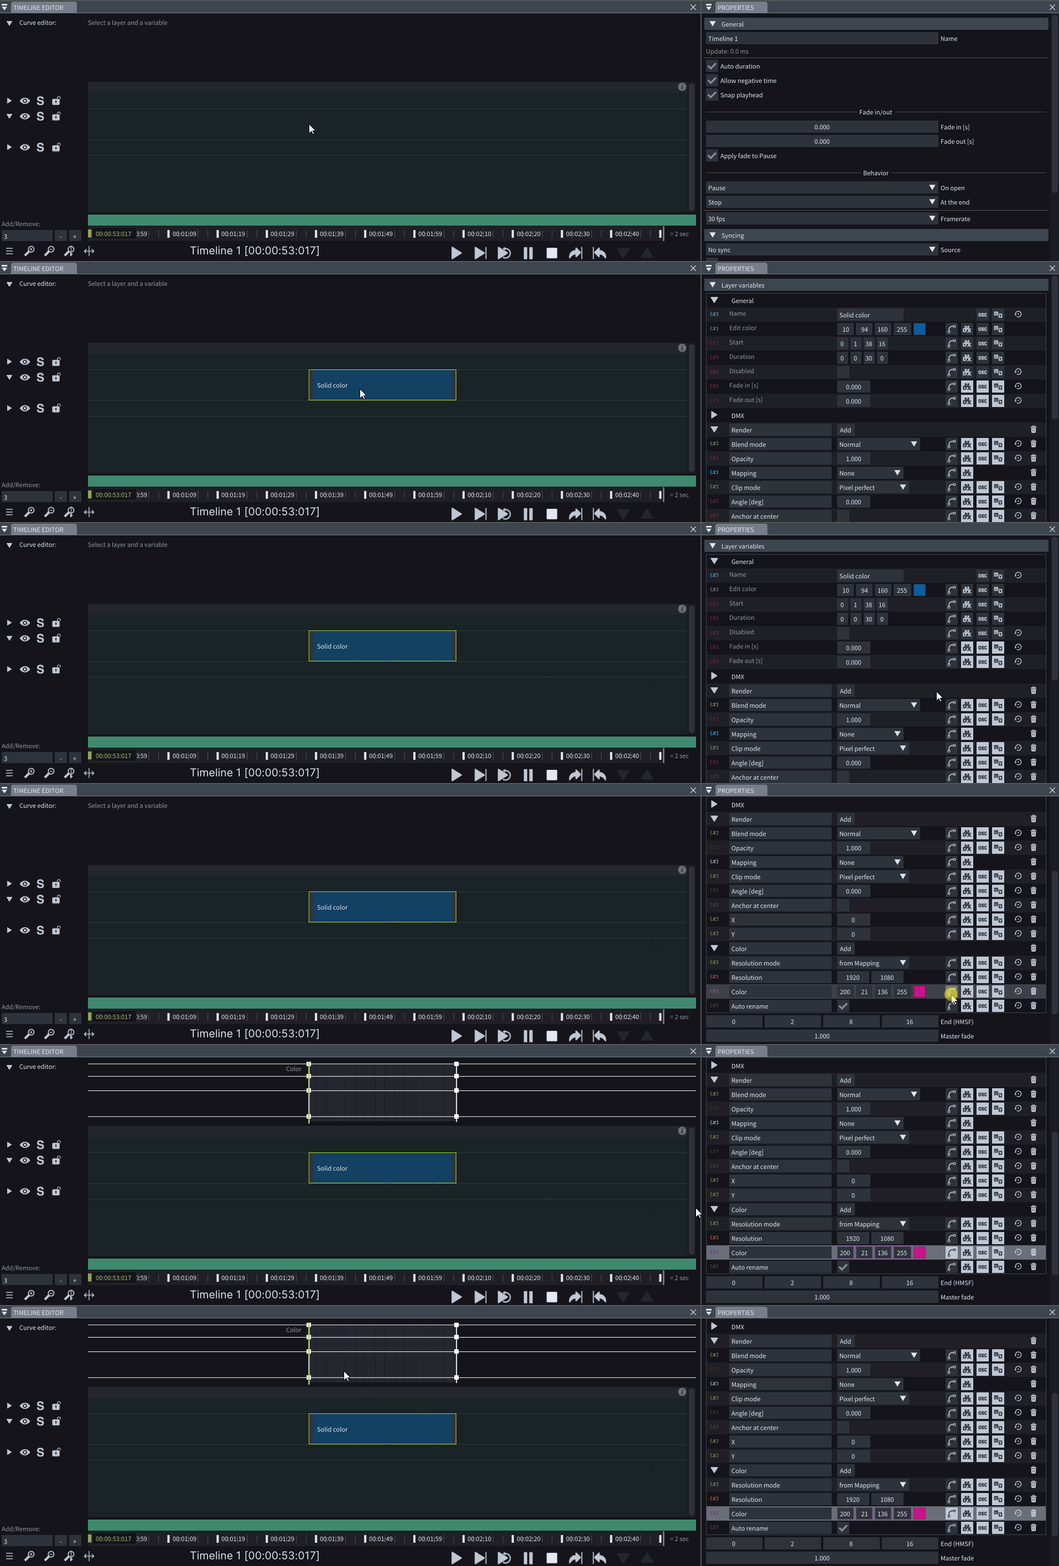
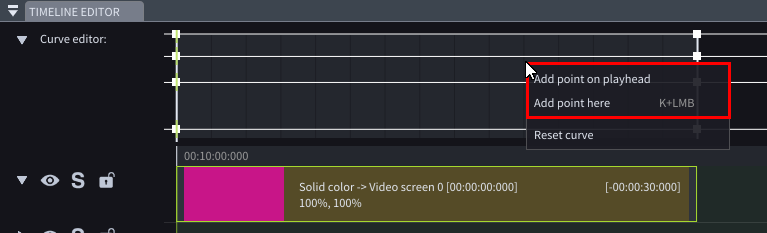
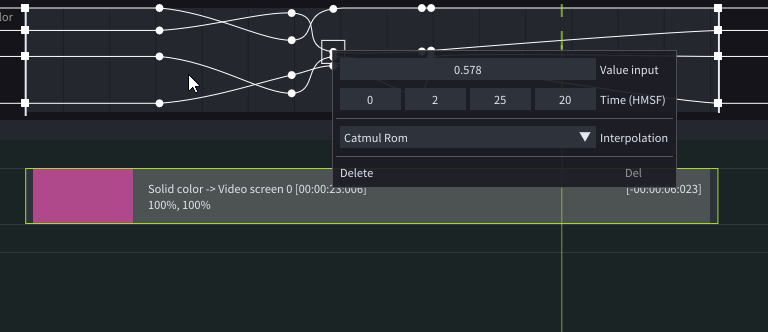
To animate a layer property over time, in Disguise you would use a method called Keyframing. A similar functionality in LightAct can be found in the Curve Editor. To enable Curve Editing for a layer variable, you must enable the Curve Editing icon. Next, upon selecting the variable in the Curve Editor, you can insert different keyframes and move them around both up, down, vertically, and horizontally.

<figure><img src="/files/ZnOo7UuhLC3VefYP1249" alt=""><figcaption></figcaption></figure>

## Cues

When you add a Cue in disguise, you get a new entry in the Cue list. LightAct can use Section or Marker as a cue as long as they have *Use as Cue* enabled.

<figure><img src="/files/U2P0ZQJAh4iHzNAOlbz5" alt=""><figcaption></figcaption></figure>

| disguise | LightAct                                     |
| -------- | -------------------------------------------- |
| Cue      | Marker or Section with *Use as Cue* enabled. |

## Multi-transport Manager

In disguise, you could control multiple Tracks within a project simultaneously, through the use of Multi-transport manager. In LightAct, you can run multiple Timelines in a single project independently from one another, and manage the process in the Timelines window.

<figure><img src="/files/SAYKTT6Hs4ZyKlB64OhS" alt=""><figcaption></figcaption></figure>

{% hint style="info" %}
**Good to know**: If you would like to sync a Timeline to an incoming timecode, you first have to create a Device that received the data and then select the device from the Sync dropdown menu of the desired Timeline in the Timelines window.
{% endhint %}


# Content Mapping

## Introduction

With the release of LightAct 4.8, content mapping has been greatly simplified. Now you can map LightAct layers:

* directly to viewport objects such as video screens
* to canvases for functionalities similar to Disguise's Feed Maps
* to throwers for functionalities similar to Disguise's Mappings such as Perspective or Spherical

### Fast workflow

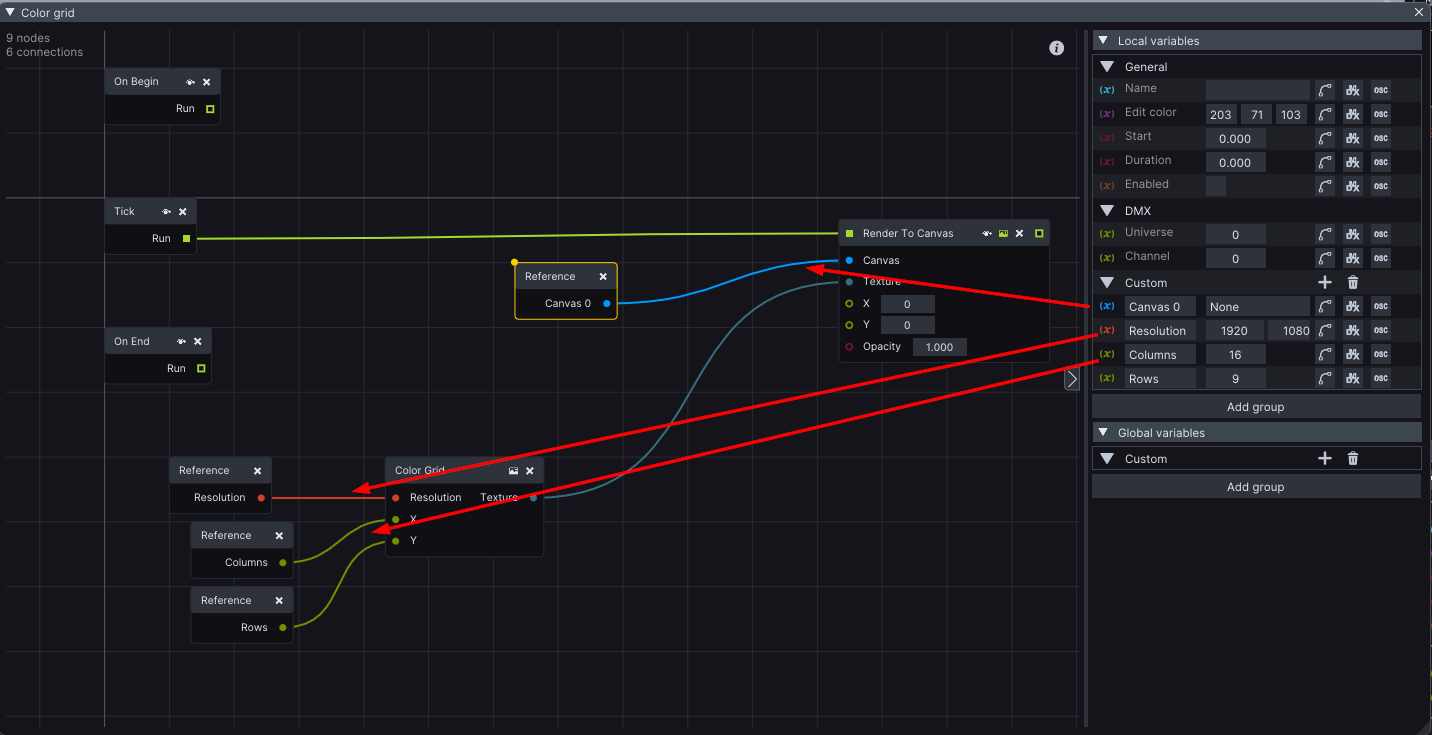
![](/files/KMoS5HgwIlF6hACaFBFs)

{% hint style="info" %}
**Good to know:** Most content mappings can be achieved by simply dragging an arrow from the viewport object or a canvas to a layer.
{% endhint %}

## Direct Mapping

<figure><img src="/files/7Nyir9Lqf5pyiA4Oq8QM" alt=""><figcaption></figcaption></figure>

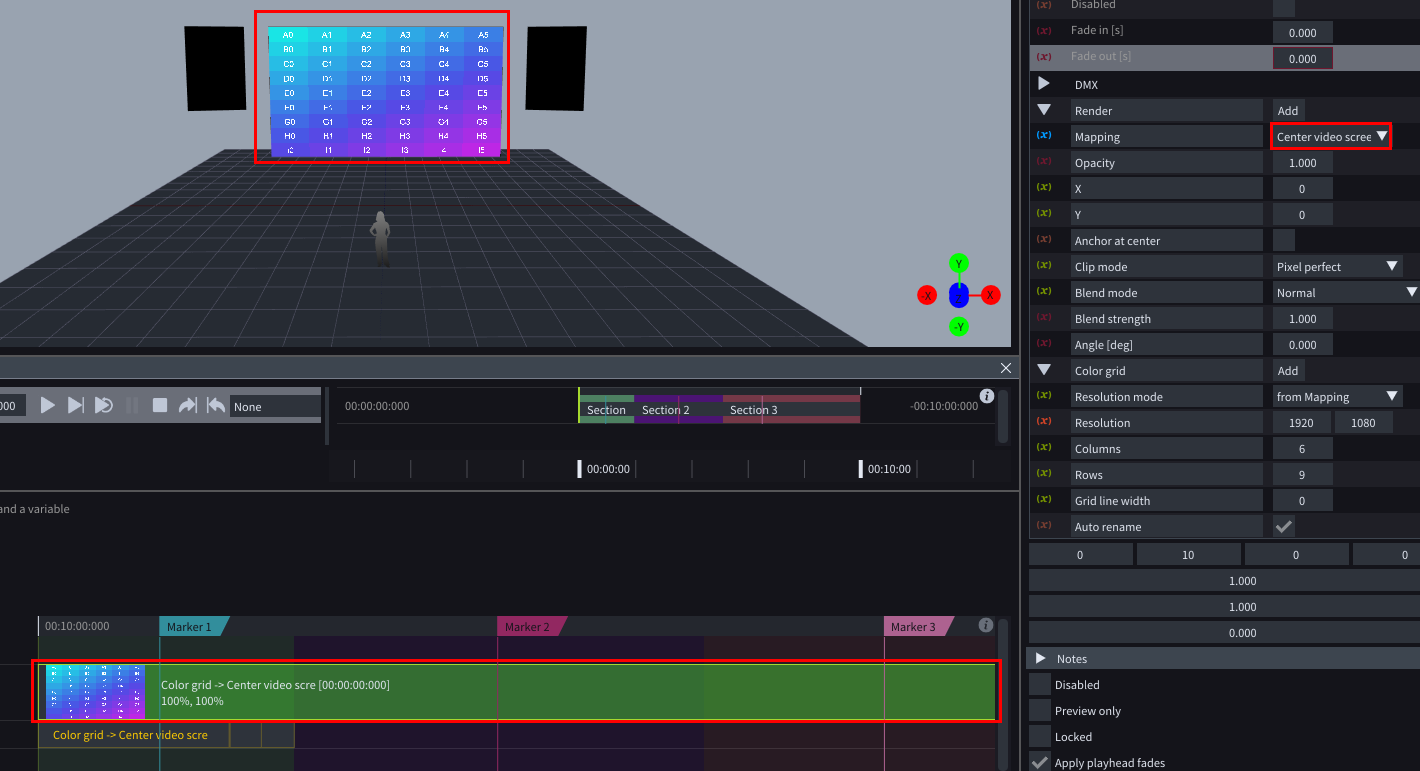
What you referred to as Direct mapping in Disguise, can be done in LightAct through mapping. You can map content directly from a Layer to any Viewport object, such as a Video screen, to any Canvas or Device.

## Perspective Mapping

<figure><img src="/files/fBrMELZOSlMCQMl22osm" alt=""><figcaption></figcaption></figure>

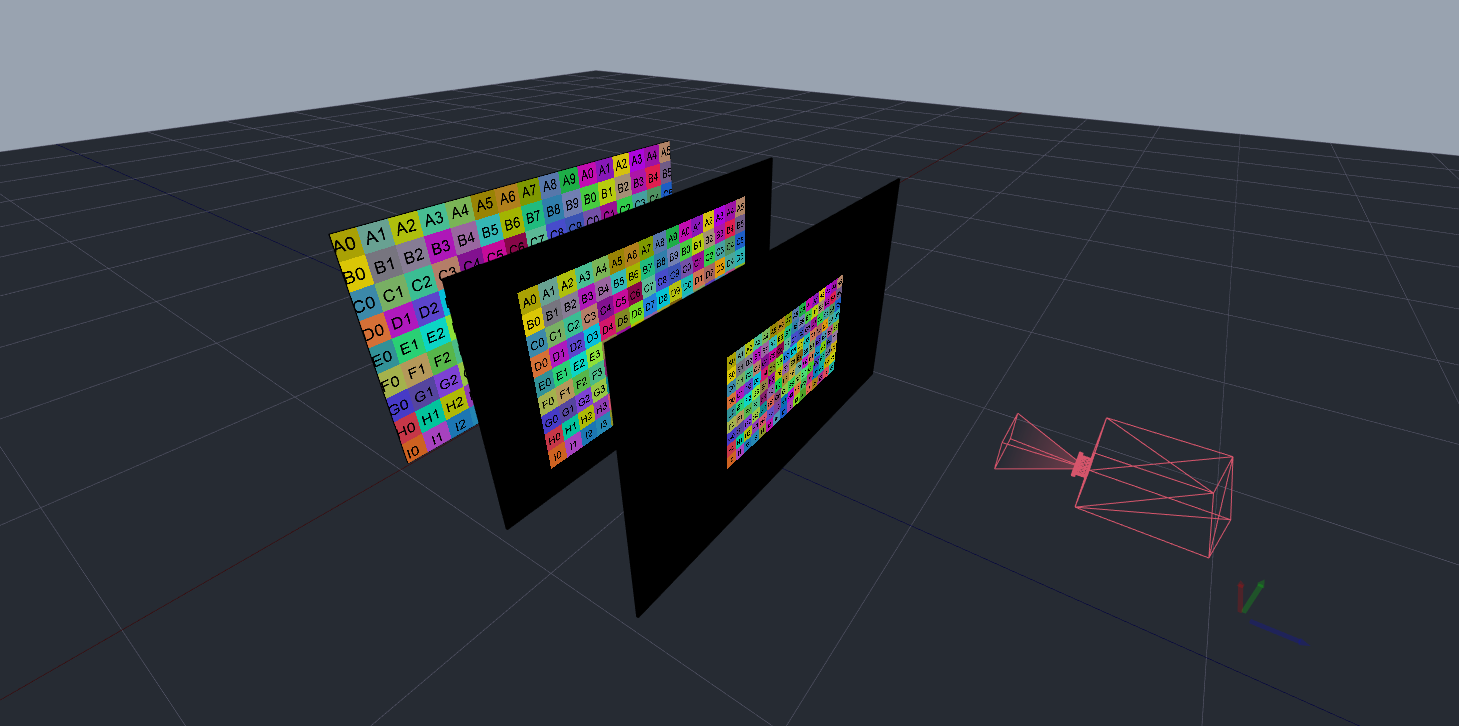
Perspective mapping in LightAct is performed by mapping content from a [Perspective Thrower](broken://pages/ZaCdR6cxWAptcq2iudJJ) to another Viewport Object, such as a Video Screen.

## Sphere Mapping

<figure><img src="/files/6UdQyrDNoomP4gt3F11g" alt=""><figcaption></figcaption></figure>

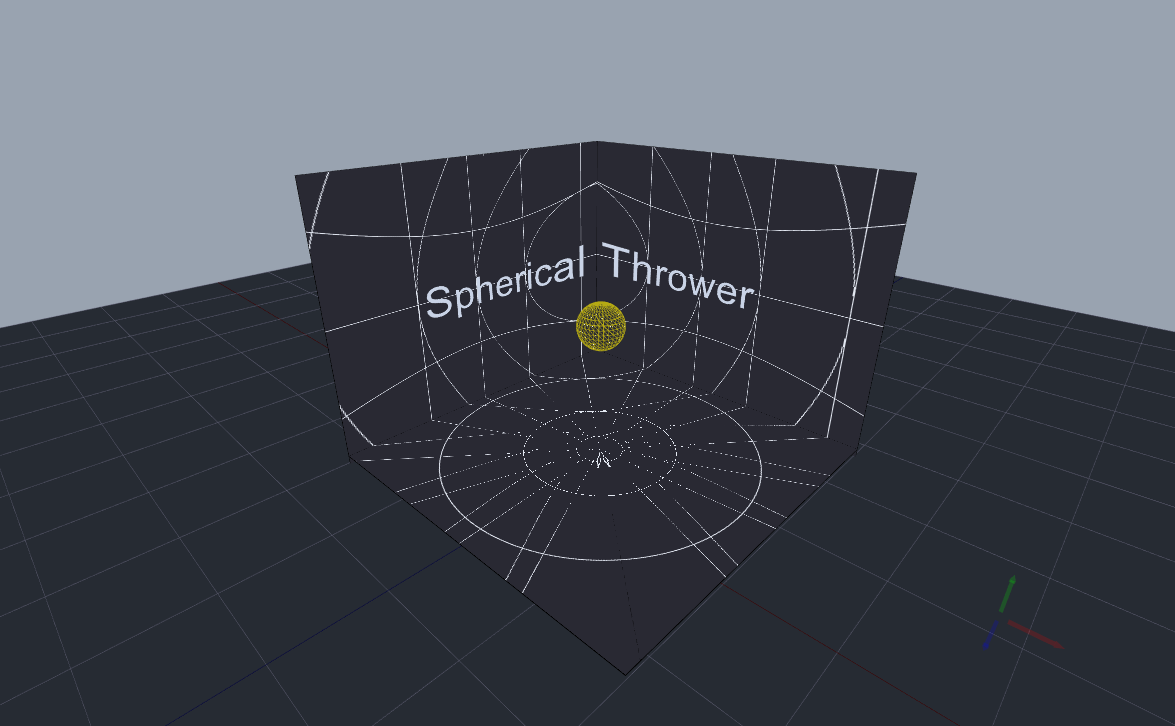
Sphere mapping in LightAct can be done with the help of a [Spherical Thrower](broken://pages/jFvjShbG8expyDBbTY4S). Similar to the Perspective thrower, a Spherical thrower can map Content to other objects placed on the Viewport.

{% hint style="info" %}
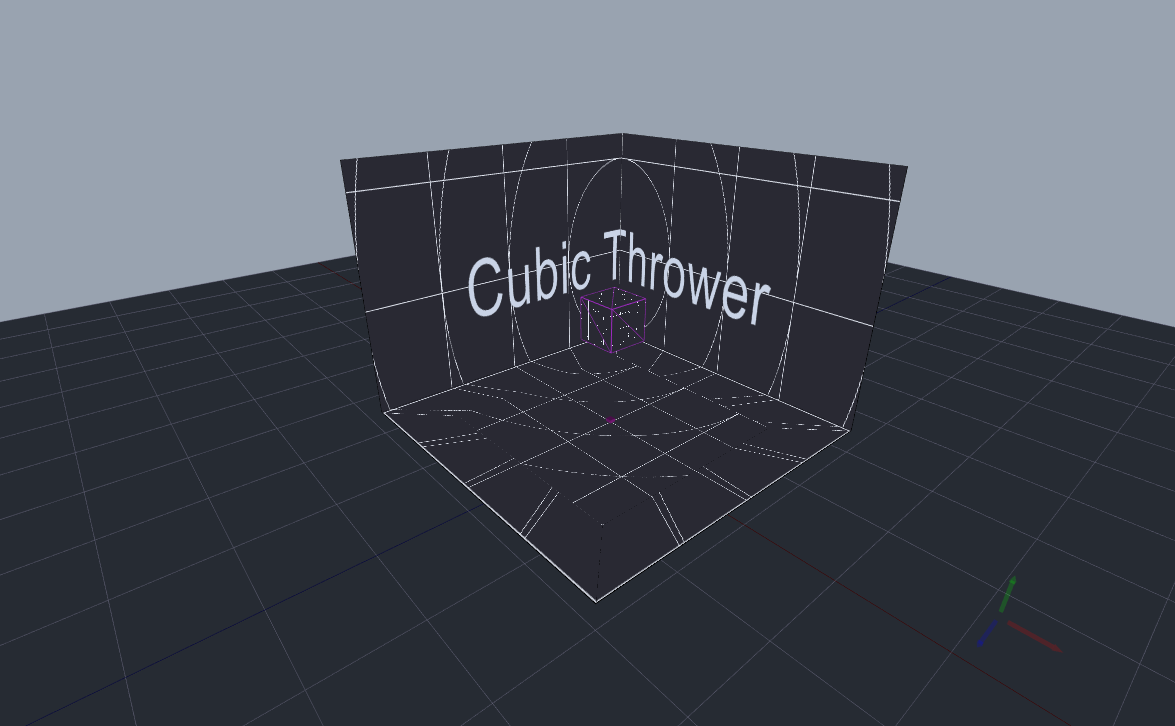
**Good to know:** In LightAct, it is also possible to achieve cubic mapping. This type of mapping can be achieved with the help of a [Cubic Thrower](broken://pages/HvMoHhVRSy65RVsqvKrk).
{% endhint %}

<figure><img src="/files/W9DgdYBHxqB6zgCNibu8" alt=""><figcaption></figcaption></figure>

## Parallel mapping

<figure><img src="/files/Qu8nVojr8PFk6xriioyd" alt=""><figcaption></figcaption></figure>

An equivalent to parallel mapping in Disguise would be Orthogonal thrower in LightAct.


# Projection Mapping

## Manual Calibration

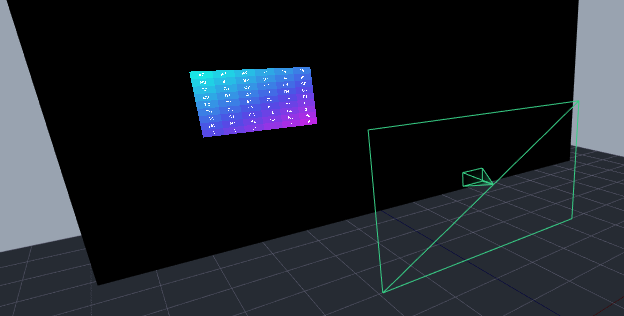
Just like in Disguise, you can do manual projector calibration by mapping a Projector to the desired Object in the Viewport and adjusting the Projector's properties until the content perfectly matches the physical object.

<figure><img src="/files/tgutUXAVzlzoS7xKHSIL" alt=""><figcaption></figcaption></figure>

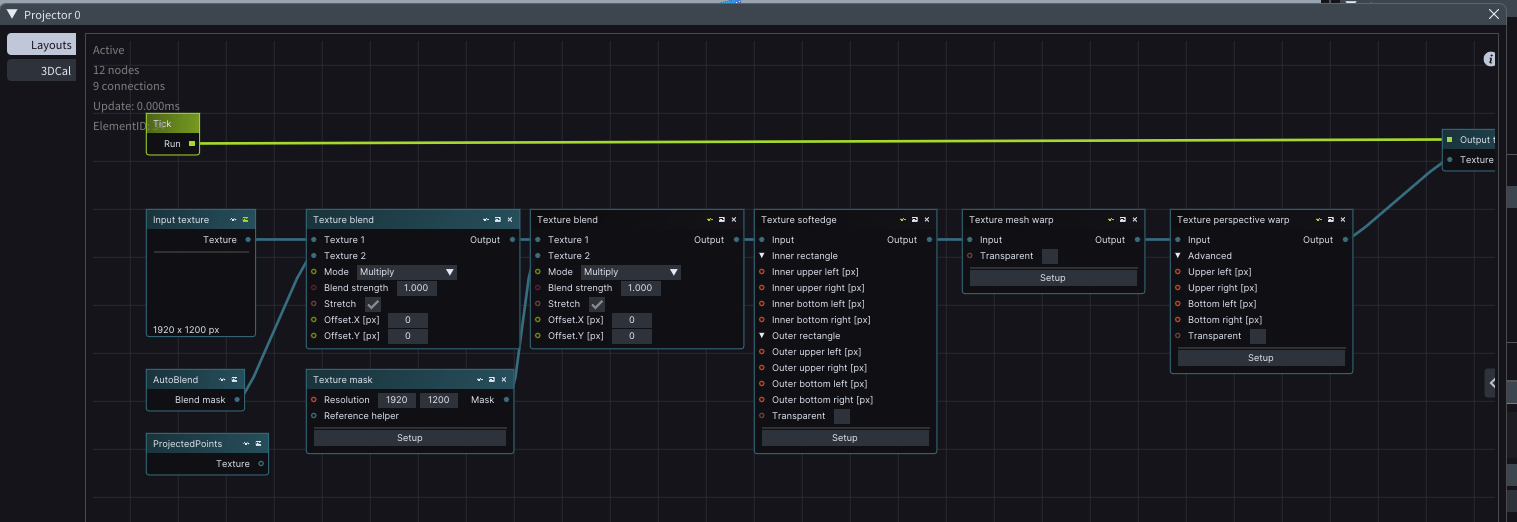
A lot of these functionalities are accessible by double clicking on a projector and opening its *Layout* tab.

## Quick Cal

The equivalent to Disguise's Quick Cal projector calibration, would be the [3D Cal Projector Calibration](/projection-mapping/3d-projection-mapping-workflow/3dcal) in LightAct. This feature can be found in the Setup window of any Projector, under the 3D Cal tab.

## OmniCal

Iris in LightAct offers similar functionality to OmniCal in Disguise.


# LightAct for Pixera Operators

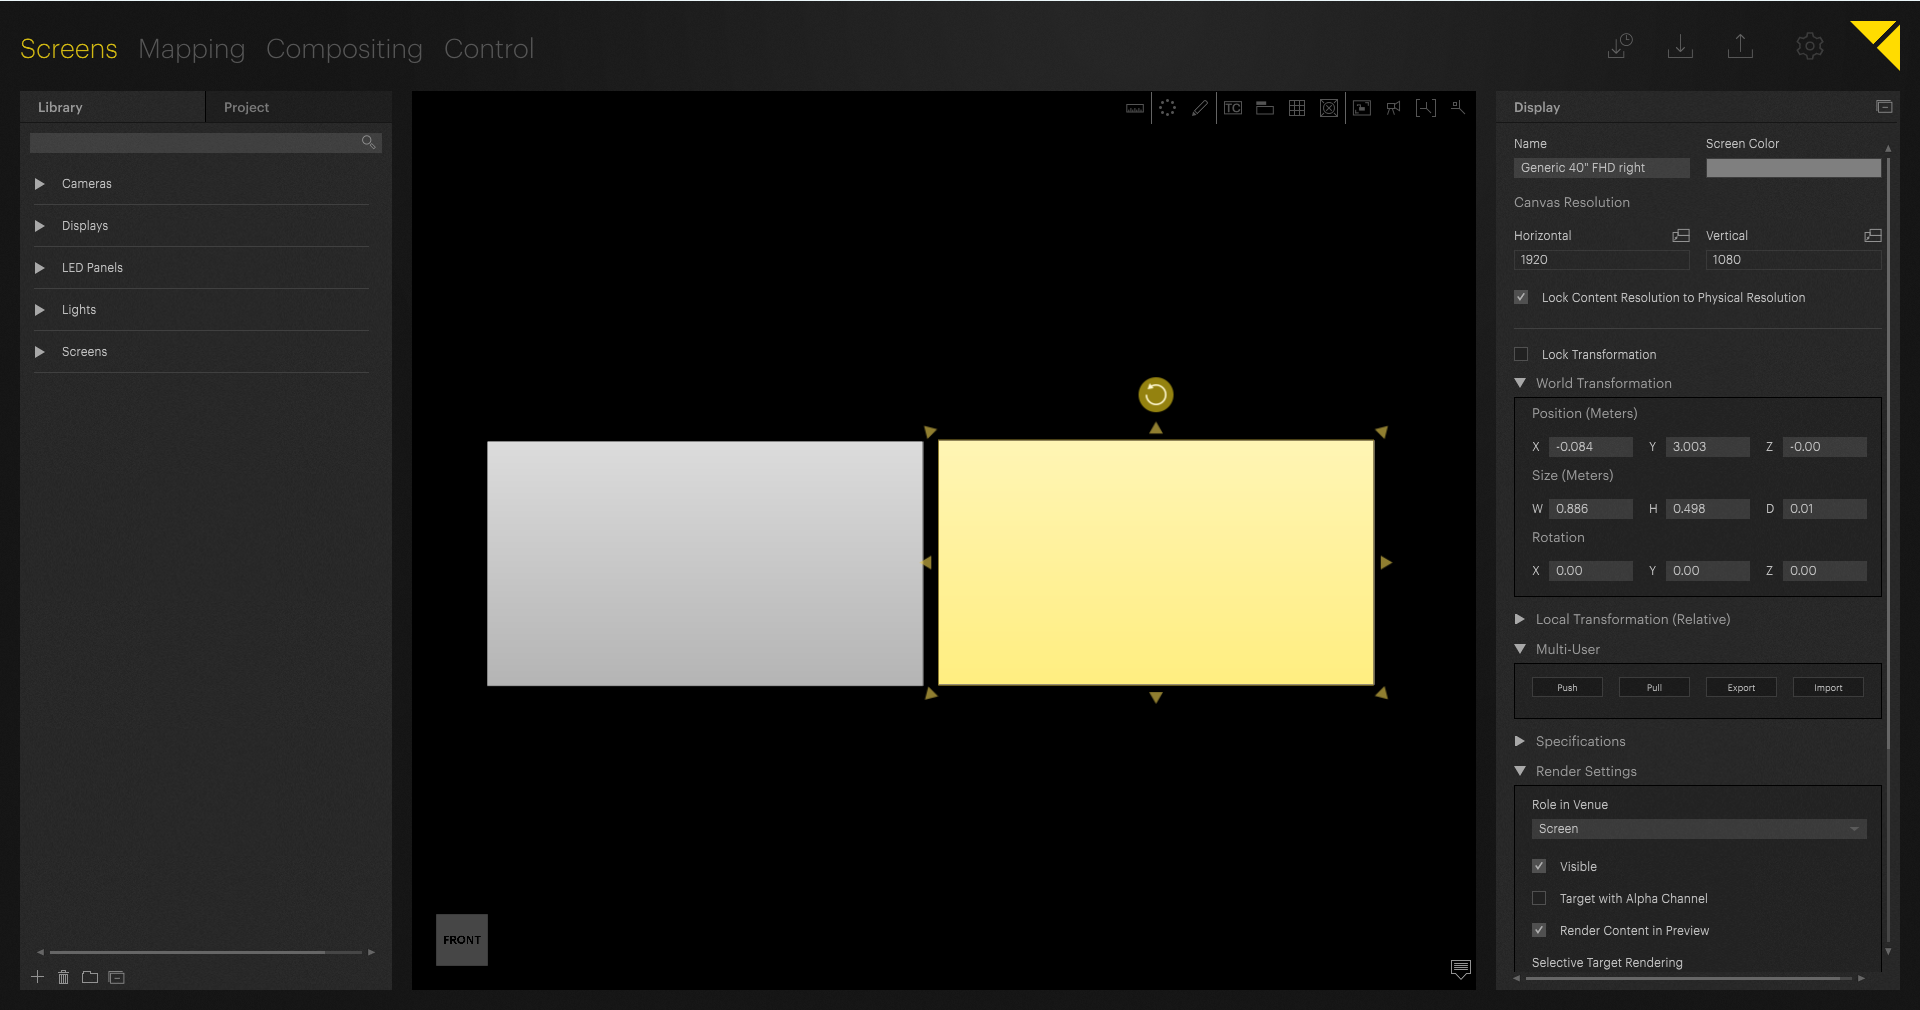
Pixera consists of 4 main tabs: Screens, Mapping, Compositing and Control.

<figure><img src="/files/K8avbIeklOalukehfzr8" alt=""><figcaption></figcaption></figure>

Below we list these tabs and their corresponding LightAct window with similar functionalities.

<table><thead><tr><th width="228.33333333333331">Pixera tab</th><th>LightAct window</th></tr></thead><tbody><tr><td>Screens</td><td>Viewport</td></tr><tr><td>Mapping</td><td>Viewport, Output Maps, Canvas Maps</td></tr><tr><td>Compositing</td><td>Timelines Window, Timeline Editor</td></tr><tr><td>Control</td><td>Layer Layouts, WebUI, Devices</td></tr></tbody></table>

## Screens tab

In *Screens* tab in Pixera, you set out the virtual screens. These functionalities can be found in LightAct's *Viewport*.

## Mapping tab

The main purpose of *Mapping* tab in Pixera seems to be to place the projectors and assign video outputs. These functionalities can be found in LightAct's *Viewport, Canvas Maps* and *Output Maps* windows.

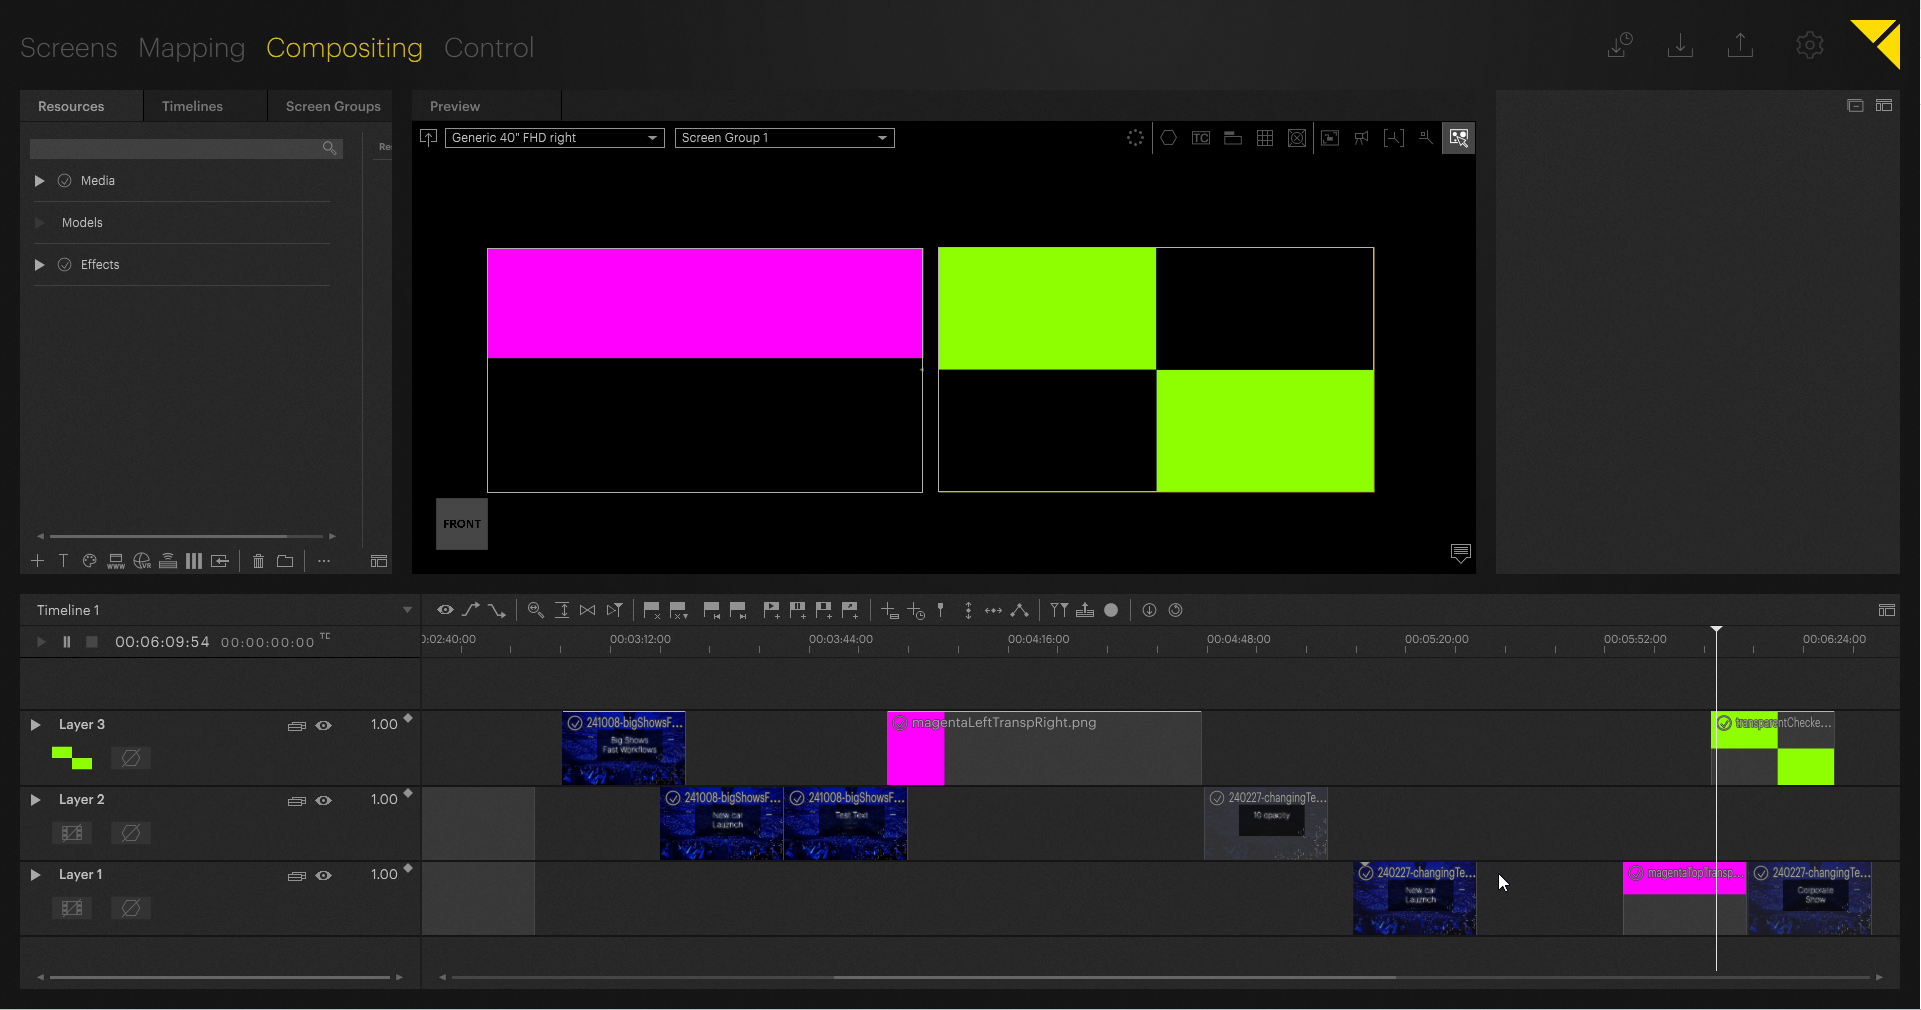
## Compositing tab

The purpose of *Compositing* tab in Pixera is to sequence the content. These functionalities are available in LightAct's *Timelines* and *Timeline Editor* windows.

## Control tab

The purpose of *Control* tab in Pixera is to give the users additional control over their show, especially when it comes to reacting to external inputs and the like.

All of these functionalities can be created with LightAct's *Layer Layouts* and *WebUI*.


# Video, images and image sequences

Whenever you import video, individual image files or an image sequence, they are treated as a **Video asset**. This means the usage of these 3 types of video assets is more or less the same inside the software with minor differences.

## Video files

By video files we mean actual video files, not individual images or image sequences.

### **Supported Formats (Containers)**

Video file container contains data (video and audio). The data is encoded with one of the codecs in the next header, but the container doesn't necessarily determine which codec the data is encoded with. For example, .mov containers can contain videos encoded with H.264, NotchLC, or HAP codecs.

LightAct supports .**mp4** and .**mov** formats.

### **Supported Codecs**

Codec is a portmanteau of coder/decoder and describes the algorithm used to encode and decode video data (video and audio). LightAct, as a media server, can only decode the data, not encode it.

We categorize codecs in 2 groups: ones that are decoded on the CPU and the ones decoded on the GPU. The GPU group of codecs have usually a much better performance (measured as the maximum resolution at a given framerate) at the expense of much larger file sizes.

| CPU   | GPU             |
| ----- | --------------- |
| H.264 | NotchLC         |
|       | HAP, HAPa, HAPQ |

{% hint style="info" %}
**Good to know**: For best performance in terms of how many concurrent video files LightAct can play at the same time, we usually recommend HAP codec.
{% endhint %}

{% hint style="info" %}
**Good to know:** You may be able to play codecs not listed in the table if they’re exported in formats that are supported by LightAct. However, as these codecs aren’t fully supported, playback performance may be limited.
{% endhint %}

{% hint style="warning" %}
Please note, as LightAct focuses on the playback of high resolution content, we provide performance benchmarks only for HAP and NotchLC codecs. We are not focusing on performance optimisation of ProRes, H.264 or any other codecs and cannot provide any performance benchmarks.
{% endhint %}

## Images

LightAct supports .png, .jpg, .tga and .tiff image formats.

{% hint style="info" %}
**Good to know**: For best performance, we usually recommend .png or .tiff formats.
{% endhint %}

If LightAct detects a single image file, it will treat it as a video file with one frame.

### Image sequences

Playing image sequences is the same as playing video files, however the files need to be labeled in a specific wa&#x79;**:**

* The file extensions should be the same. You cannot mix frames encoded as a *png* or *jpg*, for example.
* The filenames (without the extension) should have the same name with an incrementing number at the end.

An example of a image sequence files properly named would be: *Frames0000.tif, Frames0001.tif, Frames0002.tif, Frames0003.tif, Frames0004.tif.*

{% hint style="warning" %}
Please note, that the incrementing numbers at the end should start with 0 and not with, for example, 10000.
{% endhint %}

{% hint style="info" %}
**Good to know**: If you want to use versioning, then the files should be labeled *000\_Counter000\_v1.tif*, *000\_Counter001\_v1.tif*, *000\_Counter003\_v1.tif.*..
{% endhint %}

<figure><img src="/files/x8FA3Q0lf65YGdEckZ8z" alt=""><figcaption></figcaption></figure>

When LightAct detects an image sequence, it will place an image sequence icon next to it and in its properties allow you to choose the framerate with which you want to play this image sequence.

## Video playback

To learn how to play video assets, please refer to Video playback section:

{% content-ref url="/pages/xL2cJfmEPyMuTlYzU5Xp" %}
[Video Playback](/video-playback/playing-video-files)
{% endcontent-ref %}


# Notch and TouchDesigner

## Notch blocks

LightAct supports playback of Notch blocks with .dfxdll file extension. LightAct supports both Notch 0.9xxx and 1.0 and above.

{% hint style="info" %}
**Good to know:** Please refer to [Notch page ](/real-time-content-playback/notch-1)for more information on playing Notch blocks in LightAct.
{% endhint %}

## TouchDesigner components

LightAct supports the playback of .tox TouchDesigner components.

{% hint style="info" %}
**Good to know:** Please refer to [TouchDesigner page](/real-time-content-playback/touchdesigner) for more information on playing TouchDesigner components in LightAct.
{% endhint %}


# Audio files

LightAct supports .mp3 and .wav Audio asset types.

{% hint style="warning" %}
Please note, LightAct supports stereo channels only at the moment.
{% endhint %}


# 3D models

LightAct supports **.fbx** and **.obj** 3D formats and to an extent .dae.

{% hint style="info" %}
**Good to know:** FBX is the preferred format and the one that has the best support.
{% endhint %}

If you want to apply content on a 3D model, you need to properly UV map it and make sure that the normals are facing the correct way.

{% content-ref url="/pages/AVPOojBw13MUZT8vZQFC" %}
[UV Mapping of 3D Models](/assets/3d-model/uv-mapping-of-3d-models)
{% endcontent-ref %}

## Render mode

<div align="left"><figure><img src="/files/UR6DDJ9JLrUOBTyhzh41" alt=""><figcaption></figcaption></figure></div>

By default LightAct uses **Shaded Render mode**, as it is the most appropriate for general visualisation in the Viewport.

<div align="left"><figure><img src="/files/fPMcm0ag3JeJmw6ZZ782" alt=""><figcaption></figcaption></figure></div>

{% hint style="warning" %}
If the 3D model is a Source for a projector, always use **Unshaded** render mode. Otherwise the content won't look as intended.
{% endhint %}


# UV Mapping of 3D Models

UV unwrapping of 3D models can have significant impact on behaviour, possibilities and performance of your LightAct projects.

## Optimizing UV Map

A general goal should be to use as much of the UV map as possible. Doing otherwise will have detrimental effect on VRAM usage.

The examples below show the correct and incorrect usage:

![UV map above has a large area that is not used (the bottom of the map)](/files/YnXXhzWb5H2gdHOzl6DH)

![The entire UV map is used](/files/mQDQJNDv3DRv6qxiOJwT)

## Overlapping Areas

In most cases, you will want to achieve no overlapping areas of the UV map. In blender this can usually be achieved by **Smart UV Project** function.

Exceptions may include surface which will always use the same content, such as wheels of a car.

![](/files/yzgsAwkAtyUvuJDMMoxL)

## Checking Everything

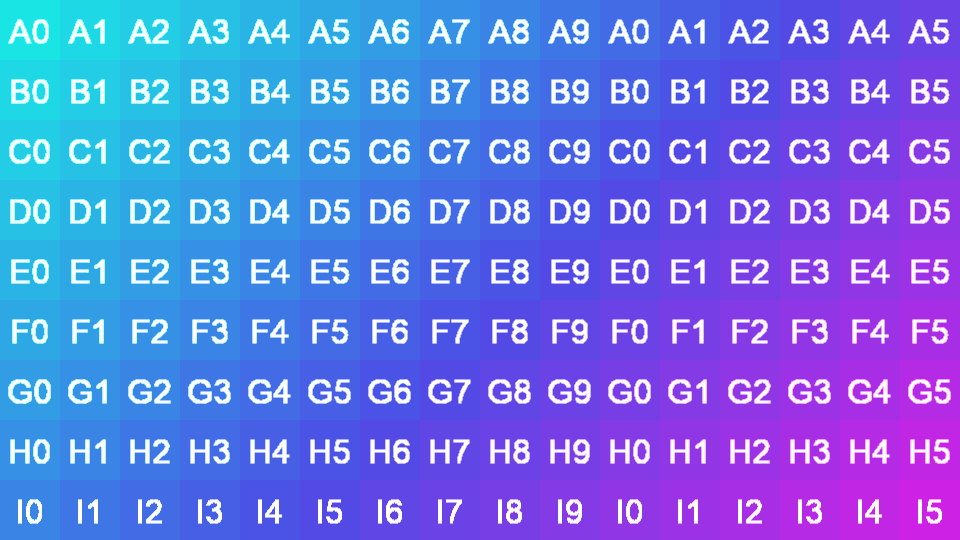
It is a good practice to check if your UV map is correct inside Blender by applying a grid to your 3D model.

![](/files/83stjZtztWdMCHecUBmy)

{% hint style="info" %}
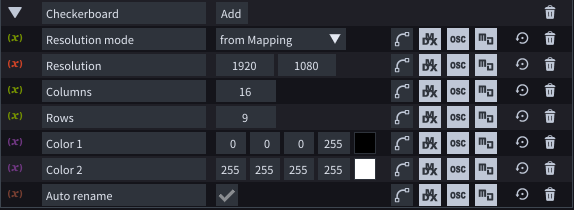
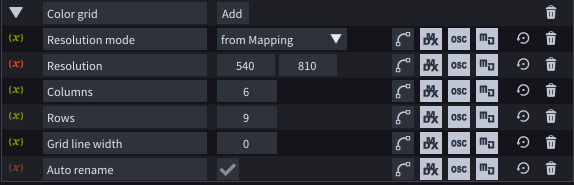
**Good to know:** you can export the image above by using a **Color Grid** node and right-clicking on its output pin
{% endhint %}

![Color grid texture applied to a 3D model in Blender](/files/xYkDfYn6RnKCvUCuGU9v)


# Asset ingestion management

<div align="left"><figure><img src="/files/DD07o5peMekrvqhqrAxe" alt=""><figcaption></figcaption></figure></div>

In the properties menu of the Assets window you have a couple of options that are useful.

## FileWatcher

FileWatcher is a LightAct feature that monitors the asset repository. If enabled, the moment you copy an asset into the repository, it will be ingested into LightAct.

{% hint style="info" %}
**Good to know**: if you want to have manual control over when to ingest assets you will want to disable that.
{% endhint %}

## Get data

Get Data function reads the Asset and makes it ready to play.

{% hint style="warning" %}
LightAct needs to Get the Data of an Asset before it can play it.
{% endhint %}


# Asset versioning

LightAct supports Asset versioning for all asset types. To enable versioning, add *\_versionName* to the end of the Asset's filename.

<figure><img src="/files/EiGdf8ASa466HTiCUreJ" alt=""><figcaption></figcaption></figure>

Examples include:

* *\_v1, \_v2, \_v3*
* *\_YYMMDD (or any 6 numbers)*
* *\_YYMMDDa, \_YYMMDDb, \_YYMMDDc*

{% hint style="info" %}
**Good to know**: we recommend to choose one method of naming versions and then sticking to it. Because this way when you import a new version of an Asset, LightAct will automatically use it.
{% endhint %}


# Overview

All the show programming that relates to timelines, layers and content sequencing happes in ***Timelines*** and ***Timeline Editor*** windows.

<figure><img src="/files/9e69XCWrIQgY534Qgi9s" alt=""><figcaption></figcaption></figure>

In the **Timelines** window you can control and monitor Play state of all the Timelines and Timeline groups.

<figure><img src="/files/iAKFIXIy5m48RfcWjqqM" alt=""><figcaption></figcaption></figure>

In the **Timeline Editor** window, you can edit *Sections, Layers,* and *Markers* of a given *Timeline*.

## Hierarchy

Timelines and Timeline Groups in LightAct are organized in a hierarchical way.

* **Timeline Group** can contain one or several Timelines.
* **Timeline** can contain several layers, sections or markers. A Timeline can be only in one Timeline Group.
* **Sections, layers and markers** are elements within one Timeline.

## Play controls

<figure><img src="/files/9vKjdiVcOaICwLB7lv0d" alt=""><figcaption></figcaption></figure>

Every Timeline and Timeline group has its own set of play controls.

* **Play**: this play states means the playhead will continue advancing from left to right even over section borders.
* **Play and pause**: playhead will advance to the last frame of its section, then pause (hold).
* **Play and loop**: playhead will advance to the last frame of its section, then jump back to the first frame of that section.
* **Pause**: playhead doesn't advance, but the active layers are still executing.
* **Stop**: playhead doesn't advance. No layers are executing.
* **Jump to previous**: executes a jump to the previous section, marker or layer.
* **Jump to next**: executes a jump to the next section, marker or layer.

## Timeline group Mode

<div align="left"><figure><img src="/files/BLiRzsS8q6YhQg2292Vo" alt=""><figcaption></figcaption></figure></div>

Every Timeline group has a Mode property with 2 options:

1. **Only one**: this mode means that only one Timeline in this group can be in a Play state at the same time. If another Timeline switches to a Play state, all the other will switch to Pause.
2. **Multiple**: this mode means that the play states of Timelines in this group are completely independent.

{% hint style="info" %}
**Good to know**: Only one mode is particularly useful with Timeline cross-fades.
{% endhint %}

## Speed multiplier

<div align="left"><figure><img src="/files/U3kVxIsb3fQhjRGj4nWd" alt=""><figcaption></figcaption></figure></div>

In LightAct 4.12 we've introduced **Speed multiplier**. This affects the playback speed of the entire timeline.


# Project framerate

<figure><img src="/files/ZwZg2z1TM5Mj3ise7Zqm" alt=""><figcaption></figcaption></figure>

In LightAct all the Timelines have the same framerate. This framerate is set up in **Project settings** in the **General** tab.

When you set a specific Project framerate:

* **Timeline increments**: the vertical lines in the Timeline editor window will adjust so that each line shows one frame. You can see this if you zoom into a Timeline all the way.
* **Playhead progression**: when a Timeline is playing, the Playhead will proceed from frame to frame as per the Framerate setting. So if you have Project framerate set to 30, playhead will make 30 increments between each second.
* **Snapping**: snapping in the Timeline editor window is based on these vertical lines, which means when you create any timeline elements (layers, markers or sections) they will be created relative to the Project framerate you have set.

{% hint style="info" %}
**Good to know**: Project framerate is in most cases set to the framerate of the content or multiple of 2. So if your content is 25FPS, project framerate should be set to either 25 or 50.
{% endhint %}

## Changing Project framerate

If you change Project framerate during the project (after you've programmed your Timelines), nothing in your Timeline should change. However, the moment you start moving timeline elements around, say, moving a layer left and right, the snapping will work relative to the new framerate, so you might not be able to move the layer back to its original position.

## Application framerate ≠ Project framerate

<div align="left"><figure><img src="/files/t6QRyqADly2xxhuro1fX" alt=""><figcaption></figcaption></figure></div>

Application framerate is the framerate at which LightAct is currently running at. This framerate is determined by one of the following:

1. the **refresh rate of your displays**.
2. If **performance load** is too heavy and LightAct cannot follow the refresh rate of your displays, then the Application framerate is going to be determined by the performance load.

## Force Project framerate

When LightAct doesn't have any outputs enabled yet, the user interface is, by default, synced to the refresh rate of the UI display.

<div align="left"><figure><img src="/files/jRpsjkSsNe8FAKF679Ax" alt=""><figcaption></figcaption></figure></div>

This means that if **Force Project framerate** is set to **false** and the refresh rate of your UI display is 60, LightAct's Application framerate is going to be 60.

If you enable **Force Project framerate** and you don't have any outputs enabled, then LightAct's Application framerate will always be equal to Project framerate.


# Sections & Markers

Sections and markers are timeline elements which allow you to organize your Timeline, introduce Cue triggers and introduce automatic actions.

* **Section**: used to split a timeline into separate parts. Very often used as Cues.
* **Marker**: used to demarcate a specific point in the timeline. Often used to trigger automatic actions.

## Sections

<figure><img src="/files/IetZODwWkdPAA488EC2F" alt=""><figcaption></figcaption></figure>

Sections are used to split a timeline into separate parts.

<figure><img src="/files/iiDesBZP1uElfoXa4Myy" alt=""><figcaption><p>Cue list window and Cue-related properties of a Section</p></figcaption></figure>

Another purpose of sections is that they are very used as Cues and triggered either manually or with external signals, such as DMX or OSC.

Sections can also be synced to external timecode.

## Markers

<div align="left"><figure><img src="/files/eSwG5xsTXXXzPaoQgbqF" alt=""><figcaption></figcaption></figure></div>

Markers are used to demarcate a specific point in a timeline.

<div align="left"><figure><img src="/files/WfAkPAwxDjtfeYSzDmng" alt=""><figcaption></figcaption></figure></div>

They can also trigger a specific Play state

<div align="left"><figure><img src="/files/pdY9eGOZQ7NJSmPrmAJx" alt=""><figcaption></figcaption></figure></div>

Or trigger other actions (such as Timeline jumps).

<div align="left"><figure><img src="/files/dxitWiGh682kcsgeiYGo" alt=""><figcaption></figcaption></figure></div>

Similarly to a section, they can also be used as a cue.


# Cue List

You can access the *Cue List* window by going to **Window** and choosing **Cue List**.

In the *Cue List* window, you can see a list of all *Cues* included in the entire project and you can easily trigger predetermined *Cue* actions during a live event.

<figure><img src="/files/HWDwi6tbf7RmuAi79ehQ" alt=""><figcaption></figcaption></figure>

* In the **Trigger** column, each *Cue* displays an icon that matches the ***Play state change*** property of a given cue. Clicking on the **Trigger** icon will prompt the Playhead to jump to that *Cue* and execute the *On playhead pass* action.
* In the **Position** column, each *Cue* displays its position in the *Timeline*, as well as its position in the *Timeline* relative to the *Playhead*.
* **Play state change** column determines whether the play state of this Timeline should change when that cue is triggered.

{% hint style="info" %}
**Good to know:** If the **Cue** is placed beyond the timeline duration in the *Timeline*, its position in the *Cue list* window will have a yellow warning color. You need to disable *Auto duration* in the Timeline's properties for that.
{% endhint %}

## Use as Cue checkbox for Sections and Markers

<div align="left"><figure><img src="/files/mpa50CqvJyp1pAmkJijS" alt=""><figcaption></figcaption></figure></div>

Sections and Markers appear in the Cue list window only of their Use as cue checkbox is set to true.

## Global Cues

*Global Cues* allow you to trigger actions that are not tied to a specific position on the *Timeline*. This is useful in situations like fading out when a performer leaves the stage, ensuring flexibility and responsiveness during live events.

### Event Global Variable

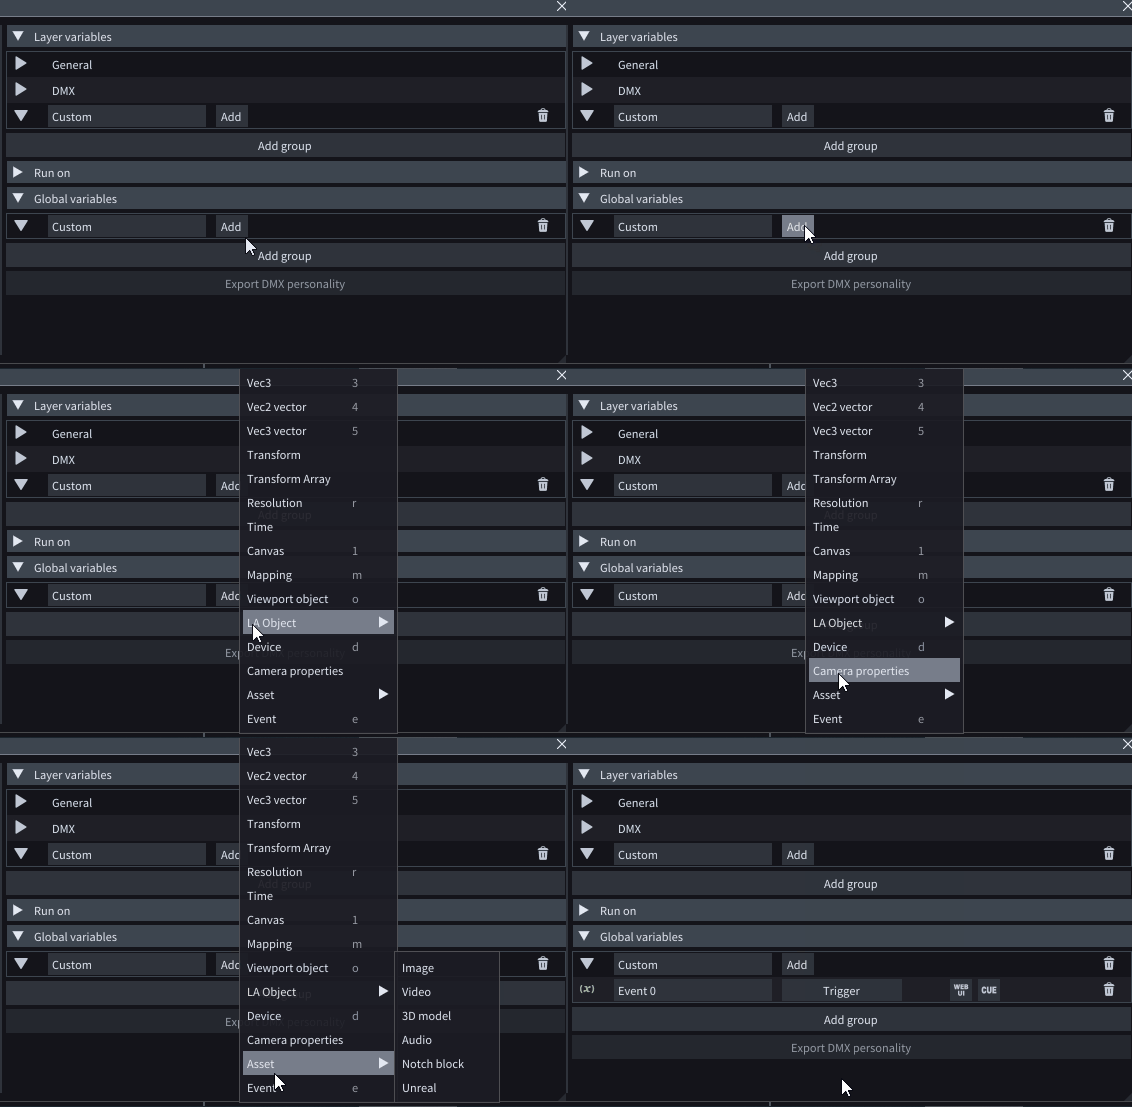
To add a **Global cue**, you first need to add a *global variable* of type **Event**.

<figure><img src="/files/qIvM2klvU2LlJKxyxZNT" alt=""><figcaption></figcaption></figure>

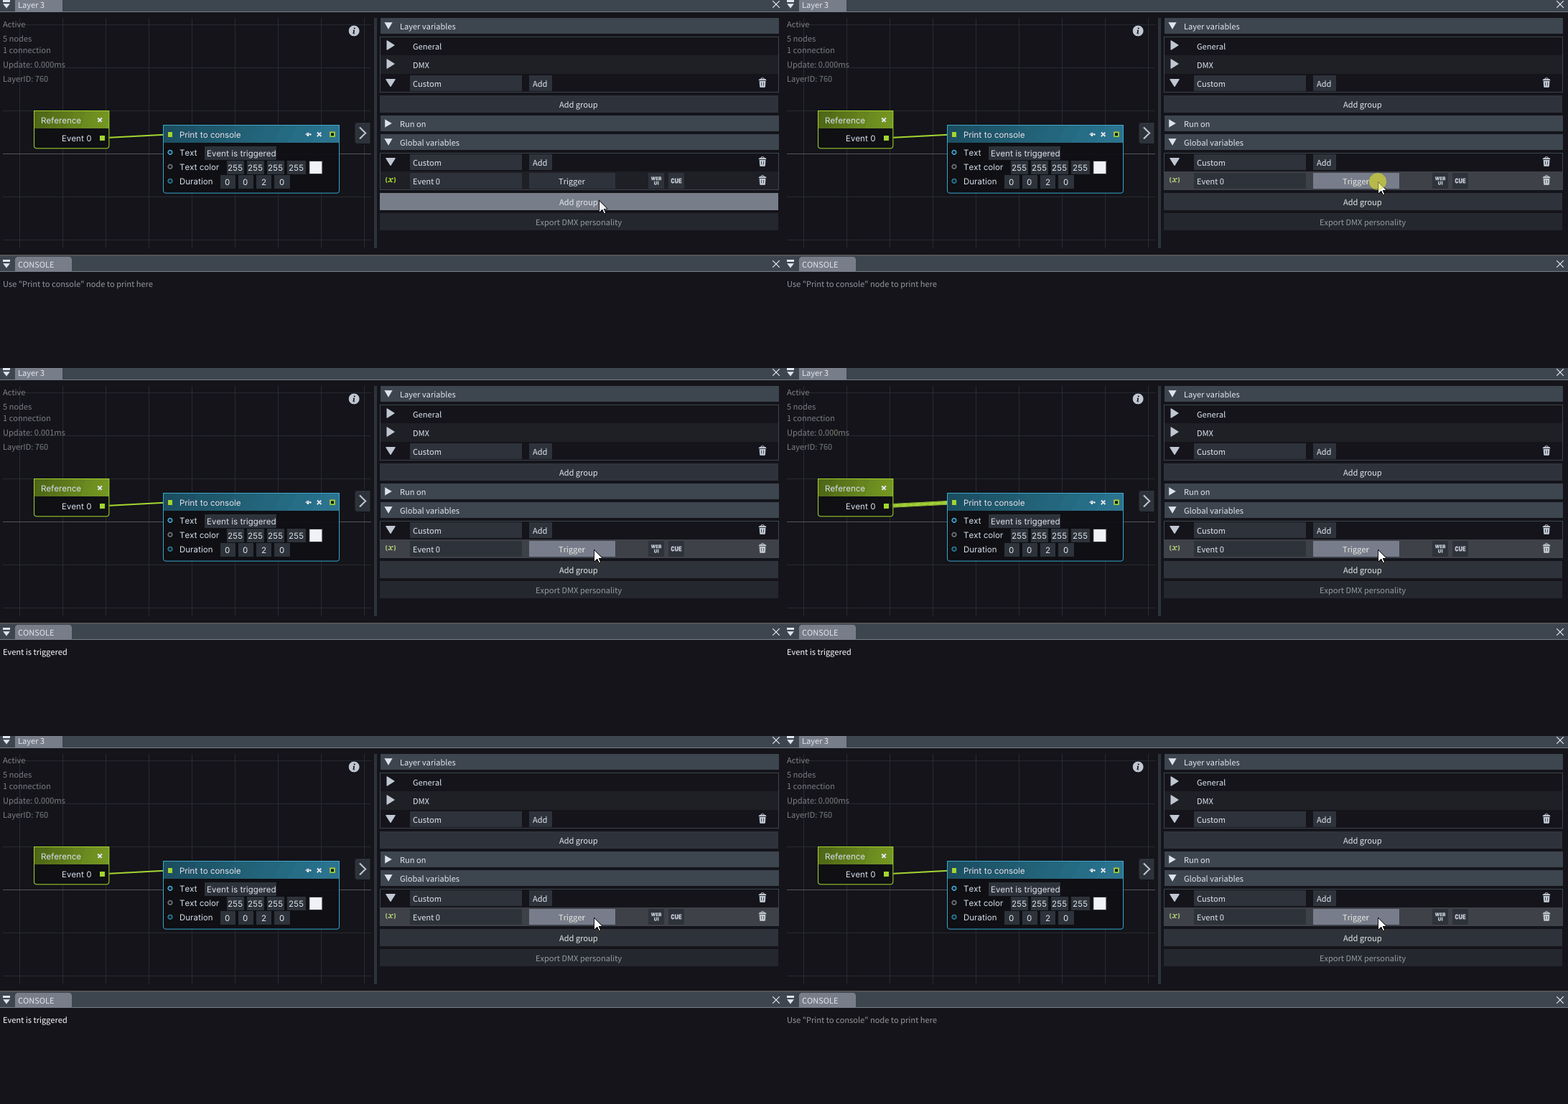
Using the *Layer Layouts*, you can program the desired action you want to occur upon a trigge&#x72;*.* You can do this by creating a *Getter node* from the *Event* variable which triggers a lifeline output anytime the **Event** variable is triggered.

{% hint style="info" %}
**Good to know:** You can learn more about *Getter nodes* in the [Variable Management](/layers-and-layouts/layer-layouts/variables/variable-management) chapter.
{% endhint %}

<figure><img src="/files/gDRs6xP49EuTsKpaNSqF" alt=""><figcaption></figcaption></figure>

{% hint style="info" %}
**Good to know:** The [*Set fade*](/layers-and-layouts/stock-layer-templates/control-layer-templates/set-fade) layer template changes the fade of a video output, section, or layer when the corresponding **Event** variable is triggered.
{% endhint %}

### Global Cue

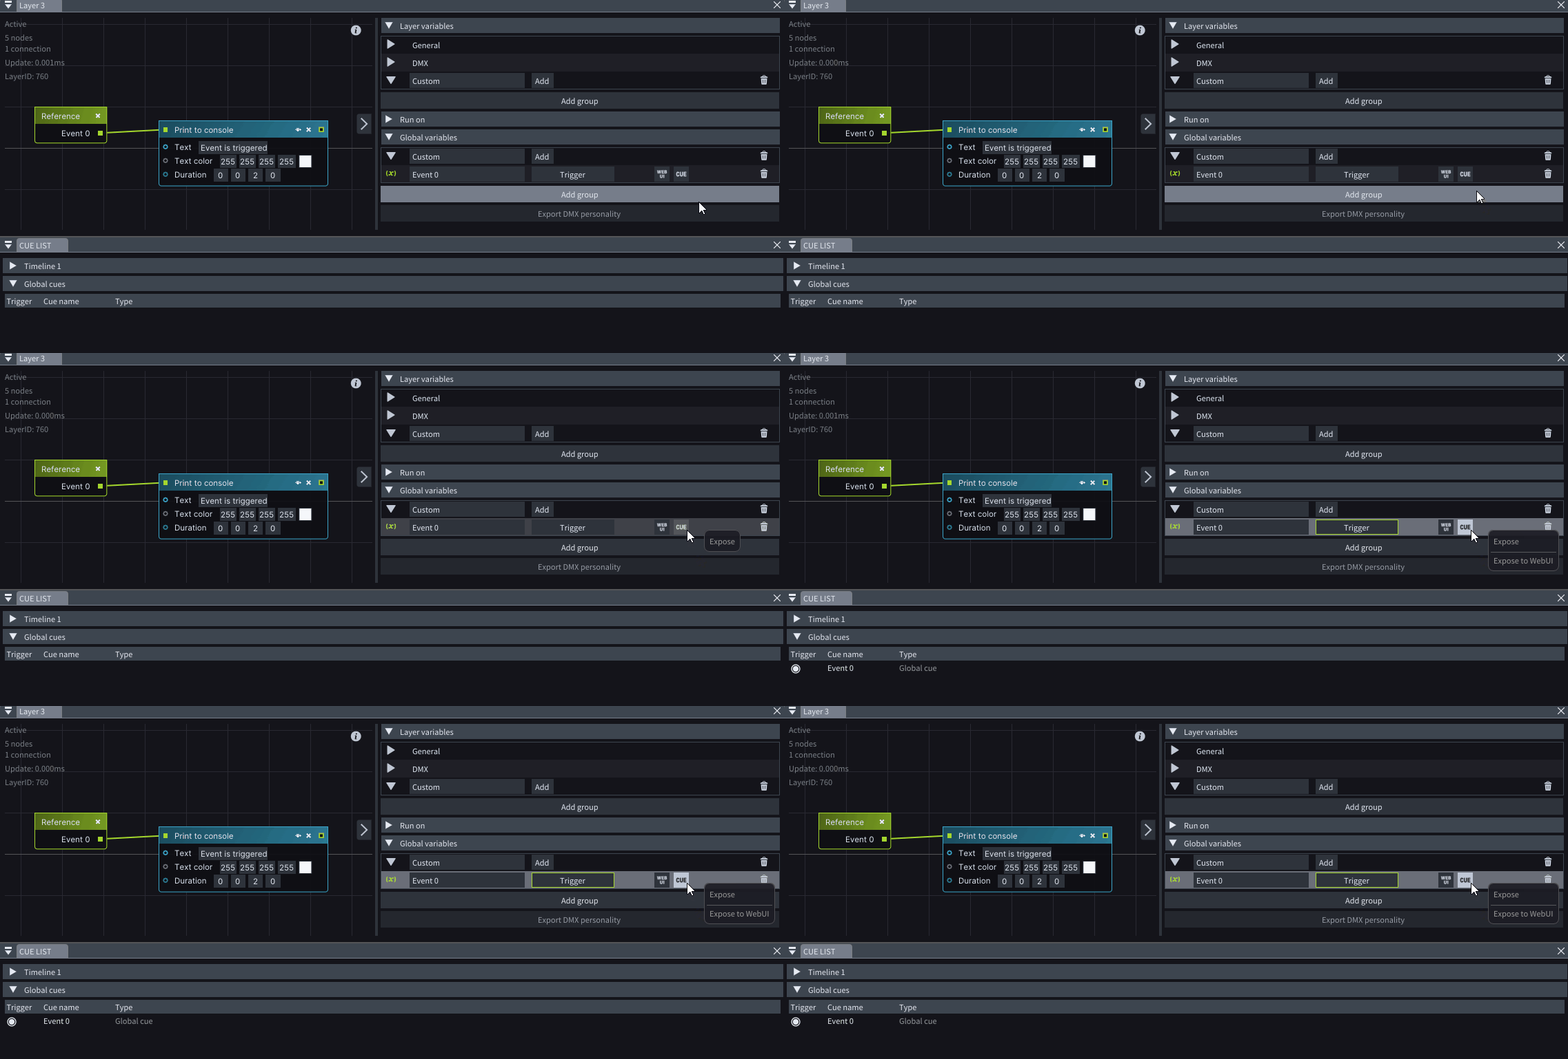
To be able to see an **Event** variable as a *Global Cue* in the *Cue list* window, click on the ![](/files/GbMIv1UmFhr93rkbWePc) control icon to enable it.

<figure><img src="/files/IiYZTZ7y7GHe0KaEzCfn" alt=""><figcaption></figcaption></figure>

From this point forward, clicking the **Trigger** button of the *Global cue* in the Cue List window will trigger the *Event*, regardless of where the *Playhead* is in the *Timeline*, as long as the *Layer* where the logic is programmed is active at the time of clicking.


# Syncing to a timecode

To sync LightAct to an external timecode the process is as follows:

1. **Receive external TC**: LightAct can receive LTC through Audio input nodes, MTC through MIDI Receiver nodes (both in the Devices window) and Art-Net timecode through DMX In window. This is described in the relevant chapters.
2. **Sync Timeline group to incoming TC.**
3. **Sync a Timeline to its Timeline group.**

## Receive external timecode

Refer to [**Audio Input**](/integrations/audio), [**MIDI Receiver**](/osc-and-midi/midi) or [**Receiving DMX** ](/dmx/dmx-in)user docs to learn how to do that.

## Sync Timeline group to incoming timecode

<div align="left"><figure><img src="/files/eXY3IfW5k4aJwAhhU9B4" alt=""><figcaption></figcaption></figure></div>

Once you are receiving your MTC, LTC or Art-Net timecode, the next step is to select the **Timeline group** you'd like to sync to it.

<div align="left"><figure><img src="/files/r0gy3E6TxfVmwNVwMCv7" alt=""><figcaption></figcaption></figure></div>

In the **Source** dropdown select the TC Source you'd like to sync to.

<figure><img src="/files/VaXmdk3mRcNUaYHKeH26" alt=""><figcaption></figcaption></figure>

In the Timelines window, you'll be able to see the incoming TC + *Timecode offset*.

### Engaged/Disengaged mode and sync status

<div align="left"><figure><img src="/files/kN0E0P0MQGmY6kqDapNz" alt=""><figcaption></figcaption></figure></div>

If a Timeline group is **Engaged**, it means it will be locked to the incoming TC if a valid one is arriving. In this case, to the right of the Engaged/Disengaged button, you'll be able to see 3 statuses:

1. **No TC source**: this means you haven't selected a Sync source in the Properties of the Timeline group.
2. **No TC**: this means you have selected a TC source, but that TC source is not receiving and TC
3. **Chasing TC**: this means the selected TC source is receiving a valid TC

### Grace period

<div align="left"><figure><img src="/files/6hegz41I88MTkqyeFjXG" alt=""><figcaption></figcaption></figure></div>

If TC stops and you enable **Grace period** in the Properties of Timeline group, LightAct will for the set duration of time assume that TC will resume.

{% hint style="info" %}
**Good to know**: A grace period could be useful to cover intermittent, unintentional breaks in incoming TC.
{% endhint %}

{% hint style="info" %}
**Good to know**: if your TC source is LTC, LightAct includes a bit-flip prevention feature. This means that if, due to audio noise, the incoming LTC suddenly jumps, LightAct will ignore it unless subsequent LTC frames confirm that the jump is intentional.
{% endhint %}

## Sync Timeline to its Timeline group

The steps you will want to follow is to:

1. Determine in which **Sections** you want the Timeline to be synced to incoming TC.
2. Determine their **Start TC** marks
3. Enable **Engaged** status

### Sync sections

<div align="left"><figure><img src="/files/vp34D0Lw0sqIl0Yyi7WN" alt=""><figcaption></figcaption></figure></div>

In the Sync sections part of the Properties of a Timeline, you determine in which Sections you'd like this Timeline to be synced to the incoming TC. You can choose:

1. **Sync in all sections**: all sections will be chasing TC if it falls within them
2. **Sync in selected sections**: only the selected sections will be chasing TC if it falls within them.
3. **Sync in unselected sections**: only the unselected sections will be chasing TC if it falls within them.

#### Section TC marks

Every synced section has a property called **Start TC**. This property determines at what TC will this section start chasing TC.

{% hint style="info" %}
**Good to know**: enable **Show start TC labels** checkbox to see how Start TC times are set up.
{% endhint %}

There are 2 types of determining the **Start TC** of every section:

1. **Automatic**: Start TC is the same as that section's position in the timeline. For example, if section starts at 00:01:50:23 of the timeline, its Start TC is also going to be 00:01:50:23
2. **Custom**: if you choose this type, then you can set up a custom Start TC time.

{% hint style="info" %}
**Good to know**: if a section with an Automatic type is positioned AFTER a section with Custom type, its Start TC time will be calculated based on the time difference between the start of the section with the Custom type and its own.
{% endhint %}

{% hint style="info" %}
**Good to know**: if a section has a Custom **Start TC** time and it's selected you can nudge the Start TC time by one frame with Ctrl & + and Ctrl & - shortcuts.
{% endhint %}

### Engaged/Disengaged mode and sync status

<div align="left"><figure><img src="/files/VvFaTl6JDqpHlJ5BIzcM" alt=""><figcaption></figcaption></figure></div>

To sync a Timeline to its Timeline group, simply switch its sync mode to Engaged. In this case, there are several different statuses that a Timeline can be in:

1. **Group not chasing TC**: this status means that the parent Timeline group is not chasing any TC, so the Timeline also isn't.
2. **Chasing TC**: this means that the Timeline is chasing incoming TC.
3. **Outside synced sections**: this means that the incoming TC does not fall within any synced section.
4. **Ignoring TC**: this means that the incoming TC falls within a synced section, but there was a manual trigger that caused the timeline to temporarily ignore the TC. Manual trigger means manual pressing of one of the play state buttons (play, pause etc.) a cue trigger or something else. If the incoming TC jumps and is still within a synced section the Timeline will start chasing the TC again.


# Overview

An overview of Layers, Layer Layouts and Variables

## Layers

A Layer in LightAct is a very flexible concept. It can do many different things so playing video or audio is just one of them.

<figure><img src="/files/uyQvE0IYtMfcJ3z4pnmB" alt=""><figcaption></figcaption></figure>

## Layer Layouts

Every Layer in LightAct is composed with nodes. These nodes graphs are created in Layer Layouts - LightAct's visual scripting system.

{% hint style="info" %}
**Good to know**: Layer Layouts is LightAct's node-based visual scripting system.
{% endhint %}

<figure><img src="/files/ZHxMK7NUqcOEDWncMr5b" alt=""><figcaption></figcaption></figure>

The main building block in any layer layout is a **node**. With various nodes, you can build complex behavior and even conditional action flows.

{% hint style="info" %}
**Good to know:** we've created dozens of [**Stock Layer Templates** ](/layers-and-layouts/stock-layer-templates)for you that fulfill all the most common functionalities you'll need in a typical project. In most cases, you won't have to modify any of the nodes.
{% endhint %}

You can read more about Layer Layouts here:

{% content-ref url="/pages/Qi9QRnYVOsimB9NELNlK" %}
[Layer Layouts](/layers-and-layouts/layer-layouts)
{% endcontent-ref %}

### Variables

A variable is a placeholder that represents some kind of value.

In LightAct there are a lot of different variable types that are capable of storing different kinds of information, such as integer, float, and boolean.

<figure><img src="/files/gu5wtZNA3qgSrWiwTNri" alt=""><figcaption></figcaption></figure>

You can read more about the variables here:

{% content-ref url="/pages/79CinBUgz7MRdQQr9I6F" %}
[Variables](/layers-and-layouts/layer-layouts/variables)
{% endcontent-ref %}

## Layer Templates

When you create a layer from scratch, you can save it as a template and use it for future use. This collection of nodes and variables we call Layer Templates.

There are 2 kinds of them:

1. **Stock Layer Templates**: these are templates that we provide with every installation of LightAct. Among them there are some typical ones like Video or Audio and some very unique ones. Explore them in [Stock Layer Template pages](/layers-and-layouts/stock-layer-templates).
2. **User Layer Templates:** these are templates that users create themselves. Read more about them [here](/layers-and-layouts/user-layer-templates).

{% hint style="info" %}
**Good to know**: sometimes we refer to layer templates as simply templates or simply layers.
{% endhint %}


# Layers

In this page we will explain 2 main approaches on creating a layer and talk about layer properties.

## Creating a layer

In LightAct, you can create a layer in 2 different ways:

* **Blank layers**
* **Layer templates**.

As you will mostly be using Layer templates, we will focus on them first.

### Layer Templates

Layer Templates are divided into 2 groups:

1. **Stock layer templates**, which are provided with every release of LightAct. More information about them is available [here](/layers-and-layouts/stock-layer-templates).
2. **User layer templates**, which you can create on your own, as per the [instructions](/layers-and-layouts/user-layer-templates).

### Blank Layers

{% hint style="warning" %}
Please note, building layers from scratch is designed for specific use cases and for advanced users. Before building a layer from scratch, please make sure there isn't already a layer template that does what you need.
{% endhint %}

{% hint style="info" %}
**Good to know**: the best way to learn advanced node programming is to attend an [Advanced training session](https://lightact.com/lightact-training/).
{% endhint %}

## Layer properties

Every layer has some properties which determine its behavior.

### Layer variables

Explained on [this page](/layers-and-layouts/layer-layouts/variables/layer-variables).

### Layer properties

<div align="left"><figure><img src="/files/Re9WHS60aW8z7pItj0Ai" alt=""><figcaption></figcaption></figure></div>

Each layer has an identical set of Properties. Among them are:

1. **End (HMSF)**: the time of the end of the layer
2. **State**: state of the layer:
   1. *Enabled*: means the layer is enabled and will execute if the playhead is on it in an active timeline.
   2. *Disabled*: means the layer is disabled and will never execute.
   3. *Preview only*: means that the layer will execute but Render Texture nodes in them won't render to the mappings. This means that you can still preview the content of the layer in the thumbnail if you expand the track, but won't see the content rendered on the mapping (and therefore not on the outputs.
3. **Locked:** if checked, the layer is locked and cannot be edited.
4. **Fades**: explained in [Fade in and Fade ](/layers-and-layouts/fade-in-and-fade-out)out and [Cross-fade](/layers-and-layouts/cross-fade) pages.

### Layer Notes

You can add custom notes to every layer by first checking the **Notes** checkbox and then writing into the text box.

<div align="left"><img src="/files/cKGagVsgmdsqaR4Nlmar" alt=""></div>

When you write a note, a \* symbol will appear next to the Layer name. If you hover over a layer with a mouse, the note will show up.

<div align="left"><img src="/files/KNmJP95FG1RXY7iSui0y" alt=""></div>


# Stock Layer Templates

With every installation of LightAct, you'll get a new and updated library of Layer Templates. These templates are called *Stock Layer Templates*.

<div align="left"><figure><img src="/files/me66dcVln4ok63CcaEyZ" alt=""><figcaption></figcaption></figure></div>

They are divided into the following categories: **Content, Generative** and **Control**.

## Content and Generative Layer Templates

All layer templates in **Content** and **Generative** categories render a texture. The only exception is *Audio* layer template, which of course plays audio assets and doesn't render anything.

### Render variable group

If you click on any of these layers (apart from Audio) you will see that they have an identical group of Variables called **Render**.

<div align="left"><figure><img src="/files/kgYuw9MbSVTJXgnvutf6" alt=""><figcaption></figcaption></figure></div>

This group has the same variables in all Layer templates:

* **Blend mode**: determines the blend mode that's going to be used when rendering the texture onto a mapping. The options are the familiar ones such as Normal, Screen, Multiply etc.
* **Opacity**: determines the opacity with which texture when rendered onto the mapping.
* **Mapping:** determines the mapping, which the texture is going to be rendered on. More information about this is in the chapter [Content mapping](/content-mapping/content-mapping-overview).
* **Clip mode**: determines how the content is rendered onto the mapping. Options are:
  * *Pixel perfect*: renders the texture as it is without and stretching, scaling or cropping
  * *Fit*: scales the texture proportionally so that it fits the mapping. If aspect ratios are different, there will be empty areas in the mapping.
  * *Crop*: fills the mapping in its entirety. If aspect ratios are different, the texture is going to get cropped
  * *Stretch*: fills the entire mapping but if the aspect ratios of the texture and the mapping are different, there will be stretching
* **Angle**: rotates the texture by the specified angle in degrees.
* **Anchor at center**: if unchecked the texture is going to be rotated around the top left corner, if checked, it's going to be rotated around the center.
* **X:** moves the texture by X pixels horizontally
* **Y:** moves the texture by Y pixels vertically
* **Scale X**: scales the texture along horizontal axis
* **Scale Y**: scales the texture along vertical axis
* **Scale proportionally**: if checked, *Scale X* is going to be used for vertical (Y) axis as well.

***

Click on the links below to dive deeper into Layer Templates.

{% content-ref url="/pages/rewKuwPYyDVPdqTBnfbX" %}
[Content Layer Templates](/layers-and-layouts/stock-layer-templates/content-layer-templates)
{% endcontent-ref %}

{% content-ref url="/pages/xvp22h61HowrWnLWInv1" %}
[Generative Layer Templates](/layers-and-layouts/stock-layer-templates/generative-layer-templates)
{% endcontent-ref %}

## Control Layer Templates

Control Layer Templates do not render anything nor do they play any audio. Instead they are used for show control and data processing.

{% content-ref url="/pages/KJ8jZep9zjBfjRkCFinQ" %}
[Control Layer Templates](/layers-and-layouts/stock-layer-templates/control-layer-templates)
{% endcontent-ref %}


# Content Layer Templates

Created to render ingested content such as videos, Notch blocks, images, audio files or content arriving through live video inputs, NDI or other texture receiver nodes in the *Devices* window.

<div align="left"><figure><img src="/files/HZI5ijnFTavxWPgJ6tj8" alt=""><figcaption></figcaption></figure></div>

There are these layer templates in Content category:

* **Audio**: layer template for playing back audio assets
* **Content input**: layer template for receiving textures from *Device* nodes (for example, NDI or live video input)
* **Multi-layer**: layer template that can switch between Content input, Notch or Video sources
* **Notch**: layer template for 'playback' of Notch blocks
* [**Video**](/layers-and-layouts/stock-layer-templates/content-layer-templates/video-1): layer template for playing back video assets.

The variables of all of these templates, apart from *Audio* are very similar. They differ only in one Variable group which is focused on the asset itself. The other variable groups are the same and are described below.

## **Render**

Explained in [Stock Layer Templates](/layers-and-layouts/stock-layer-templates).

## **Resize**

<div align="left"><figure><img src="/files/Vb49TV7KiGL10TIV5cxq" alt=""><figcaption></figcaption></figure></div>

* **Resize:** if checked the texture is going to get resized.
* **New resolution:** if Resize checkbox is checked, the texture is going to get resized to the New resolution.

## **Flip**

<div align="left"><figure><img src="/files/MvWzdFGpz4zbLWYNqMBS" alt=""><figcaption></figcaption></figure></div>

* **Flip horizontal**: if checked, the texture is going to get flipped horizontally.
* **Flip vertical**: if checked, the texture is going to get flipped vertically.

## **Color adjustment**

<div align="left"><figure><img src="/files/rPDCTwLgTyqyfHb2mrGn" alt=""><figcaption></figcaption></figure></div>

* **Vibrance:** adjusts the vibrance of the texture.
* **Hue:** adjusts the hue of the texture.
* **Contrast:** adjusts the contrast of the texture.
* **Brightness:** adjusts the brightness of the texture.
* **Saturation:** adjusts the saturation of the texture.

## **Channel multiply**

<div align="left"><figure><img src="/files/XnMYVCiqWE3VFV4to08Y" alt=""><figcaption></figcaption></figure></div>

Multiplies individual channels (Red, Green, Blue, Alpha) of the texture by the chosen factor.

## **Channel invert**

<div align="left"><figure><img src="/files/AWQ0QHJnpjJS77fBZTak" alt=""><figcaption></figcaption></figure></div>

Inverts individual channels (Red, Green, Blue, Alpha) of the texture.

## **Blur**

<div align="left"><figure><img src="/files/h8XGVB3zNXfxQP3qNYMs" alt=""><figcaption></figcaption></figure></div>

Blurs the texture.

* **Blur strength:** strength of the blur algorithm.
* **Blur size:** size of the area where blur is applied.

## **Crop**

<div align="left"><figure><img src="/files/hna6VxQp8mHUeQLiHEHt" alt=""><figcaption></figcaption></figure></div>

Crops the texture. You can adjust crop levels for every corner separately in pixels.

## **Softedge**

<div align="left"><figure><img src="/files/pvhgYgRJPg79vAMl2ko9" alt=""><figcaption></figcaption></figure></div>

Adjusts the softedge of the texture. You can adjust softedge corners of all 4 corners. If you open the Layout and find the Softedge node, you can make finer modifications of the softedge.

## **Warp**

<div align="left"><figure><img src="/files/R4MCsDGRBbsWYuLBGHI4" alt=""><figcaption></figcaption></figure></div>

Adjusts the perspective warping of the texture. You can adjust 4 perspective warp points of the texture. If you open the Layout and find the Warp node, you'll be able to make finer adjustments of the warping if you desire so.


# Audio

Category: Content

**Audio** layer template was created to play various types of audio files.

## Variables

### **Audio**

<div align="left"><figure><img src="/files/NvBHho9kazpUyMivlqov" alt=""><figcaption></figcaption></figure></div>

* **Audio**: select the audio asset you want to play.
* **Output**: select Audio output device node through which you want to output audio
* **Volume:** adjusts the playback volume
* **Loop**: if checked the audio will loop when it reaches the end.
* **Pan:** for stereo channels, this pans audio from between the 2 channels.
* **Auto rename:** if checked the video layer is going to always take the name of the video asset that's currently playing.


# Content input

Category: Content

**Content input** layer template was created to render textures from various *Device* nodes.

## Variables

### **Render**

Explained in [Stock Layer Templates](/layers-and-layouts/stock-layer-templates).

### **Device**

<div align="left"><figure><img src="/files/8smndrtMWjuyttZJ9oMV" alt=""><figcaption></figcaption></figure></div>

Notch variable group is a dynamic one. Refer to [this page ](/layers-and-layouts/layer-layouts/variables/variable-groups)for more information.

* **Device**: select the Device this layer should source the texture from
* **Device texture**: contains the texture grabbed from the selected Device node. Used as a Source texture for Layer connections.
* **Auto rename:** select if you want the layer's name to display the state of the variables.

### Other variable groups

Explained in [Content Layer Templates](/layers-and-layouts/stock-layer-templates/content-layer-templates).


# Multi-layer

Category: Content

**Multi-layer** template was created so that the users could use one layer and switch between Video, Notch or Device sources.

## Variables

### **Render**

Explained in [Stock Layer Templates](/layers-and-layouts/stock-layer-templates).

### **Media**

<div align="left"><figure><img src="/files/jwLIPzCO4PGaWxeZN3W7" alt=""><figcaption></figcaption></figure></div>

* **Source**: select whether you want this layer to get its texture from Video asset, Notch asset or a Device node.
* **Device texture**: contains the texture grabbed from the selected Device node. Used as a Source texture for Layer connections.

### **Video**

Same variables as in [Video layer template](/layers-and-layouts/stock-layer-templates/content-layer-templates/video-1).

### **Notch**

Same variables as in [Notch layer template](/layers-and-layouts/stock-layer-templates/content-layer-templates/notch-layer-template).

### **Device**

Same variables as in [Content input layer template](/layers-and-layouts/stock-layer-templates/content-layer-templates/content-input-template).

### Other variable groups

Explained in [Content Layer Templates](/layers-and-layouts/stock-layer-templates/content-layer-templates).


# Notch

Category: Content

**Notch** layer template was created to play various types of video files.

{% hint style="info" %}
**Good to know**: there is more general information about Notch playback [here](/real-time-content-playback/notch-1).
{% endhint %}

## Variables

### **Render**

Explained in [Stock Layer Templates](/layers-and-layouts/stock-layer-templates).

### **Notch**

<div align="left"><figure><img src="/files/raYaDMTNi8xMKSJjNYjH" alt=""><figcaption></figcaption></figure></div>

Notch variable group is a dynamic one. Refer to [this page ](/layers-and-layouts/layer-layouts/variables/variable-groups)for more information.

* **Asset**: select the Notch asset you want to use.
* **Resolution**: adjusts the resolution Notch block is rendering.
* **Layer:** choose the Notch layer you want to play.
* **Render**: determines if Notch block is rendering every LightAct's frame or every second, every third and so on. Useful if your machine cannot maintain the required framerate.
* **Play mode:** this dropdown has 4 options:
  * *Normal*: in this playmode Notch asset will always follow the position of the playhead relative to the beginning of the Notch layer.
  * *Free run*: in this playmode, the playback will ignore position of the play head and play even when the timeline is in pause mode. If the playhead jumps out of the layer and back onto it again, the Notch will restart from the same position it was at when the playhead jumped out.
  * *Free run & restart*: same as *Free run*, but if you jump out of the layer and back onto it again, the Notch block will always restart from 0.
  * *Timecode*: in this playmode, LightAct will refer to the *Timecode device* as the source of the timecode the playback should follow. It allows you to control the playback of the Notch block with an external timecode source.
* **Timecode**: defines the source of the external timecode that should be used if *Play mode* is set to *Timecode*. This variable is ignored if *Play mode* is anything other than *Timecode*.

{% hint style="info" %}
**Good to know**: as this is a dynamic variable group, the variables will dynamically adapt according to the Exposed properties of the selected Notch block asset.
{% endhint %}

### Other variable groups

Explained in [Content Layer Templates](/layers-and-layouts/stock-layer-templates/content-layer-templates).


# Video

Category: Content

**Video** layer template was created to play various types of video files.

## Variables

### **Render**

Explained in [Stock Layer Templates](/layers-and-layouts/stock-layer-templates).

### **Media**

<div align="left"><figure><img src="/files/ega0VTGS0jDvftUiPy8U" alt=""><figcaption></figcaption></figure></div>

* **Video asset**: select the video asset you want to play.
* **Speed multiplier**: adjusts the playback speed of the chosen video asset. 1 means unchanged.
* **Play mode:** this dropdown has 4 options:
  * *Normal*: in this playmode video asset will always follow the position of the playhead relative to the beginning of the video layer.
  * *Free run*: in this playmode, the playback will ignore position of the play head and play even when the timeline is in pause mode. If the playhead jumps out of the layer and back onto it again, the video will restart from the same position it was at when the playhead jumped out.
  * *Free run & restart*: same as *Free run*, but if you jump out of the layer and back onto it again, the video will always restart from the *Begin at* position.
  * *Timecode*: in this playmode, LightAct will refer to the *Timecode device* as the source of the timecode the playback should follow. It allows you to control the playback of the video with an external timecode source.
* **Loop**: if checked the video will loop when it reaches the end.
* **Hold last frame:** if checked and *Loop* is unchecked, the video will hold the last frame after the end is reached. Otherwise, you'll see a black texture.
* **Begin at**: defines the starting timecode of the video asset. Parts of the video before *Begin at* will never be played back by LightAct.
* **End at**: defines the end timecode of the video asset. Parts of the video after *End at* will never be played back by LightAct.
* **Loop in**: if *Loop* is checked, this variable defines the timecode to which LightAct will jump back to when it loops the video.
* **Loop out**: if *Loop* is checked, this variable defines the timecode from which LightAct will make the jump. If *Loop* is checked, this variable essentially overrides *End at* variable.
* **Frame blending**: if checked, 2 consecutive frames of the video will get blended proportionally if the framerate of the video is different from the project's framerate. This should be left checked in 99% of cases.
* **Timecode device**: defines the source of the external timecode that should be used if *Play mode* is set to *Timecode*. This variable is ignored if *Play mode* is anything other than *Timecode*.
* **Video texture**: the video frame is saved into this texture variable which is then passed through all texture processing steps. Useful for layer connections.
* **Auto rename:** if checked the video layer is going to always take the name of the video asset that's currently playing.

### **Audio**

<figure><img src="/files/ndoYx5s9X71KrJIS7S8M" alt=""><figcaption></figcaption></figure>

* **Audio output:** determines the Audio output device through which the embedded audio is going to be played.
* **Volume**: determines the volume of the playback of audio embedded in the chosen video file.

### Other variable groups

Explained in [Content Layer Templates](/layers-and-layouts/stock-layer-templates/content-layer-templates).


# Generative Layer Templates

<div align="left"><figure><img src="/files/vccO9dLQdQyLIaxPZzii" alt=""><figcaption></figcaption></figure></div>

These templates generate content in real-time and render it.

* [Channel mixer](/layers-and-layouts/stock-layer-templates/generative-layer-templates/channel-mixer)
* [Color grid](/layers-and-layouts/stock-layer-templates/generative-layer-templates/color-grid)
* [Gradient](/layers-and-layouts/stock-layer-templates/generative-layer-templates/gradient)
* [Solid color](/layers-and-layouts/stock-layer-templates/generative-layer-templates/solid-color)
* [Checkerboard](/layers-and-layouts/stock-layer-templates/generative-layer-templates/checkerboard)
* [Mapping ID](/layers-and-layouts/stock-layer-templates/generative-layer-templates/mapping-id)
* [Text](/layers-and-layouts/stock-layer-templates/generative-layer-templates/text)
* [Render time](/layers-and-layouts/stock-layer-templates/generative-layer-templates/render-time)
* [Strobe](/layers-and-layouts/stock-layer-templates/generative-layer-templates/strobe)
* [Texture to mapping](/layers-and-layouts/stock-layer-templates/generative-layer-templates/texture-to-mapping)
* [Scroll texture](/layers-and-layouts/stock-layer-templates/generative-layer-templates/scroll-texture)


# Channel mixer

Category: Generative

<figure><img src="/files/bgyme1XpPM1wiiCqEEKW" alt=""><figcaption></figcaption></figure>

**Channel mixer** is a layer template that takes 2 textures and mixes their channels in an arbitrary way to create its output texture.

In the image above what's happening is this:

1. Color grid is rendered to the video screen first. That's just for visualisation of the alpha.
2. The 2 gradients are feeding their outputs into the Channel mixer layer
3. Channel mixer layer is mixing (rerouting) their channels to create the texture that is rendered on top of the Color grid.

{% hint style="warning" %}
Please make sure that all the generative layers that are feeding the *Channel mixer* layer have their *Resolution mode* set to *Custom*.
{% endhint %}

## Variables

### **Render**

Explained in [Stock Layer Templates](/layers-and-layouts/stock-layer-templates).

### **Texture channel mixer**

<div align="left"><figure><img src="/files/6OCTkzztPoKyeivjaEtY" alt=""><figcaption></figcaption></figure></div>

* **Input 1**: the first of the two input textures. It needs to come from another layer using [Layer connections](/layers-and-layouts/layer-connections).
* **Input 2**: the second of the two input textures. It needs to come from another layer using [Layer connections](/layers-and-layouts/layer-connections).
* **R source**: using the dropdown specify which channel of the 2 input textures will be used for the R channel of the output texture.
* **G source**: using the dropdown specify which channel of the 2 input textures will be used for the G channel of the output texture.
* **B source**: using the dropdown specify which channel of the 2 input textures will be used for the B channel of the output texture.
* **A source**: using the dropdown specify which channel of the 2 input textures will be used for the A channel of the output texture.

{% hint style="info" %}
**Good to know:** if you are using a black & white texture without alpha as the alpha matte (where white means completely transparent and black completely opaque), then you need to set the A source as either R, G or B (but not A) of that texture.
{% endhint %}


# Checkerboard

Category: Generative

<figure><img src="/files/JAsx5L06WU7nAezm3s4F" alt=""><figcaption></figcaption></figure>

**Checkerboard** is one of the generative layer templates that creates a checkerboard pattern useful for various testing purposes.

## Variables

### **Render**

Explained in [Stock Layer Templates](/layers-and-layouts/stock-layer-templates).

### **Checkerboard**

<div align="left"><figure><img src="/files/ASPV5BTlhlqCxeFZQGq2" alt=""><figcaption></figcaption></figure></div>

* **Resolution mode**: select if you want the resolution of the color grid to adapt to the resolution of the mapping or would you like to use a custom resolution.
* **Resolution**: if Resolution mode is set to Custom then this would be the resolution of the texture.
* **Color**: color of the layer
* **Auto rename:** renames the layer based on the selected Mapping.


# Color grid

Category: Generative

<figure><img src="/files/RfKEQgzkGMzXvrr6tFX1" alt=""><figcaption></figcaption></figure>

**Color grid** is one of the generative layer templates that creates a color grid useful for various testing purposes.

## Variables

### **Render**

Explained in [Stock Layer Templates](/layers-and-layouts/stock-layer-templates).

### **Color grid**

<div align="left"><figure><img src="/files/CX2GbT37tGIRaEE8UN9g" alt=""><figcaption></figcaption></figure></div>

* **Resolution mode**: select if you want the resolution of the color grid to adapt to the resolution of the mapping or would you like to use a custom resolution.
* **Resolution**: if Resolution mode is set to Custom then this would be the resolution of the texture.
* **Columns**: adjusts the number of columns in the grid.
* **Rows**: adjusts the number of rows in the grid.
* **Grid line width:** adjust the thickness of the line separating the cells of the grid.
* **Auto rename:** renames the layer based on the selected Mapping.


# Gradient

Category: Generative

<figure><img src="/files/Gk8rsWPCEkPeZ1FVzOTk" alt=""><figcaption></figcaption></figure>

**Gradient** is one of the generative layer templates that creates a gradient useful for various testing purposes.

## Variables

### **Render**

Explained in [Stock Layer Templates](/layers-and-layouts/stock-layer-templates).

### **Gradient**

<div align="left"><figure><img src="/files/xvxbUwxlH0xwMLBZrbxY" alt=""><figcaption></figcaption></figure></div>

* **Resolution mode**: select if you want the resolution of the color grid to adapt to the resolution of the mapping or would you like to use a custom resolution.
* **Resolution**: if Resolution mode is set to Custom then this would be the resolution of the texture.
* **Start color**: start color of the gradient
* **End color**: end color of the gradient
* **Start point:** start point, in relative coordinates, of the gradient.
* **End point:** end point, in relative coordinates, of the gradient.
* **Auto rename:** renames the layer based on the selected Mapping.


# Mapping ID

Category: Generative

<figure><img src="/files/Bunn1kJhx4qsY05zvRcN" alt=""><figcaption></figcaption></figure>

**Mapping ID** is one of the generative layer templates that create a texture useful for identifying various screens. It takes all the data from

## Variables

### **Render**

Explained in [Stock Layer Templates](/layers-and-layouts/stock-layer-templates) with an additional **Auto rename** variable. It renames the layer based on the selected Mapping.


# Render Time

Category: Generative

<figure><img src="/files/cfOSSOHvkFGaZrO1YIQJ" alt=""><figcaption></figcaption></figure>

**Render Time** is one of the generative layer templates that create a small texture that tells various times in seconds.

## Variables

### **Render**

Explained in [Stock Layer Templates](/layers-and-layouts/stock-layer-templates).

### **Time**

<div align="left"><figure><img src="/files/lMGE9inZHhAtLJ8RA6rt" alt=""><figcaption></figcaption></figure></div>

* **Time**: with this variable you select which time you want to render. Options are:
  * From beginning of timeline
  * From the end of timeline
  * From beginning of layer
  * From the end of layer
* **Timeline**: here you select which timeline you want to render the time of. This variable is ignored if you selected one of the layer options above.
* **Layer**: here you select which layer you want to render the time of. This variable is ignored if you selected one of the timeline options above.
* **Seconds**: the time value. This variable is set by the layer itself.
* **Text before**: write the text you want to pre-append.
* **Text after**: write the text you want to write after the time value.
* **Font color**: the color of the text
* **Background color**: the color of the background
* **Font size**: the size of the font. This determines the height of the texture.
* **Auto rename:** select if you want the layer's name to display the state of the variables.


# Scroll Texture

Category: Generative

<figure><img src="/files/mShDDGwH37eKe2VDKKoF" alt=""><figcaption><p>This is a GIF preview so the scrolling isn't smooth.</p></figcaption></figure>

**Scroll Texture** is one of the generative layer templates that scrolls a texture arriving from Layer Connections.

## Variables

### **Render**

Explained in [Stock Layer Templates](/layers-and-layouts/stock-layer-templates).

### **Scroll**

<div align="left"><figure><img src="/files/t6vKOuVX17QPmxnwE4Mv" alt=""><figcaption></figcaption></figure></div>

* **Texture**: reference to the texture that's going to be scrolled. Connect it with the source layer through Layer Connections.
* **Speed**: the speed with which the texture is going to scroll
* **Vertical**: if checked the texture is going to scroll vertically, otherwise horizontally.
* **Auto rename:** select if you want the layer's name to display the state of the variables.

## Setting up

<figure><img src="/files/aSaKpgZRtHQgB9onFok8" alt=""><figcaption></figcaption></figure>

This layer template relies on [Layer Connections](/layers-and-layouts/layer-connections). This means that the Texture variable needs to be the destination of another Source layer.


# Send Texture

Category: Generative

**Send Texture** is one of the a layer template that you can use to send a texture through one of texture sender devices in the Devices window. One possible use is to stream a texture through NDI.

## Variables

### **Send texture**

<div align="left"><figure><img src="/files/K6dAHoEBVZwH7iAFM5Fc" alt=""><figcaption></figcaption></figure></div>

* **Device**: select the device you'd would like to stream the texture through. An example is NDI or Spout.
* **Texture:** the texture you want to stream.

## Setting up

This layer template relies on [Layer Connections](/layers-and-layouts/layer-connections). This means that the *Texture* variable needs to be the destination of another *Source* layer.


# Solid Color

Category: Generative

<figure><img src="/files/SufDM4OzzjjjOdJKTW5f" alt=""><figcaption></figcaption></figure>

**Solid color** is one of the generative layer templates that creates a solid color useful for various testing purposes.

## Variables

### **Render**

Explained in [Stock Layer Templates](/layers-and-layouts/stock-layer-templates).

### **Solid color**

<div align="left"><figure><img src="/files/go8lXLlCpWISFlVPGnQq" alt=""><figcaption></figcaption></figure></div>

* **Resolution mode**: select if you want the resolution of the color grid to adapt to the resolution of the mapping or would you like to use a custom resolution.
* **Resolution**: if Resolution mode is set to Custom then this would be the resolution of the texture.
* **Color**: color of the layer
* **Auto rename:** select if you want the layer's name to display the state of the variables.


# Strobe

Category: Generative

<figure><img src="/files/tW375d0riGRDZU3D7qE7" alt=""><figcaption><p>Effect is slowed down because of the GIF format</p></figcaption></figure>

**Strobe** is one of the generative layer templates that creates a strobe effect.

## Variables

### **Strobe**

<div align="left"><figure><img src="/files/Omobfx6HVoVi0HKz4sRn" alt=""><figcaption></figcaption></figure></div>

* **Mapping:** for strobe to work as intended you need to select a canvas set up in a specific way.
* **Delay:** delay between the individual flashes. The lower it is, the faster the strobe effect.
* **Spread:** the spread of individual flashes. The higher this number is, more of the screens will flash at the same time.
* **Number of screens:** type in how many screens you want the strobe effect to apply to.
* **Strobe color**: color of the strobe effect.
* **Auto rename:** select if you want the layer's name to display the state of the variables.

## Setting up

{% hint style="warning" %}
For strobe layer to work as intended, it needs to be mapped to a canvas.
{% endhint %}

<div align="left"><figure><img src="/files/50oBj1NByV3iWR7K1bX2" alt=""><figcaption></figcaption></figure></div>

To demonstrate Strobe layer in an example, say you want to generate a strobe effect on 3 independent video screens.

<div align="left"><figure><img src="/files/60f7IFgWA6c4K7EC49vS" alt=""><figcaption></figcaption></figure></div>

Then you need to:

1. map the Strobe layer to a canvas. The resolution doesn't matter
2. on that canvas, you create 3 sub-areas
3. map each of them to your video screens and select *Stretch to target*.

If you have a different number of screens, you need to adjust the Number of screens variable and of course the number of sub-areas.


# Text

Category: Generative

<figure><img src="/files/JN1HZsd0YgCc6jpVprOH" alt=""><figcaption></figcaption></figure>

**Text** is one of the generative layer templates that create a small texture based on the text you write.

## Variables

### **Render**

Explained in [Stock Layer Templates](/layers-and-layouts/stock-layer-templates).

### **Text**

<div align="left"><figure><img src="/files/a30v9wLa3gzUupiTEAaE" alt=""><figcaption></figcaption></figure></div>

* **Text**: text you'd like to render
* **Font color**: color of the text
* **Background color**: color of the background
* **Font size**: size of the font. This determines the height of the texture.
* **Auto rename:** select if you want the layer's name to display the state of the variables.


# Texture to Mapping

Category: Generative

**Texture to mapping** is one of the generative layer templates that simply renders an incoming texture to a maping you select. It is useful if you want to render one texture to several different mappings.

## Variables

### **Render**

Explained in [Stock Layer Templates](/layers-and-layouts/stock-layer-templates) with 2 additional variables:

* **Texture**: The texture that is going to be rendered to a mapping. It is also a Destination variable for a Layer connection.
* **Auto rename:** It renames the layer based on the selected Mapping.

## Setting up

This layer template relies on [Layer Connections](/layers-and-layouts/layer-connections). This means that the *Texture* variable needs to be the destination of another *Source* layer.


# Control Layer Templates

<div align="left"><figure><img src="/files/KJbd3TEuJxT8dPmPYLOz" alt=""><figcaption></figcaption></figure></div>

These templates don't render anything as they are designed for data processing and show control.

* [Receive message](/layers-and-layouts/stock-layer-templates/control-layer-templates/receive-message)
* [Send message](/layers-and-layouts/stock-layer-templates/control-layer-templates/send-message)
* [Set timeline state](/layers-and-layouts/stock-layer-templates/control-layer-templates/set-timeline-state)
* [Go to marker](/layers-and-layouts/stock-layer-templates/control-layer-templates/go-to-marker)
* [Go to section](/layers-and-layouts/stock-layer-templates/control-layer-templates/go-to-section)
* [Send DMX](/layers-and-layouts/stock-layer-templates/control-layer-templates/send-dmx)
* [Set fade](/layers-and-layouts/stock-layer-templates/control-layer-templates/set-fade)
* [Set volume](/layers-and-layouts/stock-layer-templates/control-layer-templates/set-volume)
* Send PJLink


# Go to Marker

Category: Control

**Go to Marker** layer template triggers a jump of a specified *Timeline* to a specified *Marker*.

## Variables

### Default

<div align="left"><figure><img src="/files/ODKPqGFbukfjV24C7beZ" alt=""><figcaption></figcaption></figure></div>

* **Mode**: select one of the following modes:
  * *Go to selected*: jumps to a selected marker.
  * *Go to next*: jumps to the next marker in the timeline
  * *Go to previous*: jumps to the previous marker in the timeline
* **Timeline**: select the timeline where you want to execute the jump
* **Marker**: select the marker to which you want to jump to. This value is ignored if Mode is anything other than *Go to selected*.
* **Auto rename:** select if you want the layer's name to display the state of the variables.
* **Print to console**: if checked the layer is going to print to the *Console* window a message every time a jump happens.


# Go to Section

Category: Control

**Go to Section** layer template triggers a jump of a specified *Timeline* to a specified *Section*.

## Variables

### Default

<div align="left"><figure><img src="/files/L3HsSNPCUXYL2CKheRFt" alt=""><figcaption></figcaption></figure></div>

* **Timeline**: select the timeline where you want to execute the jump
* **Section**: select the marker to which you want to jump to. This value is ignored if Mode is anything other than *Go to selected*.
* **Play state**: select the timeline's play state after the change. The default is *No change*.
* **Auto rename:** select if you want the layer's name to display the state of the variables.
* **Print to console**: if checked the layer is going to print to the *Console* window a message everytime a jump happens.


# Receive message

Category: Control

**Receive message** layer template is designed to allow you to receive message from various receivers such as UDP, TCP or OSC and trigger different actions based on them.

## Variables

### Default

<div align="left"><figure><img src="/files/dr71EN7fTvN0uaSqL1Ln" alt=""><figcaption></figcaption></figure></div>

* **Device**: Select the device which you want to use as the receiver of the message.

## Setting up

### **1. Create the appropriate Device node**

<div align="left"><figure><img src="/files/Q94bq9AFIU9Xtxd5eMGv" alt=""><figcaption></figcaption></figure></div>

In the Devices window, create an appropriate *Receiver* device node. Set it up the way you want and check the **Receive** checkbox. For more information you might want to refer to the [Network page](/integrations/network).

### **2. Inserting the layer**

**Through the right click menu**

Right click in the *Timeline*, select *Control* category and choose **Receive message** layer.

### **3. Set up the layer**

Set up the variables of the layer and choose the device you created in step 1.

### **4. Open the Layout**

<div align="left"><figure><img src="/files/pqz3cuZK05v5JACjCXeU" alt=""><figcaption></figcaption></figure></div>

Open the Layout by double clicking on the layer. In the *Logic* group of nodes, you see a number of *Switch Case* nodes. They are designed to trigger a different Lifeline output pin depending on the input.

Connect the desired *Case* output of the selected *Switch Case* node with the desired action node, such as *Go to marker* or *Go to section* node.


# Send DMX

Category: Control

**Send DMX** layer template allows you to send DMX value without having to create a DMX fixture for it.

## Variables

### Default

<div align="left"><figure><img src="/files/2DGt0FGFjmg3jWzwWcyw" alt=""><figcaption></figcaption></figure></div>

* **Universe**: select the universe where you want to send to.
* **Channel index**: select the channel which you want to set.
* **Channel value**: set the value of the selected channel.
* **Auto rename:** select if you want the Layer's name to display the variables' values.

## Setting up

### **1. Set up DMX Out window**

<figure><img src="/files/xFZ4BxHVuitHI8oBMOKw" alt=""><figcaption></figcaption></figure>

Enable **Send DMX** checkbox in DMX Out window. For more information on how DMX streaming works in LightAct, please refer to [DMX Out](/dmx/dmx-out).

### **2. Inserting the layer**

**Through the right click menu**

Right click in the Timeline, select *Control* category and choose **Send DMX** layer.

### **3. Set up the layer**

<figure><img src="/files/jZ5wN8xeNu7j5XqlZlOj" alt=""><figcaption></figcaption></figure>

Set up the layer's variables and observe the value in the DMX Out window.


# Send message

Category: Control

**Send message** layer template is designed to allow you to send messages through various sender nodes such as UDP, TCP or OSC.

## Variables

### Default

<div align="left"><figure><img src="/files/Y8gMoibZfOZ75ToAuj5H" alt=""><figcaption></figcaption></figure></div>

* **Device**: select the device which you want to use as the receiver of the message.
* **Type**: select the type of the device you selected in the Device variable. It determines whether you are sending UDP, TCP or OSC message.
* **Frequency**: determines the frequency with which the message is sent. Options are:
  * *Run onc&#x65;**:*** this means, the message will be sent once every time the play head enters the layer.
  * *Delay*: this means, the message will be sent continuously with a delay as long as the playhead is on the layer.
* **Delay**: if you specified *Delay* in the *Frequency* variable, this is where you determine the duration of the delay.
* **Message:** message you'd like to send.

### **OSC**

<div align="left"><figure><img src="/files/ipdxPaDWIFQDuBeE2FTb" alt=""><figcaption></figcaption></figure></div>

These variables are applicable only if you selected one of the OSC options in the *Type* variable.

* **OSC Address:** configure OSC address under which the data is going to be sent.
* **OSC Float:** this is the float value you will be sending if you chose *OSC Float* as the *Type* of the message
* **OSC Int:** this is the float value you will be sending if you chose *OSC Int*as the *Type* of the message
* **OSC String:** this is the float value you will be sending if you chose *OSC String* as the *Type* of the message

## Setting up

### **1. Create the appropriate Device node**

<figure><img src="/files/IugoG2mF2L3V76z9nKGU" alt=""><figcaption></figcaption></figure>

In the Devices window, create an appropriate *Sender* device node. Set it up the way you want and check the **Send** checkbox. For more information you might want to refer to the [Network page](/integrations/network).

### **2. Inserting the layer**

**Through the right click menu**

Right click in the Timeline, select *Control* category and choose **Send message** layer.

### **3. Set up the layer**

Select the device you created in step 1 and set up all the variables they way you want.


# Set Fade

Category: Control

**Set fade** layer template changes the fade of a video output, a section or a layer.

## Variables

### Default

<div align="left"><figure><img src="/files/GNOpH3mDVWVp3q7kAkCp" alt=""><figcaption></figcaption></figure></div>

* **Mode**: select the fade of what you'd like to adjust. Options are:
  * *Video output Fade*: adjusts the fade of the selected Video output.
  * *Section Fade*: adjusts the fade of the selected section.
  * *Layer Fade*: adjusts the fade of the selected layer.
* **Fade**: set the new value of the fade. 1 = 100% (fully on), 0 = 0% (fully dimmed).
* **Speed**: adjust the speed of the adjustment. 1 means real-time. If you set it to really small values, like 0.2, the fade value will adjust slowly towards the target value.
* **Auto rename:** select if you want the layer's name to display the state of the variables.


# Set Timeline State

Category: Control

**Set timeline state** layer template changes the play state of the specified *Timeline*.

## Variables

### Default

<div align="left"><figure><img src="/files/57t86LrXnvx8GDo1cuNs" alt=""><figcaption></figcaption></figure></div>

* **Timeline**: select the timeline which you'd like to change the play state of.
* **Play state**: select the timeline's play state. The
* **Auto rename:** select if you want the layer's name to display the state of the variables.


# Set Volume

Category: Control

**Set volume** layer template changes the audio volume of a section or a layer.

## Variables

### Default

<div align="left"><figure><img src="/files/ylPPguVNhRLdcuYV2CSH" alt=""><figcaption></figcaption></figure></div>

* **Mode**: select the volume of what you'd like to adjust. Options are:
  * *Section Volume*: adjusts the volume of the selected section.
  * *Layer Volume*: adjusts the volume of the selected layer.
* **Master volume**: set the new value of the master volume fade. 1 = 100% (fully on), 0 = 0% (silent).
* **Speed**: adjust the speed of the adjustment. 1 means real-time. If you set it to really small values, like 0.2, the fade value will adjust slowly towards the target value.
* **Auto rename:** select if you want the layer's name to display the state of the variables.


# User Layer Templates

In LightAct, you can also create your own custom Layer Templates.

Any layer can be transformed into a Template, by right-clicking on it and selecting **Template -> Create from layer**.

<div align="left"><figure><img src="/files/evBIXGx704cjv6UVfKG8" alt=""><figcaption></figcaption></figure></div>

Once you give your template name and click on **Create** button, you will be able to see it in the Timeline track's right-click menu, under User templates.

{% hint style="info" %}
**Good to know**: For a User Layer Template to appear as a suggestion in the *Asset suggestion menu*, it should contain at least one of the following keywords: *Video*, *Image*, *Audio*, or *Notch* in its name.
{% endhint %}

<div align="left"><figure><img src="/files/1TSYCwl2qdDdEjmd40tT" alt=""><figcaption></figcaption></figure></div>

## User Template Management

To manage your custom templates, go to **Edit -> Preferences Window** and expand the **Files** tab by clicking on it.

On the left-hand side of the *Layer Templates* section, all of your custom-created templates should be listed. Here, you can **Duplicate**, **Rename**, or **Delete** a selected *Template*. On top of that, you can also assign your own shortcuts, for their faster placement on the *Timeline tracks*.

<figure><img src="/files/ItwkyFfG6arsUTW6cxFm" alt=""><figcaption></figcaption></figure>

{% hint style="info" %}
**Good to know**: Anytime you add or delete a template, the change should be visible upon clicking the **Refresh list** button.
{% endhint %}


# Fast layer workflows

There are many different actions and shortcuts that can make your workflows faster and more efficient. Let's go through them.

## Creating layers

There are several ways to insert a layer.

### With right click menu

<div align="left"><figure><img src="/files/C8OjjPArqtitUM0ZwW7p" alt=""><figcaption></figcaption></figure></div>

One way, though the slowest, is to find the template in the menu.

<div align="left"><figure><img src="/files/oe4YrCcVYe4mVJ4S0j7W" alt=""><figcaption></figcaption></figure></div>

You can also right-click and start typing the template's name or one of its search keywords and then hit Enter.

### With shortcuts

<div align="left"><figure><img src="/files/kt2736FlnvF5GhfrMn6q" alt=""><figcaption></figcaption></figure></div>

When you find a stock template in the right-click menu, you will see that most of them have a shortcut assigned to them. For example, for a video layer template, the shortcut is V.

<div align="left"><figure><img src="/files/ijy4rcdjjpzvgPDwSGF1" alt=""><figcaption></figcaption></figure></div>

You can create a layer by simply holding this shortcut and clicking with a left mouse button (LMB). If you want to create a video layer the shortcut would be V+LMB.

<div align="left"><figure><img src="/files/zlkBN9EeLpovIsqMvsKB" alt=""><figcaption></figcaption></figure></div>

Another way is to hold Alt and hitting this key. If you want to create a video layer the shortcut would be Alt+V.

{% hint style="info" %}
**Good to know**: the mouse needs to be in the Timeline editor window for this to work.
{% endhint %}

### By dragging and dropping

<figure><img src="/files/a3MlV99hHDZQudJ4ASQU" alt=""><figcaption></figcaption></figure>

If you drag an asset of a specific type onto the Timeline, a menu will popup that will offer all the templates which have the asset type in its name.

<div align="left"><figure><img src="/files/FgjCx1wbfu66Pwd6j2Xc" alt=""><figcaption></figcaption></figure></div>

For example, if you drag a video asset onto the Timeline you will get offered a popup menu with all the templates which have *Video* in them.

## Setting variables

<div align="left"><figure><img src="/files/myDeI3pdPruaJ6EGzlEQ" alt=""><figcaption></figcaption></figure></div>

To set layer variables, you can of course use the controls in the Properties window. However, there are many drag-and-drop actions that will make your workflow faster.

### Drag & drop

<figure><img src="/files/uKhaUSexxijJXKOY5AEB" alt=""><figcaption></figcaption></figure>

For example, if you you drag any object or asset onto a layer, all variables with the correct type will get set with that object or asset. This means that if you drag a video asset onto a layer, all variables of video asset type will get set with that video asset.

{% hint style="info" %}
**Good to know**: as a practical example, if you have a video layer and you want to assign a video asset to it, simply drag that video asset onto that layer.
{% endhint %}

<figure><img src="/files/kzgFvSe3jZn69hYtSn8L" alt=""><figcaption></figcaption></figure>

Or if you drag a mapping, say, a video screen, onto a layer, all Mapping variables will get assigned to that mapping.

{% hint style="info" %}
**Good to know**: as a practical example, if you have a video layer and you want to assign it to a particular mapping, simply drag that mapping onto that layer.
{% endhint %}


# Fade in and Fade out

Timelines, Sections and Layers have Fade in and Fade out properties, however they work a bit differently.

## Timeline fades

<div align="left"><figure><img src="/files/xJkEbWarTIjFaMR30Xbi" alt=""><figcaption></figcaption></figure></div>

Every Timeline has Fade in/out and Cross-fade time property.

### Timeline fade in/out

When setting a Timeline's fade in/out, it doesn't affect the beginning or end of the Timeline. Instead, these settings apply whenever the Timeline switches between play modes.

For instance, if the Timeline's fade in time is set to 3 seconds and it is in stop mode, pressing play will cause the content to fade in over 3 seconds, regardless of where the playhead is in the Timeline. The same approach applies to fade out.

#### Apply fade to Pause

If this checkbox is **checked**, then Fade in/out will apply when switching between any play state and the Pause or Stop state.

If this checkbox is **unchecked**, then Fade in/out will apply only when switching between any play state and the Stop state.

## Section Fade in/out

<div align="left"><figure><img src="/files/NS5Y5tLuKDTHnfPmfRnO" alt=""><figcaption></figcaption></figure></div>

Section Fade in and Fade out apply to all the layers in the beginning and end of a section.

<div align="left"><figure><img src="/files/Z1gVlrRUeVO2gf0MfbKF" alt=""><figcaption></figcaption></figure></div>

In the above image, for example, all 3 layers are going to be faded in because they are all within the Fade in time of *Section 2*.

## Layer Fade in in/out

<div align="left"><figure><img src="/files/uZByfaKshGuSC51JNspO" alt=""><figcaption></figcaption></figure></div>

Every layer also has Fade in and Fade out property. They work similarly to Section Fade in/out except that they apply only to that specific layer.

{% hint style="info" %}
**Good to know**: Layer Fade in/outs and Section Fade in/outs multiply with eachother.
{% endhint %}


# Cross-fade

In LightAct, it is possible to achieve a cross-fade effect when jumping from part of the timeline to another. Similarly to Fade in and Fade out, cross-fade property can be adjusted on the Timeline, Section or Layer level.

<div align="left"><figure><img src="/files/wbbOWPeZwcpHteXKP2fs" alt=""><figcaption><p>Cross-fade properties of a Timeline</p></figcaption></figure></div>

## **Cross-Fade for Timelines**

Cross-fade property of a Timeline determines cross-fade property of every section and layer in it, but only if their Cross-fade property is set to inherit.

<div align="left"><figure><img src="/files/WiXKVdQceeZ5mVxIj6C9" alt=""><figcaption><p>Cross-fade properties of a Section</p></figcaption></figure></div>

## **Cross-Fade for Sections/Layers**

Three options are available for setting cross-fade properties of sections or layers:

1. **Inherit**: Adopts the cross-fade behavior of a higher hierarchical object. If you set Inherit on a section, it is going to inherit the properties from a Timeline. If you set Inherit on a Layer, it's going to use the properties of the Section it is in.
2. **FadeDip**: this means that the outgoing layer is going to fade down while the incoming layer is fading up. This produces a slight dip in overall brightness/opacity
3. **FadeHold**: This means the origin layer is going to stay at the original opacity, while the destination layer is fading up over it. This results in unchanged overall brightness/opacity.

{% hint style="warning" %}
Please note, cross-fade does not work if you jump from one point to another on the same layer.
{% endhint %}

<div align="left"><figure><img src="/files/zHkVEy2bKlO8Ketbe2K9" alt=""><figcaption></figcaption></figure></div>

If you set Cross-fade to something other than Inherit, you'll be able to type in the Cross-fade time.

{% hint style="info" %}
**Good to know:** if you are using cross-fade on a section, LightAct will always use cross-fade time of the destination section. Even if the cross-fade times of the origin section is different from the one of the destination section.
{% endhint %}


# Curve Editor

*Curve Editor* helps you manipulate the value of different variables over time.

## Enabling the Curve Editor

To access the *Curve Editor*, first select the desired *Layer* in the *Timeline Editor* and find the **Variable** you want to adjust in the *Variables* section of the *Properties* window.

Select one or multiple Variables and **click on** ![](/files/ZvrheDrdqOMIH9HrrNj2) next to it to enable the curve editing option in the *Curve Editor*.

To view and edit the curve of a specific enabled Variable, you can select it by **clicking on** ![](/files/WhiEaNfTdSOT4EwZpzwf) next to the Variable inside the *Properties* window.

<figure><img src="/files/dGeWQ7ban1p9eyvpTA7b" alt="Demonstrating how creating a layer on the Timeline offers many Variables to choose from that can be edited in the Curve Editor"><figcaption></figcaption></figure>

## Manipulating Curves

### Adding Curve Point

You can add curve points to the curves of a selected *Variable* by right-clicking in the *Curve Editor* and choosing:

<figure><img src="/files/DyjBGDeXzq6iH05JERcn" alt=""><figcaption></figcaption></figure>

* **Add point on playhead** option to add points where the *Playhead* is located, or
* **Add point here** option to add points at the current mouse location.

{% hint style="info" %}
**Good to know:** When editing a **Variable** with multiple components in the *Curve Editor*, you can choose to edit just one component (or curve) at a time. To do this, first select the curve by clicking on one of its **Points**, then **right-click** and choose one of the **Add point** options from the context menu.
{% endhint %}

### Manipulating Curve Points

Each *Curve Point* contains unique information accessible by **right-clicking** on it within the *Curve Editor* window.

<figure><img src="/files/ygcuUIKu51MOYDCXfCj6" alt="Window that holds information about the point"><figcaption></figcaption></figure>

You can create and manipulate curve points by placing a *Playhead* on the desired location and changing the value of the *Variable* in the *Properties* window.

By selecting a *Curve point* in the *Curve Editor* you can move it vertically (**Scroll**) or horizontally (**Shift + Scroll**).

{% hint style="info" %}
**Good to know:** You can change the value of the Color variable in the *Curve Editor* by **selecting it from the color picker**.
{% endhint %}

### Deleting Curve Points

To delete single point from the Curve you can:

* select a point and choose **Delete** option from its right-click menu,
* select a point and **press Del** shortcut, or
* delete a point by **double-clicking** on i&#x74;*.*

If you want to delete all user-added points use **Reset curve** in the right-click context menu of the Curve editor.


# Layer Connections

Layer connections are a tool to share data and content between Layer variables in different layers. They present a more streamlined way to do that compared to [Global variables](/layers-and-layouts/layer-layouts/variables/global-variables).

In most cases you will be using Layer connections to pass textures from one layer to another, so let's demonstrate how this can be done.

## Example: Scroll texture

<div align="left"><figure><img src="/files/nL8ju92fZtMwNePdEKLX" alt=""><figcaption></figcaption></figure></div>

Create a:

1. **Video screen** in the Viewport
2. **Color grid** layer and
3. above it a **Scroll texture** layer

<figure><img src="/files/ZADlL2Exjk8I4RkOOhBd" alt=""><figcaption></figcaption></figure>

Then:

1. **drag** from the Video screen to Scroll texture layer.
2. **Alt + drag** from Color grid layer to Scroll texture layer

You've just created a layer connection. It copies the Texture variable from Color grid layer to Texture variable to Scroll texture.

<div align="left"><figure><img src="/files/WFmhhywhzjNv9fV8bNra" alt=""><figcaption></figcaption></figure></div>

Now open **Layer connections** window. You can find it in the **Window** top menu. In this window you can see a Table with 2 columns:

* **Source**: with 3 sub-columns you set the *source variable*
* **Destination**: with 3 sub-columns you set the *destination variable*

{% hint style="info" %}
**Good to know**: by Alt-dragging from one layer to another you create a layer connection between 2 layers that copies **all Texture** variables from the Source layer to all Texture variables of the Destination layer.
{% endhint %}

{% hint style="info" %}
**Good to know**: to create layer connections of **non-texture** variables, you need to use Layer connections.
{% endhint %}

<div align="left"><figure><img src="/files/otPlHkK3V77L3qkRsMTX" alt=""><figcaption></figcaption></figure></div>

If you want to temporarily disable a Layer connection just click on the eye icon in Layer connections window.

<div align="left"><figure><img src="/files/DZyiqXI6F5RLCVSs3RsQ" alt=""><figcaption></figcaption></figure></div>

If you want to delete a Layer connection you can do that in Layer connection window or by right clicking on one of the layers and selecting **Delete layer connections**.


# Layer Layouts

*Layer Layouts* gives you the power to create, ingest, import and process content and data in a completely flexible way. With various *nodes*, you can build complex behavior and even conditional action flows.

{% hint style="info" %}
**Good to know**: Layer Layouts allow you to modify existing layer templates or create your own from scratch.
{% endhint %}

<div align="left"><img src="/files/avzghIzOQGD2Q3vVEAUt" alt=""></div>

We can access *Layer Layout* window by double-clicking on any **Layer** in the Timeline.

![](/files/GZRGcnDSlBk9LFeghZVI)

On the right-hand side of the window, you can see the **Layer Variables**.

![](/files/JgPbn15orKmBAUKABk7g)

If we right-click somewhere in the **empty area** of a *Layer Layout*, a popup window appears, where we can browse a library of nodes. You can quickly find the desired node by typing its name in the **Search window**.

<div align="left"><img src="/files/k3UKW8TP8p9YIVIlE2c7" alt=""></div>

You can **drag** from a *node's output* or *input* and drop it somewhere on a *Layer Layout* to get new node recommendations. You can learn more about nodes in the [Nodes ](/layers-and-layouts/layer-layouts/nodes)chapter.

{% hint style="info" %}
**Good to know**: by far the best way to learn about node programming is to participate in one of our [Training sessions](https://lightact.com/lightact-training/).
{% endhint %}


# Nodes

Every node has inputs on the left side and outputs on the right side.

There are 2 types of nodes: action nodes and basic nodes.

## **Action nodes**

They have at least one lifeline (lime color) square pin input or output.

<div align="left"><img src="/files/R1xLGi8Itl9gO7ttvyzk" alt=""></div>

There are **3 special action nodes** in every layer. They are inserted by default.

<div align="left"><img src="/files/xDvwIfT2aXmaJ1tqh0xh" alt=""></div>

* **Tick** node executes every frame as long as the transport (the green vertical line in the Timeline indicating where in the Section you are) is on the layer.
* **On Begin** executes only once when this layer first become active. Usually this happens when the playhead touches the left side of the layer.
* **On End** is similar to On begin, except that it executes at the end of the layer.

## **Basic nodes**

They have no square lime Lifeline pin inputs or outputs.

<div align="left"><img src="/files/nxeQ1TQVDLOXNudzoo3Q" alt=""></div>

### Node controls

#### Preview

Some nodes also contain a **Preview** option. Toggle it on or off with a **Preview** icon.

<div align="left"><img src="/files/AXUJQVuJwfgHxk7CkpRT" alt=""></div>

#### Bypass

<div align="left"><img src="/files/HXKd0LIhMmrj3C9PUPVo" alt=""></div>

Bypass icon causes the node to not execute at all.

{% hint style="info" %}
**Good to know**: Bypass is useful, especially with various texture processing nodes.
{% endhint %}


# Node Connections

There are several types of connections between nodes, but there is one that is special. It is called **Lifeline**.

It is the one with a lime color and it determines the action flow of the layout. Contrary to most other connection types, an input pin can have many connections whereas an output pin can have only one.

*Layer layouts* consist of nodes connected with chains. There are **2 types of chains:**

* **lifeline chain** and a
* **sub-chain**.

## Lifeline chain

It consists of nodes connected with a lifeline connection. It is shown with a lime green color and has square pins.

![A lifeline chain with nodes labeled as per the order of execution.](/files/BbEwbfF94v2J3Z9AgPYg)

{% hint style="info" %}
**Good to know:** One lifeline output can be connected to only one lifeline input, but one lifeline input can be connected to several lifeline outputs.
{% endhint %}

## Sub-chains

It consists of all the nodes that are connected with other connection types, but if they are to be executed, their *sub-chain* needs to be connected to the *lifeline chain*.

![All non-lifeline connections above are a sub-chain of the one lifeline connection.](/files/kZWRTSTzpri0bEvM0JpE)

Connections between nodes have different colors. Each color represents what is sent along that connection. For example, dark red represents a float which stands for a *real number* whereas light blue represents a string or text.

{% hint style="info" %}
**Good to know:** You can only connect pins with the same color and you can only connect an output to an input.
{% endhint %}

## Active vs Inactive connections

A connection will be **active** or enabled only when the **Playhead** on the Section is placed *on top of a layer* and only when it is connected to a lifeline generator in some way.

![Example of inactive node. It is not blinking.](/files/gNvyjQCXTfa0a4ogiMHO)

When we move the **Playhead** away from the layer, it gets *disabled* again and connections *stop blinking.*


# Node Action Flow

Action flow determines which nodes will be executed. You determine the action flow with Lifeline connections and every Lifeline starts with a Lifeline generator node.

## Default Lifeline Generator Nodes

<div align="left"><img src="/files/uYE8kIJX6oodvJDDhGn7" alt=""></div>

Default layer nodes: **Tick**, **On Begin,** or **On End**.

## Other Lifeline Generator Nodes

![Several nodes have New message lifeline output](/files/as6SJM2YlT9RU4q9ELNr)

There are a lot of nodes that have **New message** lifeline output. These nodes are primarily designed to receive messages from the network and work in conjunction with receiving *Device nodes*.

{% hint style="info" %}
**Good to know:** A good indicator that a layer is active, is blinking connection lines.
{% endhint %}


# Order of Node Execution

Let's say that you are using *Tick node* as your Lifeline generator. You’ll see that it has only one *Lifeline* output which is executed every frame.

![](/files/l5jhASuU8vF2WSUnHWyY)

<div align="left"><img src="/files/k8hjFZzVzDvFNCkK86Go" alt=""></div>

The order is as follows:

1. LightAct will execute the node connected to the **Tick** node
2. In order to execute it, it will execute all the sub-chains connected to this node.
3. When it's done with step 2, it will look for the next node connected with the lifeline and so on
4. The layer execution ends when all connected nodes are executed. Non-connected nodes are not executed.

You can also split *Lifeline* node by using conditional nodes or delay its execution and so on. There are many ways you can play with how a particular layout is executed. For example, the layout below renders a red 400 x 400 px square on a canvas at different positions depending on the value of the **Input** boolean in the **If node**.

<div align="left"><img src="/files/eAbVyq4clNoYlb5SPP4z" alt=""></div>


# Texture Processing

Texture processing nodes are used in computer graphics and digital image processing to manipulate and enhance the appearance of textures.

In LightAct there is a wide number of Texture Processing nodes which can be found in the *Layer Layouts*. To locate them, right-click somewhere in the *Layer Layout*, and in the *Search bar* expand **Utilities -> Texture** Collapsible. There, you will find a list of all the nodes which can be inserted into the *Layer*.

<div align="left"><figure><img src="/files/AQeMwpEUw0ze5LnPOVnG" alt=""><figcaption></figcaption></figure></div>

In this chapter, we will go over some of the most commonly used Texture Processing nodes:

{% content-ref url="/pages/ad5WXQ1bj7UJViIFYYot" %}
[LUT](/layers-and-layouts/layer-layouts/nodes/texture-processing/lut)
{% endcontent-ref %}

{% content-ref url="/pages/iOFukRLJnAglupHKmlly" %}
[Luma Key](/layers-and-layouts/layer-layouts/nodes/texture-processing/luma-key)
{% endcontent-ref %}

{% content-ref url="/pages/QofbT3Jypc7kRXUS8q9n" %}
[Rotate](/layers-and-layouts/layer-layouts/nodes/texture-processing/rotate)
{% endcontent-ref %}


# LUT

*Texture LUT* node applies a LUT, also known as Look Up Table, to an image. This node is useful for enhancing the color or contrast of an incoming texture.

## Setup

To use the node, you first have to insert it in the *Layer Layouts*. You can find it in the dedicated *Search bar*, under **Utilities -> Texture** collapsible.

<div align="left"><figure><img src="/files/GAHcfGFPvSIKMwtLX1YI" alt=""><figcaption></figcaption></figure></div>

Give the *Texture Lut* node a *Texture input* and connect it to an active *lifeline*.

<figure><img src="/files/xbDdOmo2cwlxMtcH1fmt" alt=""><figcaption></figcaption></figure>

To use apply a pre-existing LUT to the chosen *Texture input*, select the *Texture Lut* node and navigate to its **Node properties**, on the right-hand side of the *Layer Layouts* window. Under the **Node properties** collapsible, click on Browse button and locate the LUT file in *File Explorer*.

<div align="left"><figure><img src="/files/TO5B0LEPo9JL3hFRhQep" alt=""><figcaption></figcaption></figure></div>

Finally, click **Generate LUT** button to see the results.

<figure><img src="/files/gzMEy6QVWlpSi6ntDWbr" alt=""><figcaption></figcaption></figure>

{% hint style="info" %}
**Good to know:** LightAct supports *\*.3dl* and *\*.cube* file types, as well as a *Texture* as a LUT input.
{% endhint %}


# Luma Key

*Texture Luma Key* is a very useful node designed to mask pixels based on a given threshold. In practice, it is used to create a composite based on the luminance levels of the incoming texture.

<div align="left"><figure><img src="/files/XcxPI7NaNcPQvNx4VvLI" alt=""><figcaption></figcaption></figure></div>

## Setup

To use the node, you first have to insert it in the *Layer Layouts*. You can find it in the dedicated *Search bar*, under **Utilities -> Texture** collapsible.

<div align="left"><figure><img src="/files/v9Clzm9MHjM5VXCmcpOK" alt=""><figcaption></figcaption></figure></div>

Give the *Texture Luma* node a *Texture input* and connect it to an active *Lifeline*.

<figure><img src="/files/audhXB5R190IqxiIpSCf" alt=""><figcaption></figcaption></figure>

All pixels from the incoming *Texture* whose brightness is above the *Luminance value* will be masked. This node is often used in combination with other Texture nodes, such as the *Texture Blend* node.

<figure><img src="/files/MSmN4HUVG2I5lEpfg8xC" alt=""><figcaption></figcaption></figure>


# Rotate

*Rotate Texture* node allows you to manipulate the orientation of a *Texture* by rotating it with a desired angle around its center.

<div align="left"><figure><img src="/files/ILjAu9wKAv1LTP6JKiDp" alt=""><figcaption></figcaption></figure></div>

## Setup

To use the node, you first have to insert it in the *Layer Layouts*. You can find it in the dedicated *Search bar*, under **Utilities -> Texture** collapsible.

<div align="left"><figure><img src="/files/zNS2L5gflomCtnySojTP" alt=""><figcaption></figcaption></figure></div>

Give the *Texture Rotate* node a *Texture input* and connect it to an active *Lifeline*. As you change the **Angle value** of the *Texture Rotate* node, you will notice the *Texture* changing its default orientation.

<figure><img src="/files/X10jslFlrEjlGKx4bKQg" alt=""><figcaption></figcaption></figure>


# Computer Vision

## CV Variable Type

LightAct has a special variable type called CV Mat or CV, which stands for Computer Vision. As the name indicates, this variable type has been specifically designed for computer vision operations, which in LightAct can be executed through Computer Vision nodes.

<figure><img src="/files/hovu2VeeECLA0UYiYNUr" alt=""><figcaption></figcaption></figure>

## Convert node

All Computer Vision nodes in LightAct expect a CV variable type as an Input and produce a CV variable type as an Output. However, most often, our goal is to apply Computer Vision algorithms on incoming camera video streams, which in LightAct are often rendered out in the Texture variable type.

Additionally, after applying Computer Vision operations to a video, we often want to visualize the outcome. Since all Computer Vision nodes output a CV variable type, in order to visualize it, we have to turn the stream back into a Texture variable type.

Because of this, LightAct offers two useful types of **Convert** nodes:

1. Texture to CV,
2. CV to Texture.

which repack incoming Texture data to a format suitable for the CV variable type and vice versa.

### 1. Texture to CV

To insert this node in the *Layer Layouts*, drag from the *Texture* output pin of a pre-existing node. In the *Search* menu, under *Utilities -> General*, click on **Convert** node.

<figure><img src="/files/uJAfRJb83JEdmRrru83N" alt=""><figcaption></figcaption></figure>

### 2. CV to Texture

Similarly, to insert this node in the *Layer Layouts*, drag from the *CV* output pin of a pre-existing node. In the *Search* menu, under *Utilities -> General*, click on **Convert** node.

<figure><img src="/files/VY6I20NFwoWXj4ngN9QS" alt=""><figcaption></figcaption></figure>

A typical *Computer Vision* workflow contains both types of *Convert* nodes.

<figure><img src="/files/UkHCTblvzxKVQaPlcrdC" alt=""><figcaption></figcaption></figure>

## Other Computer Vision nodes

LightAct supports a variety of Computer Vision nodes that implement different algorithms. You can find out more about each one, on its dedicated page:

{% hint style="warning" %}
When working with CV nodes, please make sure to keep the resolution of incoming and outgoing CV streams low for better use of system resources.
{% endhint %}

{% content-ref url="/pages/Fh1OArDtu4UOc1l6ZdnQ" %}
[Optical Flow](/layers-and-layouts/layer-layouts/nodes/computer-vision/optical-flow)
{% endcontent-ref %}

{% content-ref url="/pages/evFXh5HYJ2IuZV2aJ7j8" %}
[Find Blobs](/layers-and-layouts/layer-layouts/nodes/computer-vision/find-blobs)
{% endcontent-ref %}

{% content-ref url="/pages/QmAy46cY6Q8NYVuTIMVc" %}
[Mog2 Background Subtraction](/layers-and-layouts/layer-layouts/nodes/computer-vision/mog2-background-subtraction)
{% endcontent-ref %}

{% content-ref url="/pages/Svup7fwTSvsbu7QjtJ23" %}
[Combine](/layers-and-layouts/layer-layouts/nodes/computer-vision/combine)
{% endcontent-ref %}

{% content-ref url="/pages/fUq6kxGBYaOktww2DMlF" %}
[Subtract](/layers-and-layouts/layer-layouts/nodes/computer-vision/subtract)
{% endcontent-ref %}


# Optical Flow

**Optical Flow** node analyzes the movement of pixels from frame to frame and detects moving parts based on the current and previous frames. This node requires CV Mat input and produces a CV Mat output.

<figure><img src="/files/UJxg4vOLM5nEoWO4AAS8" alt=""><figcaption></figcaption></figure>

**Optical Flow** node analyzes a CV image to identify moving pixels. It compares the current and previous input images to determine these moving parts. The resulting information is stored in the CV output as HSV values. The H channel represents the direction or displacement of the detected movement, while the V channel represents the velocity of the moving part.

## Input pins

<figure><img src="/files/Lyajx7arr2o6ghGrs6kn" alt=""><figcaption></figcaption></figure>

* **CV input:** input image on which moving parts will be detected.
* **Scales number:** the amount of detail in the moving area. A higher *Scale numbers* value translates into a more detailed Output image.

{% hint style="info" %}
**Good to know:** If computation is slow, you can try lowering *Scales number* value.
{% endhint %}

* **Scales step:** expressed as a ratio. If the object is small and moving fast through the images *Scales number* and *Scales step* parameters can be reduced.
* **Median filter size:** higher number results in more "blurry" rectangular-shaped detected moving areas. If the object is moving fast through the image, the *Median filter size* parameter can be set to a higher number than the default.
* **Threshold magnitude:** if the maximum detected magnitude, or velocity, in the whole image is below this value then the output image will be black.
* **Dynamic magnitude:** If disabled then the magnitude for each pixel will be divided by *Normalize magnitude* parameter and stored in V channel. If this checkbox is Enabled, then the maximum magnitude will be set to 255 and the minimum magnitude will be set to 0 in V channel. All values in between will be linearly interpolated.
* **Dynamic Flow:** If this checkbox is disabled, then only the current and previous images from the incoming video stream will be used in detection. If enabled, however, the optical flow algorithm will also use results from the previous detection.

## Output pins

* **Output: d**etected parts of input images in HSV where H is moving direction and V is moving velocity.
* **Max magnitude:** maximum magnitude, or velocity, of all detected parts in the *Output* image.\
  This value is not normalized as is the *V channel* in the *Output* image.


# Find Blobs

*Find Blobs* is useful in finding all groups of connected pixels, or blobs, in an Image. This node expects a *CV* input.

<figure><img src="/files/pWTepYnXeUzWwuUMSQIq" alt=""><figcaption></figcaption></figure>

## Input pins

<div align="left"><figure><img src="/files/WIbX0VUpSm49ioXyow8C" alt=""><figcaption></figcaption></figure></div>

* **Input:** incoming CV Mat with 1, 3, or 4 channels,
* **Filter by threshold:** enforces a Threshold value on the input which is between the *Min threshold* and *Max threshold* values.
* **Filter by area:** filters the Output, so that the detected blobs are between the *Min area* and *Max area*.
* **Min distance:** the minimum distance between Blobs. If the distance between two blobs is smaller than the chosen value, then those two separate blobs will be combined into one.
* **Max track count:** maximum amount of Blobs in Output.

## Output pins

* **Relative X, Y, area:** relative coordinates of the blobs formatted as such: x position/image width, y position/image height, area = area of blob/area image.


# Mog2 Background Subtraction

**Mog2 Background Subtraction** node separates the foreground from the background in a video stream. It does so by subtracting the background image from the current frame to reveal the foreground objects.

<figure><img src="/files/iubmKdxf02LjpRIOwI8y" alt=""><figcaption></figcaption></figure>

## Input pins

<div align="left"><figure><img src="/files/2N89dlYgEyyJIDy7sZXS" alt=""><figcaption></figcaption></figure></div>

* **Input:** incoming CV Mat with 1, 3, or 4 channels,
* **History:** number of frames used to produce background image.
* **Learn rate:** if smaller than 0, then the value is ignored and the best *Learn rate* is chosen automatically. If the value is equal to 0 or larger than 1, the background image will not be updated with the Input image. If it is 1, the background image will always update with the last Input.
* **Threshold variance:** variance parameter MOG2 background subtraction,
* **Detect Shadows:** detects shadows in the incoming stream. If a shadow is detected, then it will be represented with grey color in the output.

## Output pins

* **Output:** outgoing CV Mat stream in which foreground objects are represented in white, background objects are in black color, and shadows, if present, are displayed with grey color.
* **Background:** background image from which the current frame is subtracted.


# Combine

Sometimes you may want to combine multiple CV Mats together and run computer vision algorithmy on the combined feed. This is usually the case if you have, for example, multiple overlapping cameras covering the same area.

In this case, you can use the **Combine** node.

<figure><img src="/files/PKI508wee8sw31tEjUVY" alt=""><figcaption></figcaption></figure>

## Input pins

<div align="left"><figure><img src="/files/ECqbh3HiDj83gTGbruYL" alt=""><figcaption></figcaption></figure></div>

* **Resolution**: number of width and height pixels for the CV Mat which will be outputted.
* **Inputs**: each pin represents a single incoming CV stream, which will be combined together with the other inputs to a single output.

## Output pins

* **Output:** CV stream which outputs all incoming streams together, through a single CV Mat.

## Node properties

In the properties of the *Combine* node, you can increase the number of inputs, by clicking on **Add input** button in the node properties. Similarly, you can remove the number of inputs by clicking on **Remove input** button.

<div align="left"><figure><img src="/files/WDVbxt6lQ3IwJrhnxDuM" alt=""><figcaption></figcaption></figure></div>

{% hint style="info" %}
**Good to know**: This node needs to have at least two inputs.
{% endhint %}

## Setup window

Once you choose the desired number of inputs, it is time to arrange them as pleased, so they look exactly as desired relative to each other on the Output texture. For this, the **Combine** node offers a *Setup* window in which each CV input acts like a polygon that can be easily repositioned, reshaped, or rescaled within the borders of the Combined texture.

You can open the *Setup* window by clicking on the **Setup** button of the node.

<div align="left"><figure><img src="/files/3WuxlKJqzJuGMvuEbRDR" alt=""><figcaption></figcaption></figure></div>

In this window, you will be able to see all inputs as polygons, listed under the *Setup* collapsible. Below this list, you can choose one of several combining modes for the overlapping polygon areas such as Max, Min, Sum, or simply None.

<figure><img src="/files/2wGkD1l0cyNf6sgHML6T" alt=""><figcaption></figcaption></figure>

To select a polygon, simply click on its name on the list. Once you do so, a new collapsible called *Edit* will appear, displaying properties unique to the selected polygon.

<figure><img src="/files/9wLrdECpw5APgC2P5wW0" alt=""><figcaption></figcaption></figure>

To move a polygon point around, you can select the specific point and drag it to the desired location. Another way to achieve this is by adjusting the X and Y values of that point under the *Polygon points position* section.

<figure><img src="/files/627Q6KXAUBsI6zH9eNEv" alt=""><figcaption></figcaption></figure>

Clicking on **Reset** button will restore the initial positions of all polygon points. You can also perform a horizontal or vertical flip on the polygon by enabling the **Flip X** and **Flip Y** checkboxes.

To scale or rotate the polygon, simply right-click on it and choose the desired entry from the menu.

<figure><img src="/files/is478PKzQ41UvB1chErC" alt=""><figcaption></figcaption></figure>


# Convert CV Color

Convert CV Color node allows for quick and easy conversion of one color format to another.

<figure><img src="/files/vW5a50EugqSlGaSPP4jQ" alt=""><figcaption></figcaption></figure>

## Node properties

In its node properties, under **Type** variable, you can choose to convert the incoming CV stream to grayscale, RGB, or RGBA formats.

<div align="left"><figure><img src="/files/ajJ3RhDnkWz5rKEqfYK4" alt=""><figcaption></figcaption></figure></div>


# Subtract

## Subtract

To subtract two CV inputs, you can use the **Subtract** node. Once you feed it two CV inputs, the Subtract node will produce a single output, inheriting the resolution of the first CV input.

<figure><img src="/files/lwHRh5dHaHnQo7MPkYgC" alt=""><figcaption></figcaption></figure>

## Node properties

In its node properties, Subtract node gives you the option to output the absolute value of the subtracted images to the Output node pin.

<div align="left"><figure><img src="/files/SSqFGUgSiQgQ5AtBrNBh" alt=""><figcaption></figcaption></figure></div>


# Variables

There are 2 categories of variables:

* **Layer variables**: accessible only within one layer
* **Global variables**: accessible throughout LightAct and also WebUI.

Regardless of this category they have some things in common.

## All variables hold data or content

<div align="left"><figure><img src="/files/sFggxaSY2rAHpCcbgyjR" alt=""><figcaption></figcaption></figure></div>

For example, every variable can hold only one type of a information. When we say information, we mean either data (a number, for example) or texture (also referred as content).

Below are 2 examples:

<div align="left"><figure><img src="/files/D0Chz4p8aYRx3Cq6qTsL" alt=""><figcaption></figcaption></figure></div>

*Resolution* variable always holds 2 whole numbers (integer) representing **resolution**.

<div align="left"><figure><img src="/files/HqQel8tOM8yrpuUPRyK8" alt=""><figcaption></figcaption></figure></div>

*Texture* variable holds a **texture**.

### Types of variables

Each variable type therefore holds a different type of data. The list is explained below:

<table><thead><tr><th>Variable type</th><th width="341">Description</th><th>Example</th></tr></thead><tbody><tr><td><strong>Float</strong></td><td>Number with a decimal point</td><td>1.6314</td></tr><tr><td><strong>Integer</strong></td><td>Whole number</td><td>5</td></tr><tr><td><strong>Boolean</strong></td><td>True or false (represented as a checkbox)</td><td>True</td></tr><tr><td><strong>String</strong></td><td>Text</td><td>Hello world!</td></tr><tr><td><strong>Color</strong></td><td>RGBA representation of color where 0 is 0 and 1 is full</td><td>[1.0,1.0,1.0,1.0] (white)</td></tr><tr><td><strong>Texture</strong></td><td>A pointer to a texture in the VRAM of the GPU</td><td><img src="/files/v8oeNflqM4PD7CG8yz6n" alt="" data-size="original"></td></tr><tr><td><strong>OpenCV</strong></td><td>An image for computer vision processing</td><td><img src="/files/4B1c91qAxkBjuBAyTQKn" alt="" data-size="original"></td></tr><tr><td><strong>Vec2</strong></td><td>A vector of 2 floats</td><td>[1.231, 10.231]</td></tr><tr><td><strong>Vec3</strong></td><td>A vector of 3 floats</td><td>[543.12,-1.231,5.000]</td></tr><tr><td><strong>Vec2 array</strong></td><td>An array of Vec2</td><td>NA</td></tr><tr><td><strong>Vec3 array</strong></td><td>An array of Vec2</td><td>NA</td></tr><tr><td><strong>Transform</strong></td><td>A vector of: Vec3 representing Position, Vec3 representing Rotation, Vec3 representing Scale</td><td>NA</td></tr><tr><td><strong>Transform array</strong></td><td>An array of transforms</td><td>NA</td></tr><tr><td><strong>Resolution</strong></td><td>A vector of 2 integers representing resolution</td><td>[1920,1080]</td></tr><tr><td><strong>Timecode</strong></td><td>A HMSF representation of time</td><td>[00:02:12:32]</td></tr><tr><td><strong>Canvas</strong></td><td>A reference to a canvas (obsolete)</td><td>NA</td></tr><tr><td><strong>Mapping</strong></td><td>A reference to a mapping</td><td>NA</td></tr><tr><td><strong>Viewport object</strong></td><td>A reference to a viewport object</td><td>NA</td></tr><tr><td><strong>LA Object</strong></td><td>A reference to all kinds of objects in LightAct: Timeline, Section, Layer, Marker, Video output</td><td>NA</td></tr><tr><td><strong>Device</strong></td><td>A reference to a Device node</td><td>NA</td></tr><tr><td><strong>Camera properties</strong></td><td>An array of values representing properties of a camera: Position, Rotation, FOV, Aspect ratio, Near clip, Far clip</td><td>NA</td></tr><tr><td><strong>Asset</strong></td><td>A reference to an Asset. There are several types: Video, 3D model, Audio, Notch block, Unreal, TouchDesigner component</td><td>NA</td></tr><tr><td><strong>Event</strong></td><td>A Lifeline type</td><td>NA</td></tr></tbody></table>

## All variables can be referenced in Layouts

<div align="left"><img src="/files/yPvZb1Fi8X7sK58z57Kg" alt=""></div>

Almost every variable type has a corresponding connection type represented by the same color. These connections serve to pass the value of the variable between different nodes in the Layout.


# Layer variables

![](/files/Jm0YD7Cuek1fyk5mkWS1)

You can see all Layer variables if you double click on a layer. In the window that opens, Layer variables will be visible on the right hand side.

![](/files/oT7cPZge5ZreKjep9xIT)

Most of *Layer variables* are also visible under the *Layer variables* collapsible of the *Layer properties*.

{% hint style="info" %}
**Good to know**: to keep Layer Properties clean and neat, you can hide some Layer Variables so that they do not appear in the Properties window.
{% endhint %}

<div align="left"><figure><img src="/files/bRZhXOr0g28mSI9eX33f" alt=""><figcaption></figcaption></figure></div>

Every layer has a few predetermined Layer variables, that define the characteristics of the layer itself. These variables are in **General** and **DMX** Variable groups and cannot be deleted.


# Global variables

<div align="left"><img src="/files/I3snXw1MZAfspTj6p9Ua" alt=""></div>

We can access and manage *Global variables* collapsible from every **Layer Layout** window.

<div align="left"><figure><img src="/files/3ST8NoLSKqva48U7J2Wv" alt=""><figcaption></figcaption></figure></div>

Alternatively, Global variables can also be accessed from the **Global variables** window.

{% hint style="info" %}
**Good to know**: Global variables are accessible throughout the program which makes them ideal for global show control and data transfer between layers.
{% endhint %}

## Example of using Global variables

Let's say we want to control the opacity of two video layers with just one global variable we create one by pressing the + icon in the **Global variables** section.

<div align="left"><img src="/files/6b1s5JnOxdTWM1AfXfko" alt=""></div>

You can choose from a selection of variables. Let's choose a Float variable for this tutorial.
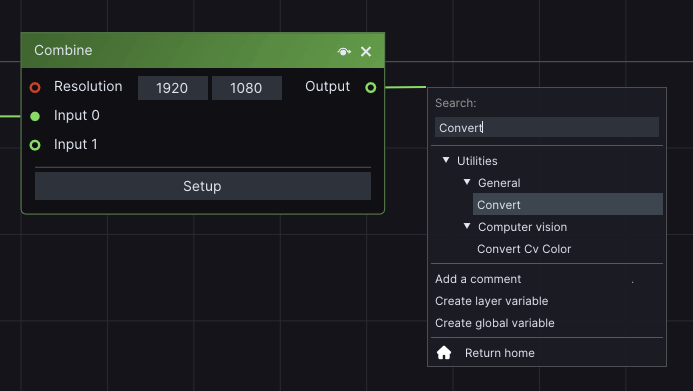
<div align="left"><img src="/files/3R6En1BbHIYHTCQLlBRj" alt=""></div>

It is a good practice, to give your variables descriptive names, so let's rename it to *Opacity* and change its value.

<div align="left"><img src="/files/LrlcbDSWoGRwQRD6PfOu" alt=""></div>

Now when we open another video layer we can see that under **Global Variables** there is the *Opacity* float variable we created on another layer with the same values.

<div align="left"><img src="/files/Q9EJfBkzDQF0ZuIJsfgS" alt=""></div>


# Variable management

{% hint style="info" %}
**Good to know:** Variable management is the same for layer and global variables alike.
{% endhint %}

## Create Variable

You can create a variable by clicking on the **+** icon of the *Custom* variable group. Once you choose what information you would like your variable to hold by clicking on the correct menu entry, the variable will appear under the *Custom* variable group.

<div align="left"><figure><img src="/files/lC48HbscAKurBUz54pPI" alt=""><figcaption></figcaption></figure></div>

{% hint style="info" %}
**Good to know**: You can also create different variable groups by clicking on the **Add group** button at the bottom of the *Layer variables* or *Global variables* collapsible.
{% endhint %}

## Rearrange Variables

You can change the order of a variable within its Variable group by clicking on its icon and **dragging** it to the spot you want to place it.

<div align="left"><figure><img src="/files/RkmNVNbiOQVxtTGqvgLC" alt=""><figcaption></figcaption></figure></div>

You can also move a variable to another Variable group by **dragging** from its icon to the collapsible icon of the wanted *Variable* group.

<div align="left"><figure><img src="/files/IUnFottcyRhFAck7xAbF" alt=""><figcaption></figcaption></figure></div>

## Delete Variable

You can delete a Variable by clicking on its **Trash icon** or by right-clicking on the **Variable icon** and selecting **Delete**.

<div align="left"><figure><img src="/files/NzXyFTag0AOZtLDEU8LO" alt=""><figcaption></figcaption></figure></div>

## Adjusting Numeric Variables

Every numeric Variable has a setting to limit the minimum and maximum values. You can change it by left-clicking on the property and selecting **Min and max** setting. Similarly, the **drag rate** can be adjusted by left-clicking on the dropdown menu.

<div align="left"><figure><img src="/files/VnpRoHzsQRsUPaiZG1hd" alt=""><figcaption></figcaption></figure></div>

With some variables, you can toggle between appearances. You can do that by right-clicking on the Variable icon and selecting the appearance dropdown menu. You can change the Integer Variable to show *As Integer* or *As Dropdown*. This is useful for uniquely naming each integer. Likewise, Float Variables that are used for time and duration, have a similar dropdown menu and can appear *As Time* or *As Float.*

## Using Variables in Layouts

Drag a Variable on the layout either by dragging and holding shift or ctrl which skips the popup menu, or by dragging and dropping, which brings up a menu where you can select either a **Getter** or a **Setter** node.

<div align="left"><img src="/files/jZUibQ1i5ZYXWxmst9jl" alt=""></div>

### Getter and Setter Nodes

<div align="left"><img src="/files/bSounx8SHoPg27o4dNZW" alt=""></div>

* **Getter** node is used to **get** the current value of a variable
* **Setter** node is used to **set** the current value of a variable

## Reference Node Replacement

In LightAct, you have the option to substitute the Getter or Setter node of a specific variable with the Getter or Setter node of another variable.

To do this, drag from the **Variable icon** of the desired variable to the *Reference node* you want to substitute.

<div align="left"><figure><img src="/files/JWGys0pgxgDcKpBTmDkJ" alt=""><figcaption></figcaption></figure></div>

{% hint style="info" %}
**Good to know:** This can be extremely useful when you copy Reference nodes of Layer variables to other layers in the project.
{% endhint %}


# Variable groups

<div align="left"><figure><img src="/files/MQISDxxzwjIXBjsjsgR4" alt=""><figcaption></figcaption></figure></div>

Variable group is a group of variables. You can add them by clicking on the **Add** button in the **Layer Layout** window.

## Private variable groups

<figure><img src="/files/eiAYr5rTwnOzCti1bdPH" alt=""><figcaption></figcaption></figure>

Every Layer Variable group has an option to designate it as a **Private**.

<figure><img src="/files/EN2swcSYHzff8UoYdZGn" alt=""><figcaption></figcaption></figure>

If a Layer Variable group is Private, it will not be visible in the *Properties* window.

{% hint style="info" %}
**Good to know**: Private Layer Variable groups are useful for variables that you use in your Layout but don't need to have exposed in the Properties.
{% endhint %}

## Creating Variable groups from nodes

To facilitate a faster creation of Layer templates, we created 2 ways of creating Variable groups and Variables themselves directly from the nodes.

### Creating static Variable groups from nodes

<div align="left"><figure><img src="/files/u4mQ1cJDb3SVhVTzKuaw" alt=""><figcaption></figcaption></figure></div>

You can create a Variable group by right clicking on a header of a node and then on **Create variable group**.

<figure><img src="/files/GjaPVDnc6J4PdDhxnwLN" alt=""><figcaption></figcaption></figure>

This will create a:

1. a Variable group in the Layer variables section with the same name as the name of the node you clicked on
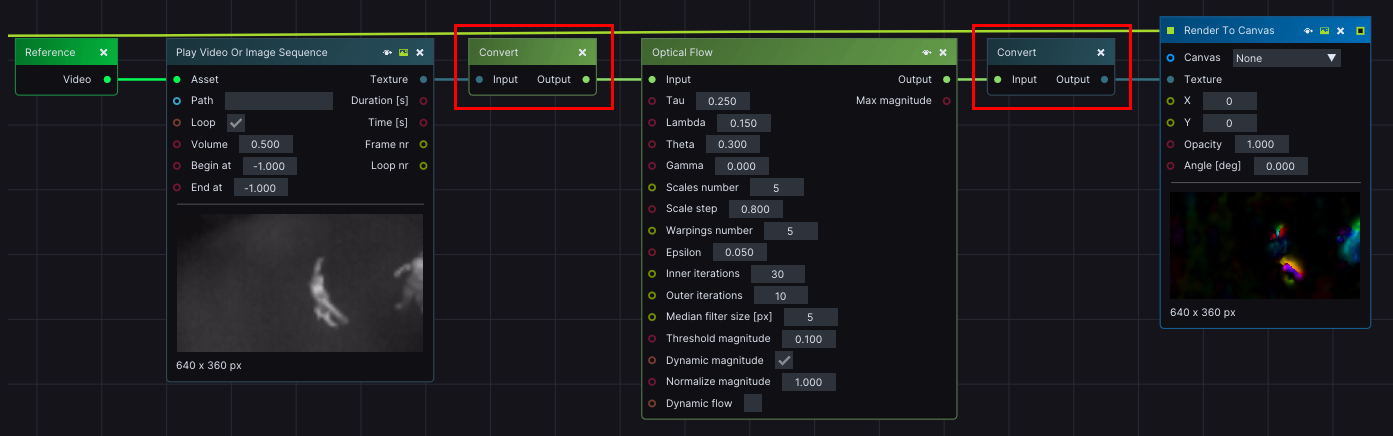
2. in this group, LightAct will create appropriate variables for every input pin of that node
3. and Reference nodes will be created for every newly created variable and connected to the appropriate pins of the node.

{% hint style="info" %}
**Good to know**: once created this variable group doesn't retain any connection to the node you created it from.
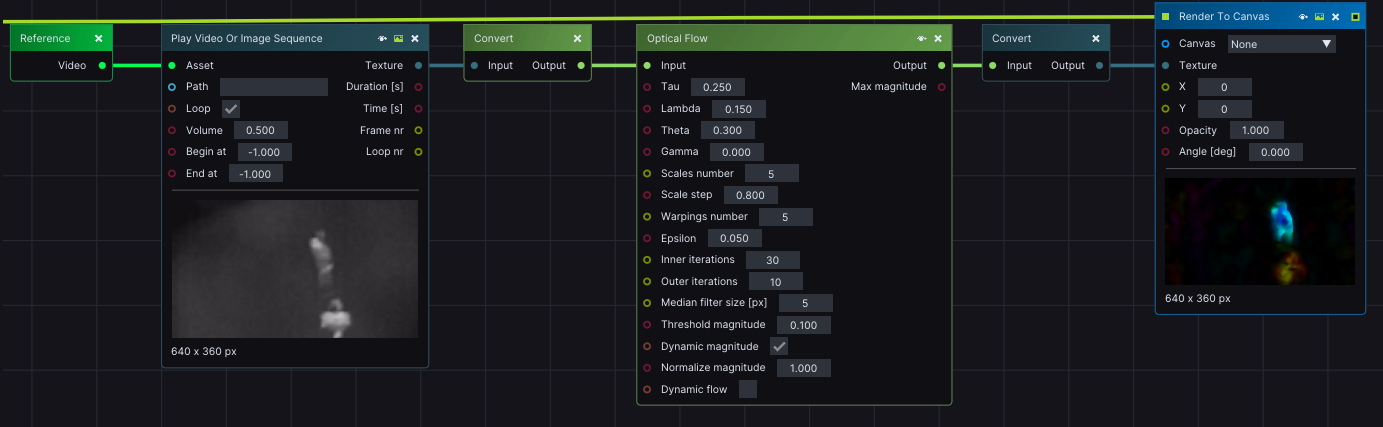
{% endhint %}

### Dynamic variable groups

<div align="left"><figure><img src="/files/Roz7lRYHOvLxIRqWFwwu" alt=""><figcaption></figcaption></figure></div>

There are some nodes in LightAct whose input pins can change. An example of that would be **Play Notch** node. When you change the *Notch asset* it references, the node's input pins adapt according to Notch's Exposed parameters.

If we want to always have all the input parameters of Notch exposed in Layer variables, we need to create a **Dynamic Variable Group**.

<figure><img src="/files/ORe6ivXUHB2OTQSGqItf" alt=""><figcaption></figcaption></figure>

Dynamic Variable group looks similar to a standard Variable group, except that it retains the connection between the original node it was created from.
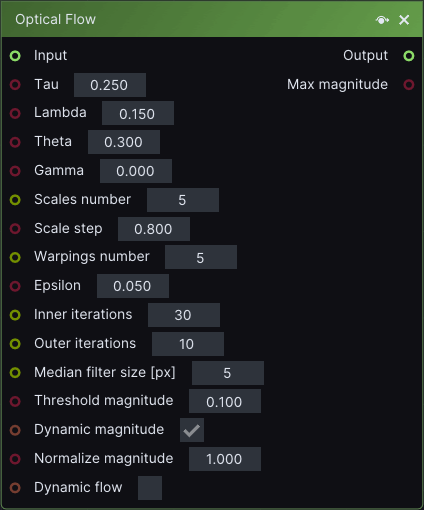
<figure><img src="/files/uk6sHIYucTySIEORX326" alt=""><figcaption></figcaption></figure>

This means that if you change Notch asset, the variables in this group are going to adapt according to Exposed parameters of the new Notch block.


# Node reference

There are 2 types of nodes: the ones in *Devices* window and the ones in the *Layouts*. By Layouts we mean *Layer Layouts, Projector Layouts* or *Mapping Layouts*.

{% content-ref url="/pages/HKyBNtAqk4ORxcVqYOoU" %}
[Layout nodes](/node-reference/layout-nodes)
{% endcontent-ref %}

{% content-ref url="/pages/ooIgei0XsUZJQUcRvinp" %}
[Device nodes](/node-reference/device-nodes)
{% endcontent-ref %}


# Layout nodes

Layout nodes are categorized in the following categories:

* [Lifeline and actions](/node-reference/layout-nodes/lifeline-and-actions-node-category)
* [Texture generators](/node-reference/layout-nodes/texture-generators-node-category)
* the rest is coming soon
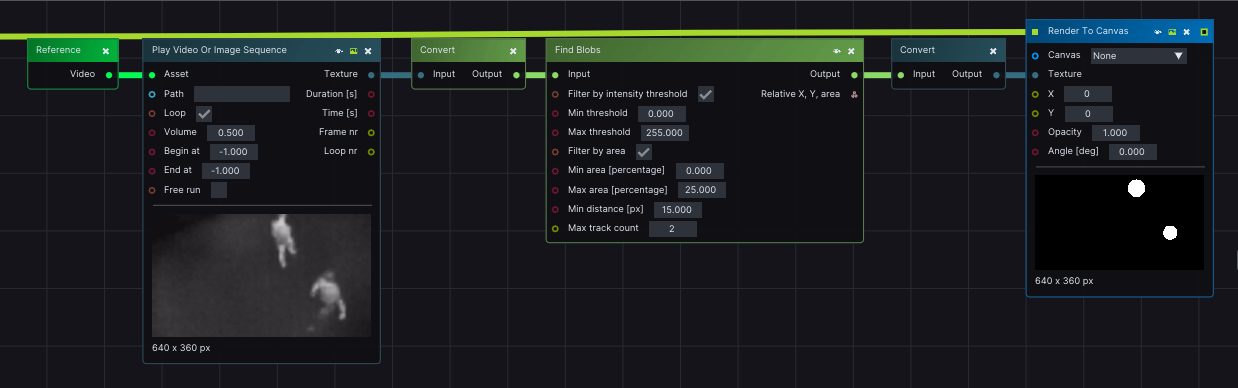

# Lifeline and actions node category

In Lifeline and actions node category we have the following subcategories and nodes.
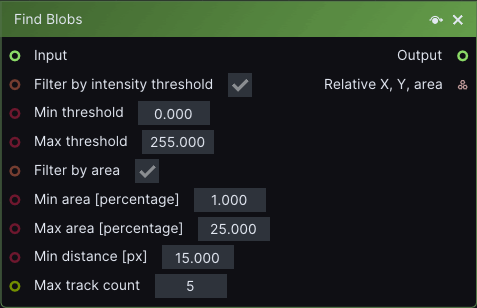
* [Tick](/node-reference/layout-nodes/lifeline-and-actions-node-category/tick-node)
* coming soon...


# Tick node

*Updated on 17.2.2025 using LightAct 4.10.1*.

## Description

Triggered every frame when layer is active.

## Search keywords

Run...


# Texture generators node category

In Texture generators node category we have the following subcategories and nodes.

* coming soon...


# Device nodes

Coming soon...


# Playing video files

When playing Video assets, you will mostly use [Video](/layers-and-layouts/stock-layer-templates/content-layer-templates/video-1) or [Multi-layer](/layers-and-layouts/stock-layer-templates/content-layer-templates/video) stock layer templates when playing back video files.

<div align="left"><figure><img src="/files/D2CtIib9ZlW3oeZBSoRG" alt=""><figcaption></figcaption></figure></div>

However, if you double click on one of those layers you will find that there is a **Play video** node in both of these layer templates. This is the node that actually takes care of the video playback.

You will also notice that the inputs of this node correspond to the exposed Layer variables described in [Video layer template page](/layers-and-layouts/stock-layer-templates/content-layer-templates/video-1). Refer to that page for the explanation of the input pins of the node.

## Content framerate

To understand framerates in video playback in LightAct we need to understand the differences between **Content framerate**, **Project framerate** and **Application framerate**. *Content Framerate* is the framerate of the *Video asset*, whereas *Project framerate* and *Application framerate* are explained [here](/timelines/project-framerate).

{% hint style="warning" %}
In order to prevent any missed frames, **Application framerate** should always be higher or equal to the **Project framerate**. *Project framerate* should in most cases be the same as the **Content framerate**, but never lower.
{% endhint %}

{% hint style="danger" %}
If **Application framerate** drops below **Content framerate**, you will get missed frames.
{% endhint %}

When LightAct executes (triggers) a **Play Video** node, it always passes the time of the frame it wants to get. This time is determined by the progression of the playhead across the timeline which is determined by the *Project framerate*.

This means for example:

* if *Project framerate* and *Content framerate* are both 30 and Application framerate is a steady 60, LightAct will request and display each frame twice.
* if *Content framerate* is 30 and *Project framerate* and *Application framerate* are both 60, it also means that each frame will be requested twice. However, if you have *Frameblending* enabled, you will get 2 frames blended every second frame.


# Frame buffering

In order to ensure smooth video playback and preserve as much system resources as possible, LightAct carefully manages how many frames of a video file it keeps in its memory.

{% hint style="info" %}
**Good to know**: we use word buffering but some users prefer the word caching. It's essentially the same thing.
{% endhint %}

<div align="left"><figure><img src="/files/6tYJn7kM0eUahRrge48e" alt=""><figcaption></figcaption></figure></div>

These settings are configured in the properties of each Timeline separately. There you will find a **Video Playback** collapsible section with properties related to video playback.

* **Video Buffer**: This determines how many frames LightAct will attempt to keep in an internal buffer while playing a video asset.
* **Video Preload Time**: This specifies how many seconds before the playhead reaches the beginning of a layer containing a Play Video node, LightAct will load the frames into its *Video Buffer*.
* **Always Ready Buffer**: Timelines are not always played back in a linear fashion from start to finish. Sometimes the playhead jumps directly onto a video layer. This means LightAct keeps a certain portion of the *Video Buffer* in its memory at all times. This buffer is called the *Always Ready Buffer*.

### How does video frame buffering work?

<figure><img src="/files/T74sx9z5abR3gLRpPFGS" alt=""><figcaption><p>You can monitor the status of all Play Video nodes in the Performance window</p></figcaption></figure>

In this situation, we see that:

* **Video buffer** = 20 frames
* **Video preload time** = 5 seconds
* **Always ready buffer** = 50% of *Video buffer* = 10 frames

{% hint style="info" %}
**Good to know**: if you open *Performance* window, you'll see there is a Video playback collapsible section where you can monitor the status of all *Play Video* nodes in the project.
{% endhint %}

The playhead is positioned 5 seconds and 1 frame before the beginning of the video layer (cameraFeedCentraText) which is more than the 5 seconds we specified as the *Video preload time*. Therefore, the *Play Video* node has only 10 frames loaded in the memory which is 50% (*Always ready buffer*) of 20 (*Video buffer*).

<figure><img src="/files/8hsHD4b3WaLtNnPY2v2G" alt=""><figcaption></figcaption></figure>

The moment the playhead reaches 5 second mark, *Play Video* node loads all the frames into its buffer (19 in the case above).

{% hint style="info" %}
**Good to know**: if you have problems with video playback performance, you might want to increase the Video buffer size to, say, 32 and Video preload time to, say, 20.
{% endhint %}

{% hint style="info" %}
**Good to know**: to analyze performance issues, watch *Missed frame* indicator in the *Performance* window and try to understand where the issue is.
{% endhint %}

{% hint style="info" %}
**Good to know**: for highly interactive timelines, where the playhead is jumping back and forth a lot, you might want to increase *Always ready buffer*.
{% endhint %}

#### Graphs in Play Video node

If you want to dive deeper into the stats of an individual **Play Video** node, you have to double click on the *Video layer* and select the *Play video* node in it.

<div align="left"><figure><img src="/files/WP4eK2UedGVheb0zi3gG" alt=""><figcaption></figcaption></figure></div>

These graphs tell you exactly what is happening under the hood of the Play Video node:

* **Missed frames**: shows if there was a missed frame in the last few seconds.
* **Decode times**: this steps shows how much time LightAct needed for decoding the codec. HAP and NotchLC have quite low times usually, whereas H.264 and other CPU based codecs often have higher times.
* **Decompress times**: shows how much time LightAct required to unpack (decompress) the frame.
* **Buffered frame**: shows the status of the buffer. If the graph is slowly decreasing, it may indicate that the disk read speed is too slow.
* **Frame blending**: if Frame blending is enabled, this graphs shows the blending of individual frames.


# Proxy video files

In [LightNet ](/lightnet/lightnet-overview)configurations, it is desirable that the Primary and Editor servers playback files even when these files will not be actually displayed from these servers. That's because on these machines the users usually want to see all the content in the Viewport.

However, if all Primary and Editor servers tried to play all these video assets in full resolutions, the performance load would be too heavy. That's why we developed **Proxy video file feature**.

### Proxy video file naming

<div align="left"><figure><img src="/files/tTh0zFOwteN37VCMeAVO" alt=""><figcaption></figcaption></figure></div>

If a Video asset has **\_proxyN** or **\_prxN** in its name, LightAct knows it is a proxy file downscaled by a factor of N. This means the *Play Video* node before it passes the frame onwards, upscales it by the factor of N.

In the above image, for example, LightAct knows that:

* the original file is called *LightAct\_showreel\_published.mov*
* there is a proxy downscaled by 2, which, if it were played, is going to be upscaled by factor of 2
* and a proxy downscaled by 4, which, when played, is going to be upscaled by factor of 4.

<div align="left"><figure><img src="/files/1HDzNqouphAlDEsr6qg7" alt=""><figcaption></figcaption></figure></div>

The proxy status of a specific video asset is visible in its *Properties*.

{% hint style="info" %}
**Good to know**: How LightAct determines which server in a LightNet cluster should play the source, which server should play a proxy and which server shouldn't play a particular video asset at all is explained in [LightNet](/lightnet/lightnet-overview) chapter (specifically [here](https://docs.lightact.com/lightnet/server-workload-distribution#run-on-for-layers)).
{% endhint %}

{% hint style="info" %}
**Good to know**: if a server determines that it should be playing a proxy file and not the original one, it will always take the one that's been downscaled the most.

For example, if there are both \_proxy2 and \_proxy4 available, LightAct is going to play *\_*&#x70;roxy4.
{% endhint %}


# LightAct Hardware video playback performance

We thoroughly video playback performance of LightAct hardware, and the results are available on these pages.

{% hint style="info" %}
**Good to know**: if you are building your own hardware, please refer to [this page](/preparing-your-hardware-for-lightact/getting-your-hardware-ready-to-run-lightact).
{% endhint %}

## Measurement methodology

* All [servers ](https://lightact.com/hardware/)are measured in Base Configuration, meaning a single GPU.
* 4 x 4UHD displays are connected to the GPU, one of them is used to render the GUI, the other 3 are joined together in a single 11,520 x 2,160 output with Nvidia Mosaic. LightAct is outputting to this output.
* For playback at 30 and 60 fps, the output display refresh rate is set to 60 Hz, and for 25 and 50 fps playback, it is set to 50 Hz.
* During the test, no other programs aside from LightAct are running.
* Nvidia Control Panel is also closed.

### LightAct setup

#### GUI

* All windows are closed except for the Performance window.
* The GUI opens and runs in Full screen.

#### Project

* Upon opening the project, we wait for all the thumbnails to load before starting with the test.
* In the project, every 1 or 2 seconds, a new Play video node starts playing a new video. All Play video nodes are in the same layer and each Play video node is playing a unique copy of the same video file. In Performance window in Video playback section (available in 4.12) we monitored Missed frames counters. When they started to increase regularly, we knew the Max number of videos was exceeded.


# reActor v3

## Data

* Date of measurement: July 2025, LightAct v4.10.1
* Media drives: 4 x SSD 2TB drives in RAID10 configuration
* All HAP files were exported with a 28 chunk setting.

### Playback

| Resolution | Codec & Framerate | Data rate \[MB/s] | Max # videos |
| ---------- | ----------------- | ----------------- | ------------ |
| UHD        | NotchLC\@60FPS    | 637               | 8            |
| UHD        | NotchLC\@50FPS    | 531               | 8            |
| UHD        | NotchLC\@30FPS    | 320               | 16           |
| UHD        | NotchLC\@25FPS    | 265               | 18           |
| UHD        | HAP\@60FPS        | 250               | 20           |
| UHD        | HAP\@50FPS        | 207               | 25           |
| UHD        | HAP\@30FPS        | 125               | 49           |
| UHD        | HAP\@25FPS        | 104               | 60           |

***

Please note, the results are dependent on several factors and your results might be lower or higher than our measurements.


# Double 2

## Data

* Date of measurement: July 2025, LightAct v4.10.1
* Media drives: 2 x SSD 2TB drives in RAID1 configuration
* All HAP files were exported with an 8 chunk setting.

### Playback

| Resolution | Codec & Framerate | Data rate \[MB/s] | Max # videos |
| ---------- | ----------------- | ----------------- | ------------ |
| UHD        | NotchLC\@60FPS    | 637               | 3            |
| UHD        | NotchLC\@30FPS    | 320               | 7            |
| UHD        | HAP\@60FPS        | 250               | 12           |
| UHD        | HAP\@30FPS        | 125               | 32           |

***

Please note, the results are dependent on several factors and your results might be lower or higher than our measurements.


---

[Next Page](/llms-full.txt/1)