> For the complete documentation index, see [llms.txt](https://docs.lightact.com/llms.txt). Markdown versions of documentation pages are available by appending `.md` to page URLs; this page is available as [Markdown](https://docs.lightact.com/integrations/camera-and-object-tracking/node-based-tracking-workflows/antilatency.md).
# Antilatency
### Antilatency Receiver Device Node
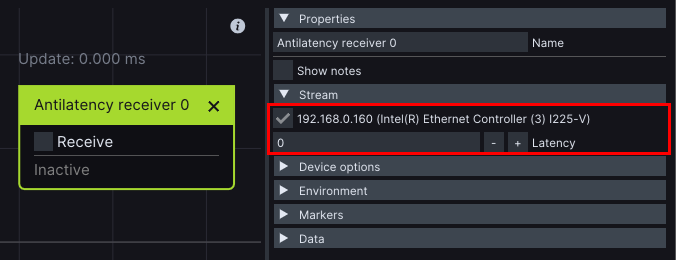
To start receiving Antilatency data, insert the **Antilatency receiver** device node in the *Devices Window*.
On the right-hand side of the selected node, configurable properties will be displayed.
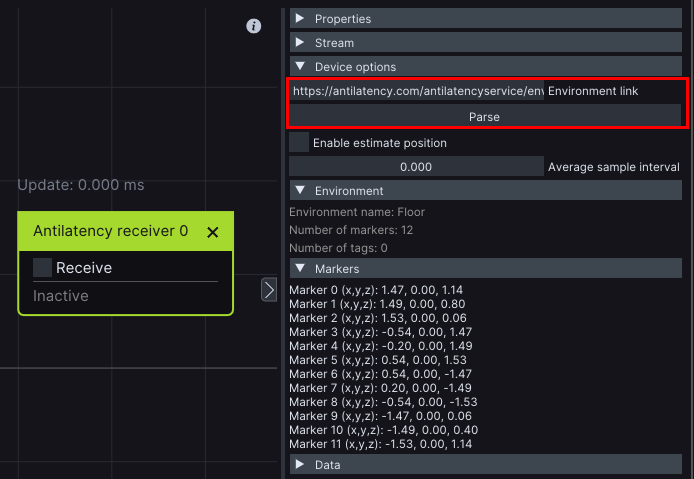
To use your own custom *Environment*, just paste the corresponding **Environment link** under the *Device options* section and click on the **Parse** button.
Finally, select the **Receive** checkbox to enable the node.
### Read Antilatency in Layer Layouts
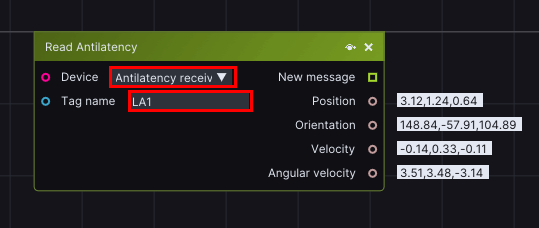
To use the information read by *Antilatency receiver* device node in LightAct, create a **Read Antilatency** node in the *Layer Layouts*.
Choose **Antilatency Receiver** device in the **Device** dropdown and insert the name of the specific **Tag** you would like to read data from.
*Read Antilatency* node provides *Tag Position*, O*rientation*, V*elocity*, and A*ngular Velocity*.